Craft Project #15 – Spring rag wreath

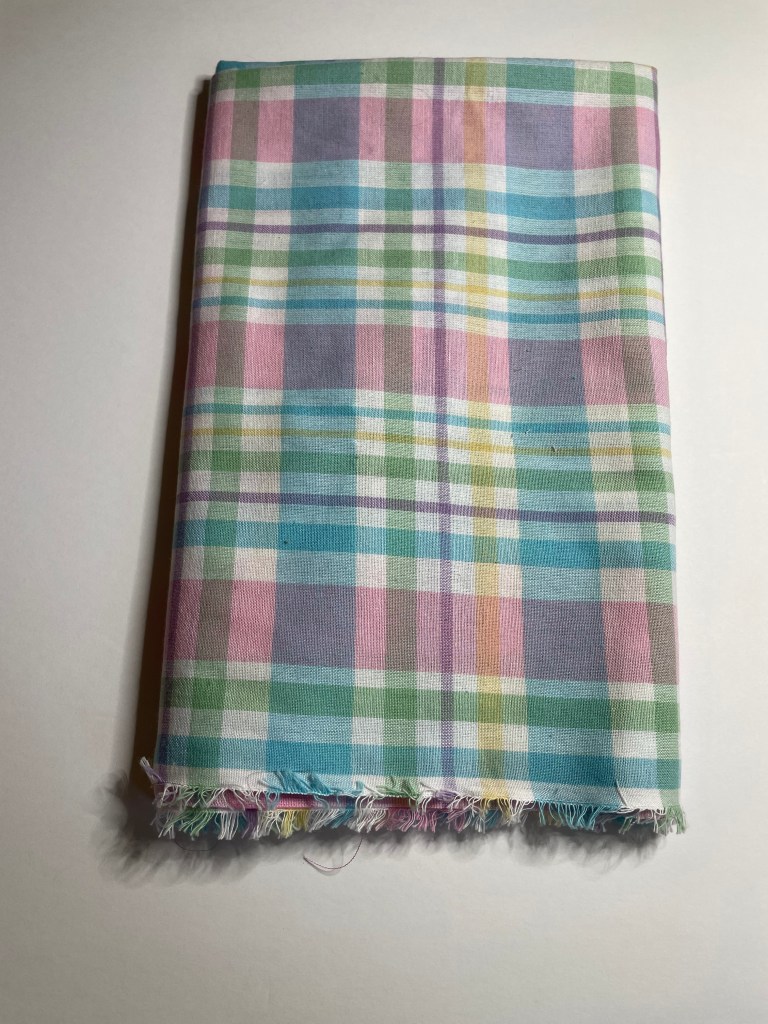
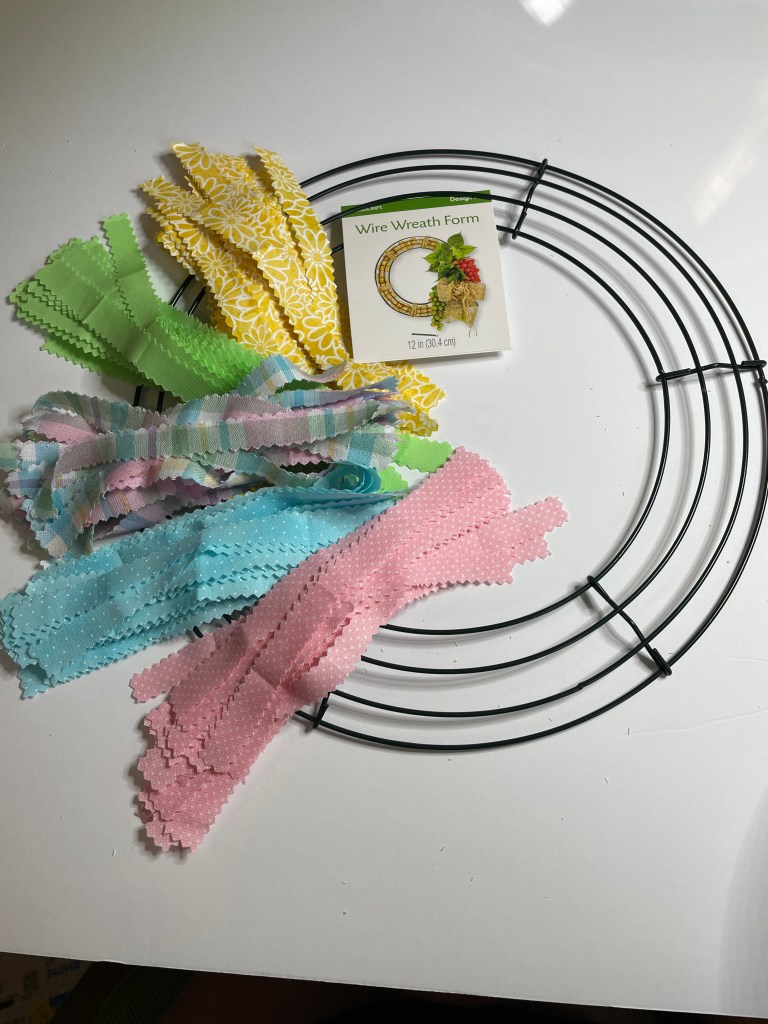
All of the craft projects for Spring and Easter are based on one single fabric selection. The pastel plaid fabric. I just love this so much.

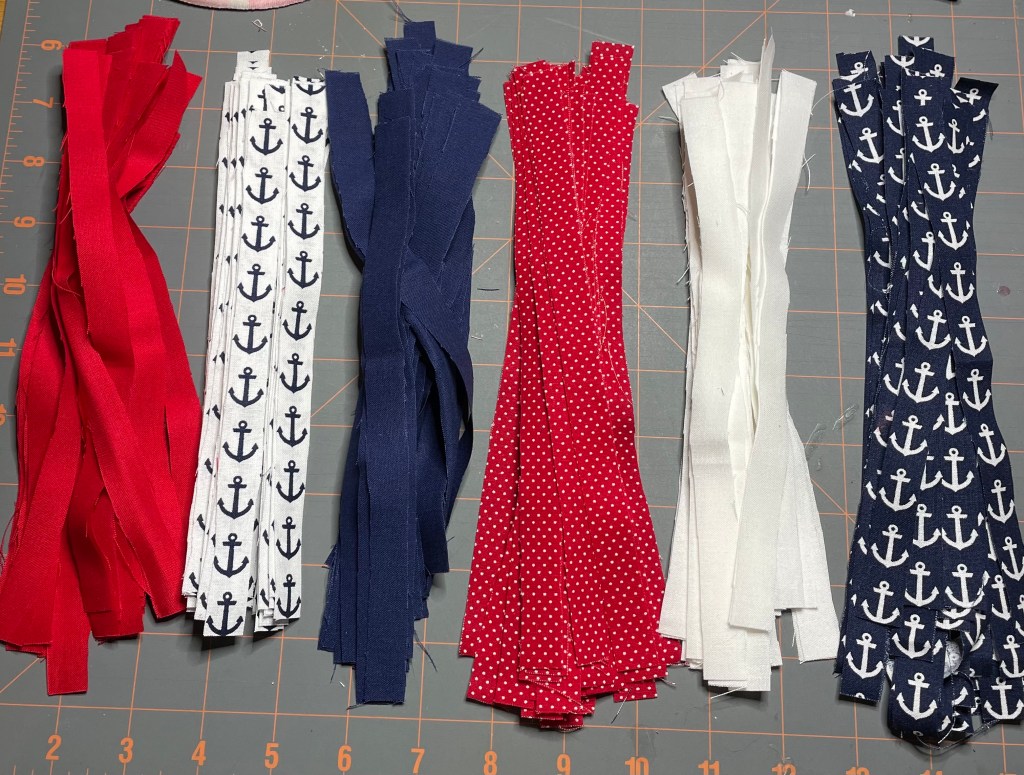
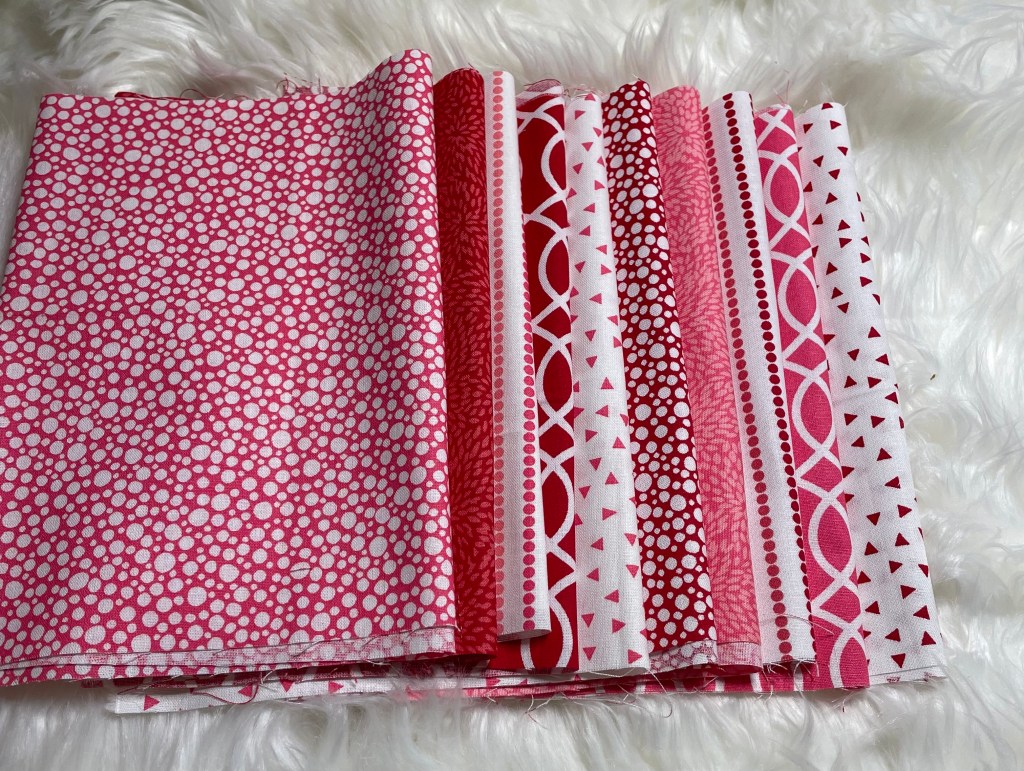
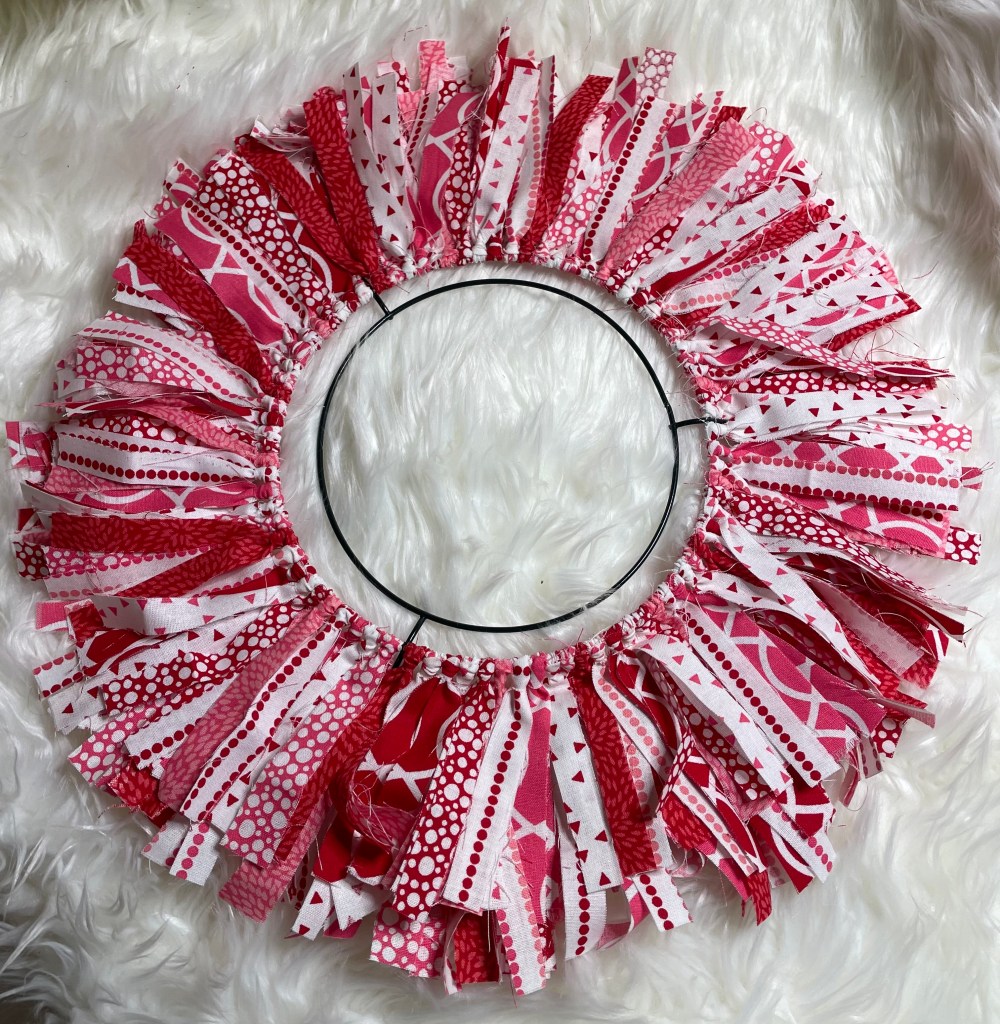
I decided that this rag wreath will have a total of five separate fabrics with the first one being the plaid. I am also adding fabrics in the colors pink, blue, yellow, and green making sure they compliment the plaid fabric. All fabrics were purchased at Hobby Lobby. I found that they have a better selection of pastel selections.

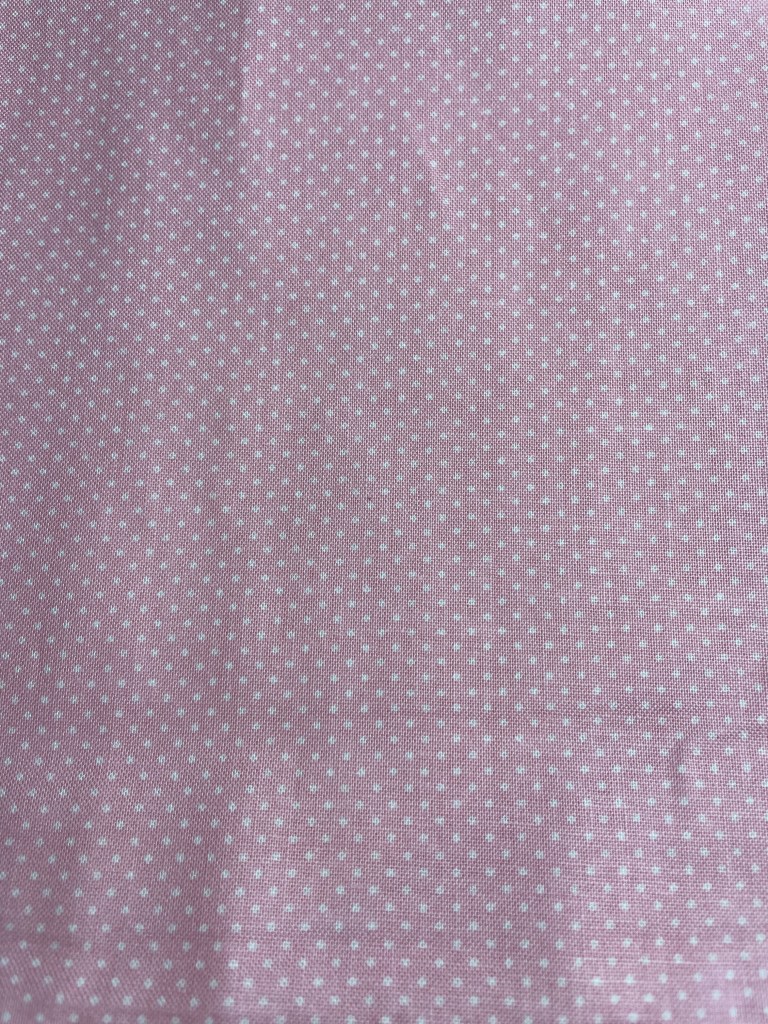
The pink and blue fabrics have white dots on them.

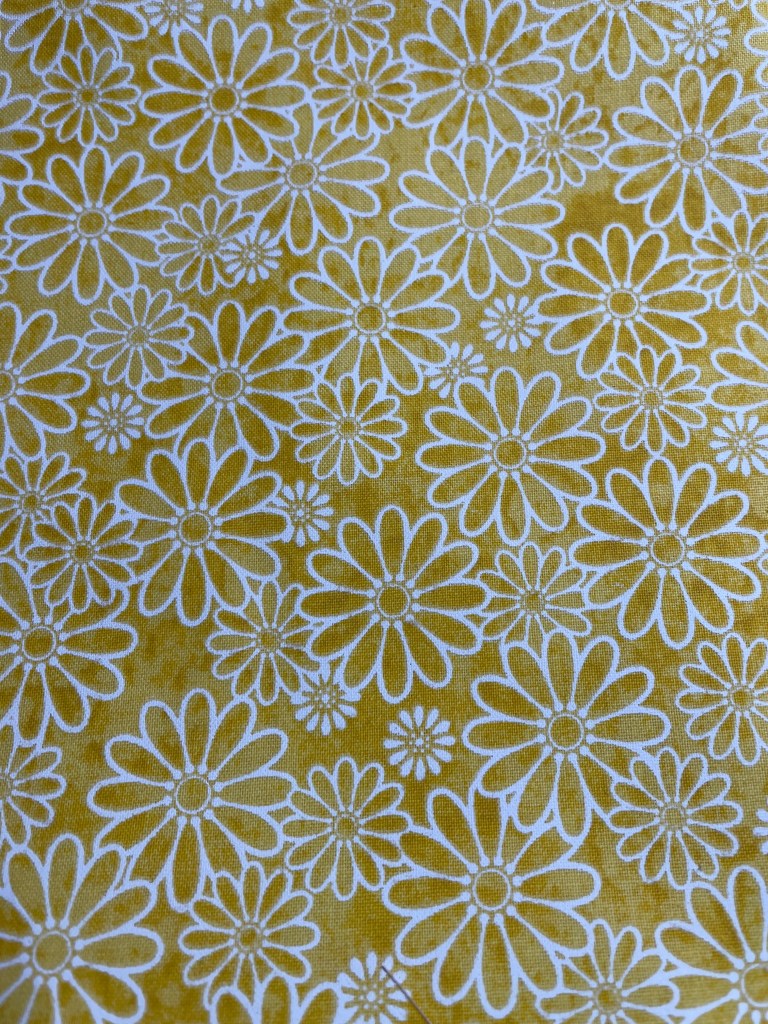
They yellow fabric has white flowers all over it.

The green is just a plain solid green. I chose this color as I did not want a darker shade of green.

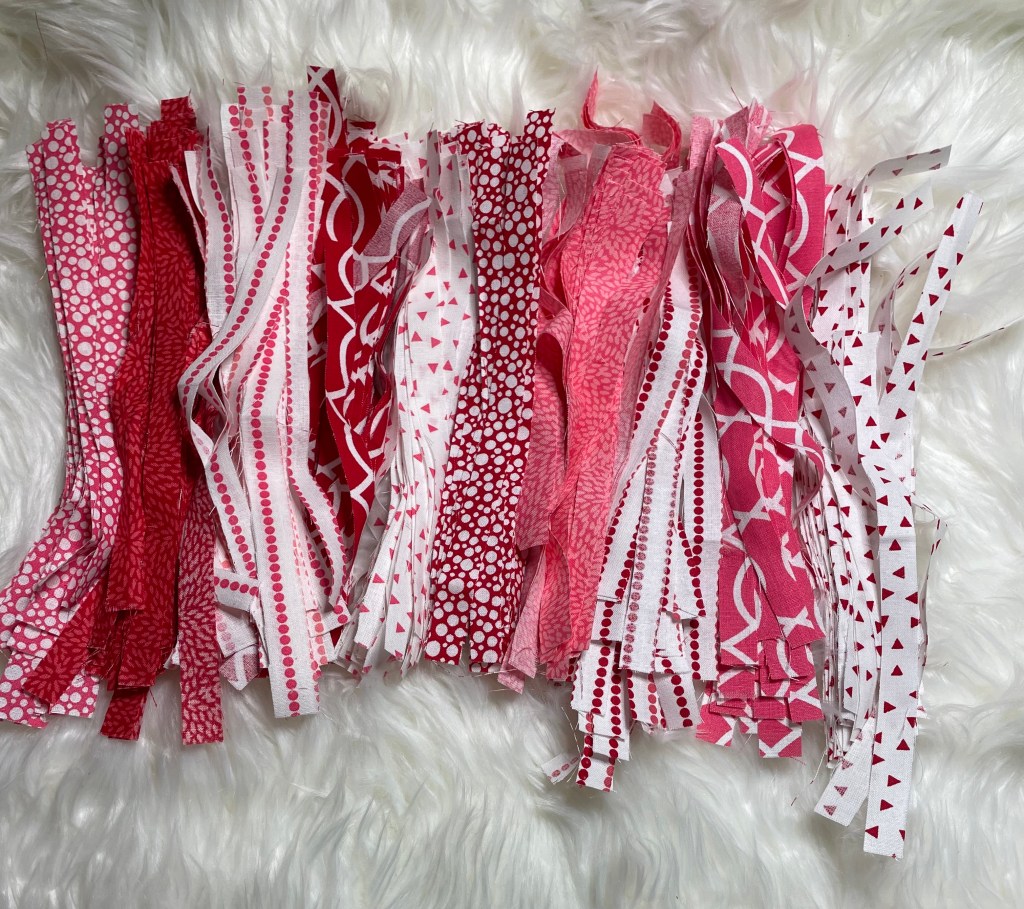
I started the wreath by ironing the fabric before I started cutting them down to size.

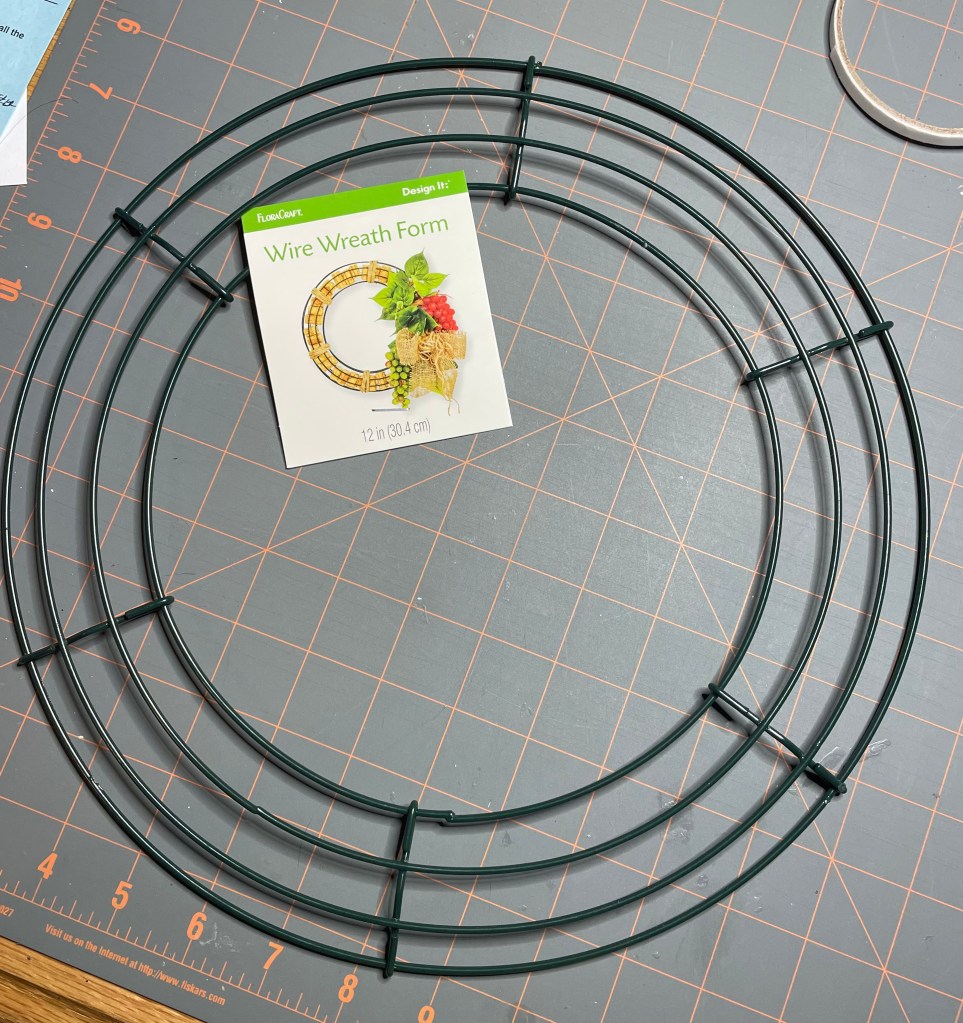
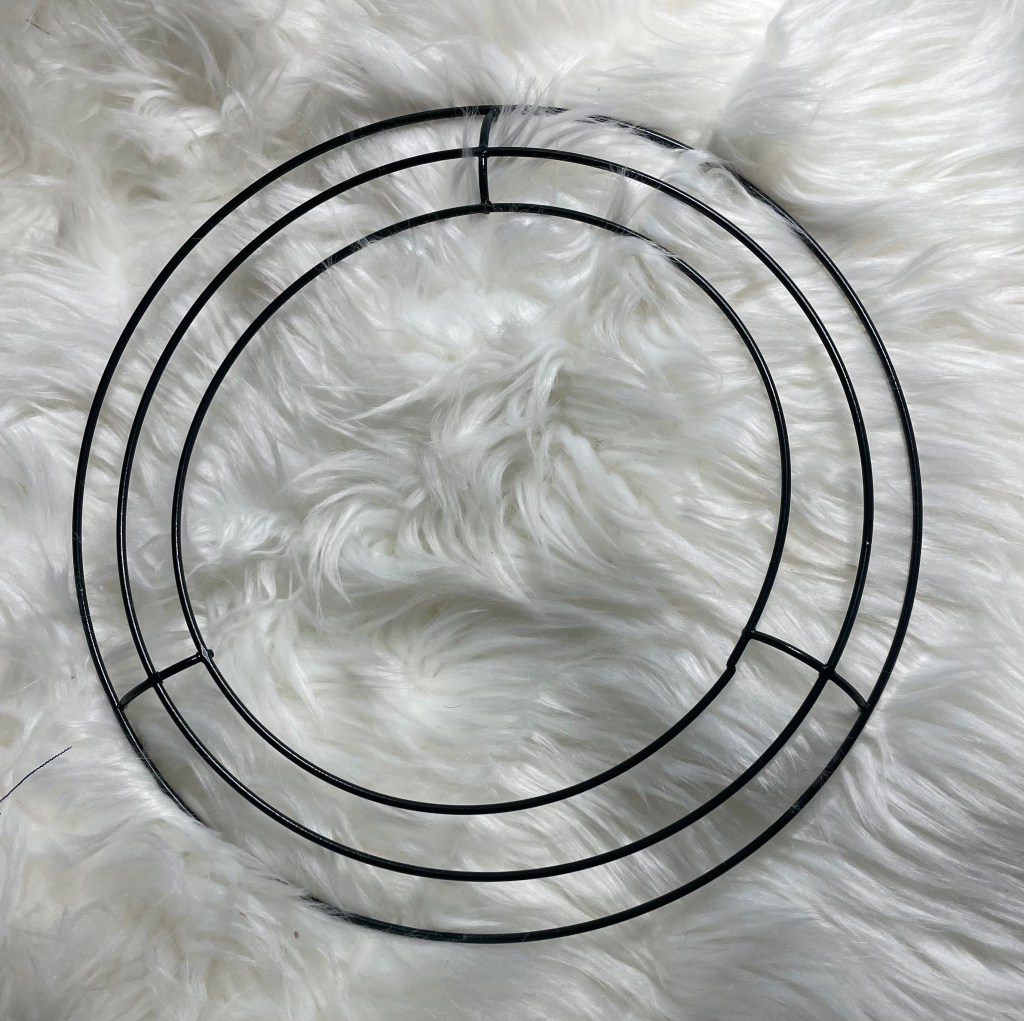
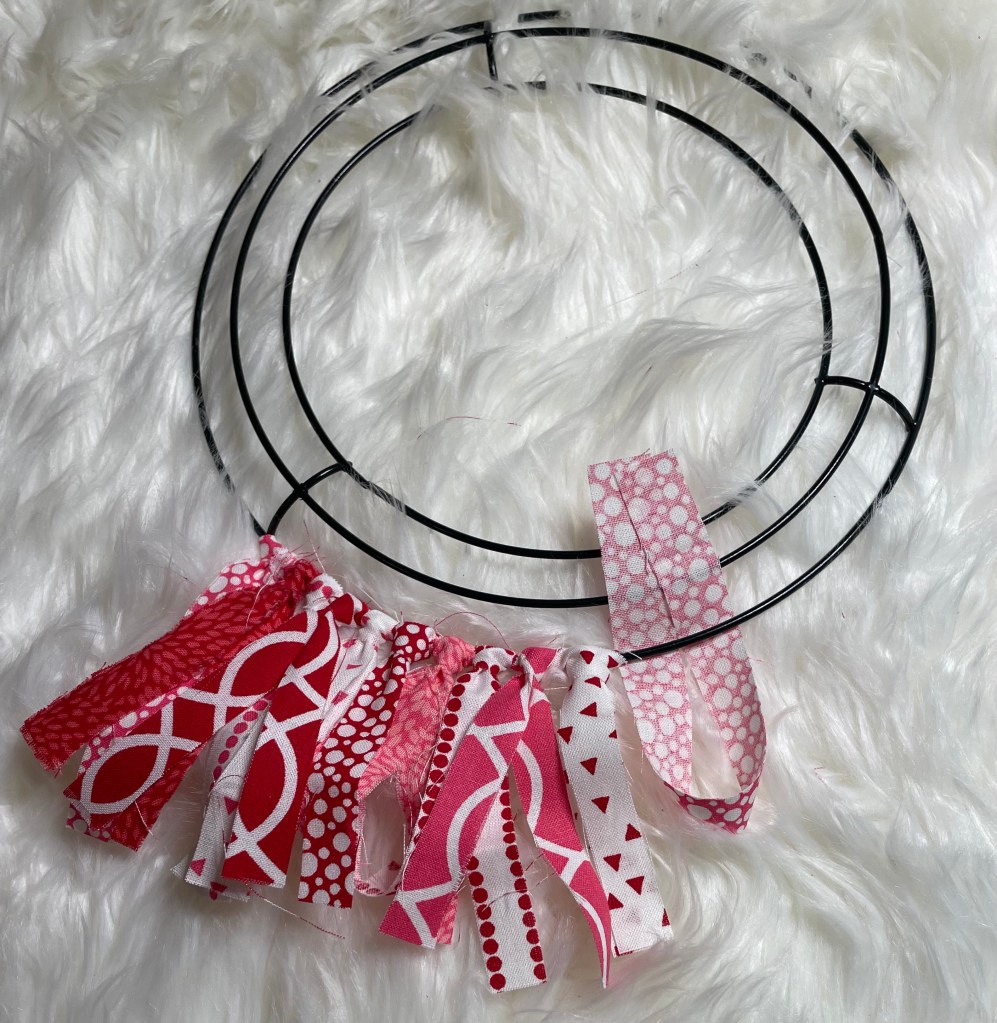
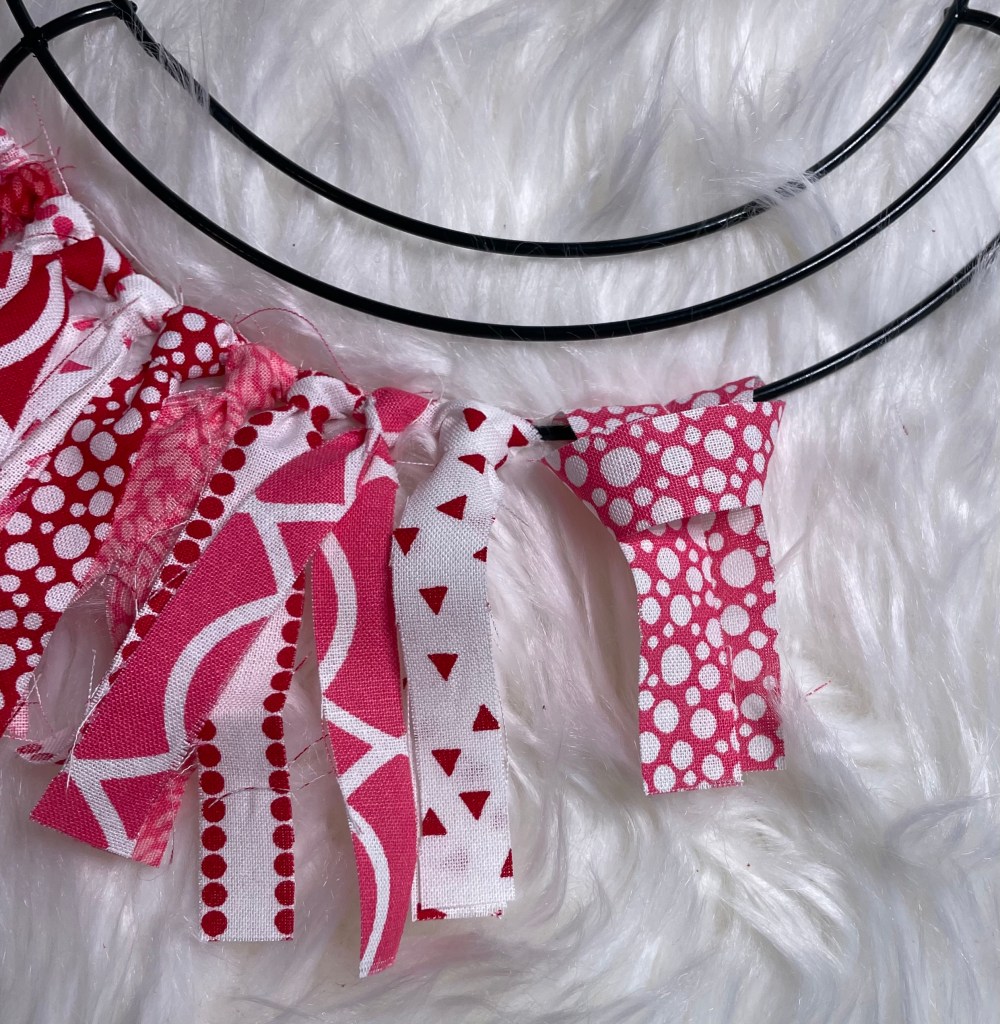
The final size of the fabric strips is 1/2 to 3/4 inch wide by 7 inches long. Fabric strips will be attached to a 12 inch round wire wreath form that I purchased from Walmart.

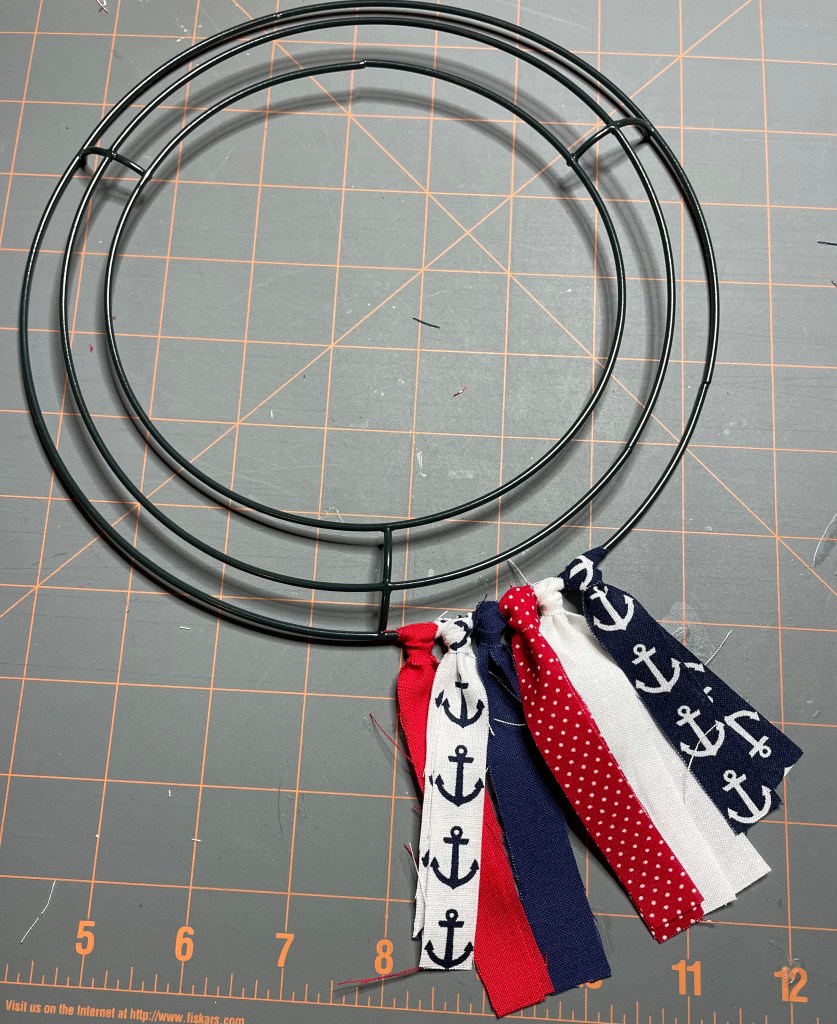
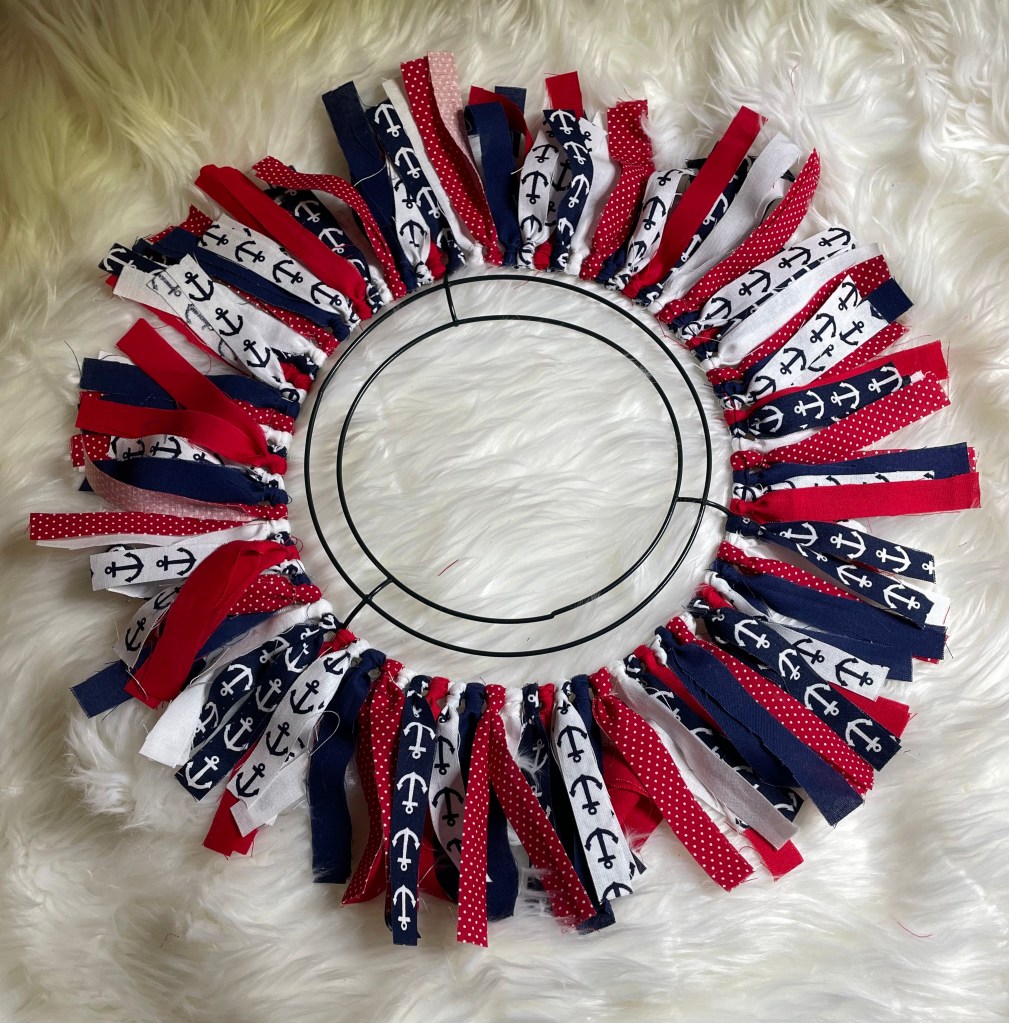
I started with the outer ring and made my way in.

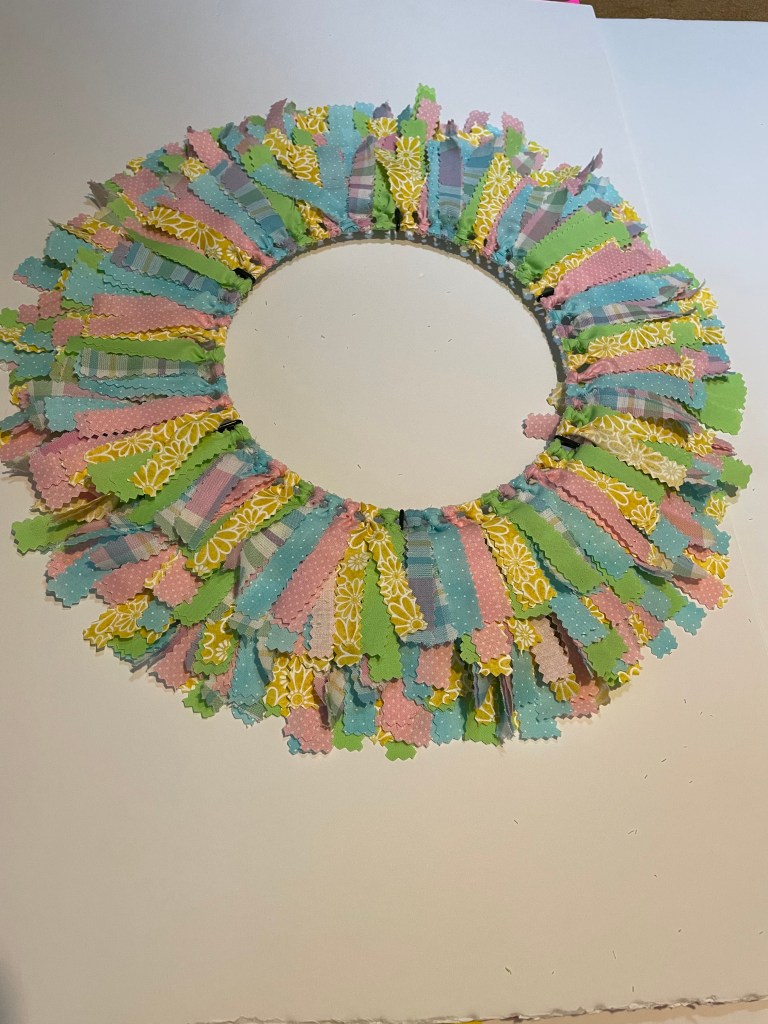
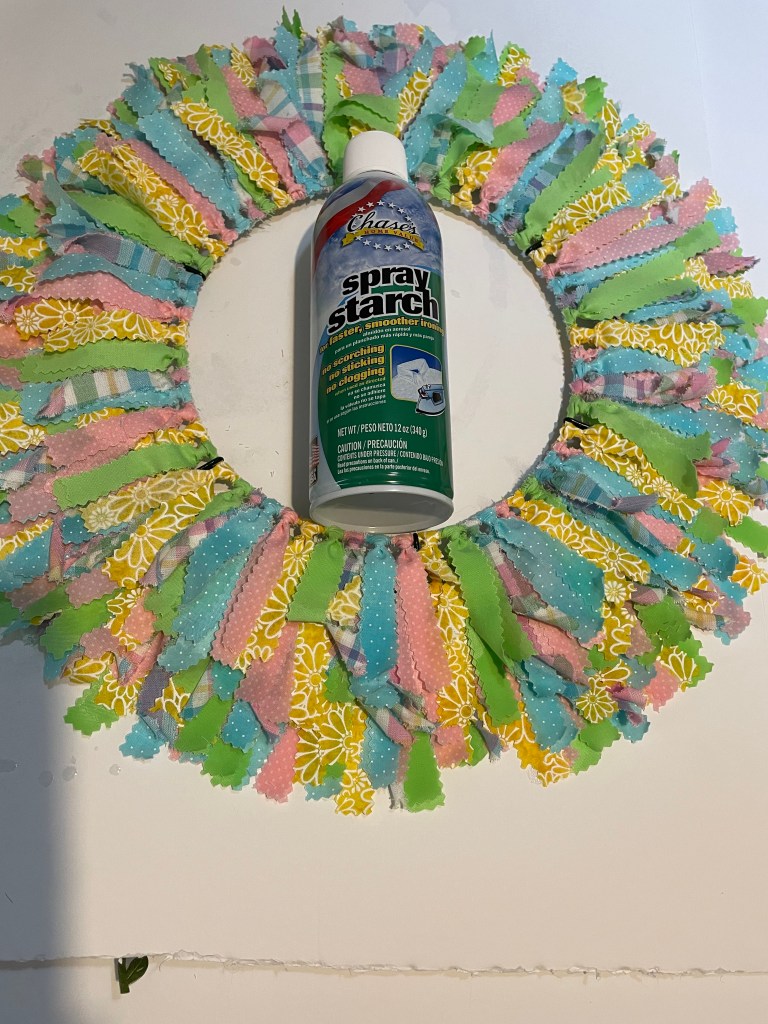
Now that the wreath is complete, I will spray some spray starch of each section to make the fabric stiff. By doing this, my hope is that the fabric strips will stay in place better. I’m using some spray starch I found at Dollar Tree.

The only thing left to do with this wreath is to put it on my mom’s door. Spring decorations will be going up soon.

Craft Project #12 – Sign

Time to make a pre-decorating sign for my moms door area! I find that it keeps her door area somewhat decorated before we put up the next seasonal/holiday decorations up. This time, I decided on a wood frame that has slats. I found it at Hobby Lobby and it is the perfect size!!!!

I decided to use Varathane wood enhancer in the color Whitewash to tone down the appearance of the frame and to make sure the embellishments would not get lost in the natural wood tone.

I purchased unfinished wood letters that are 2 inches in height at Hobby Lobby. I initially thought I would spell out SPRINGTIME but once I got everything at home, I realized that would not work and decided I would just spell out SPRING.

I was not sure what color I wanted to paint the letters since there are so many pastel colors that I thought I might use. I even thought about using a different color for each letter.

In the end, I decided to use the color yellow after painting the back of the letters to see how the color would actually look.

Once everything was dry, I attached the letters to the frame using E6000 adhesive. These letters are not going anywhere!

I started second guessing myself about how I wanted to decorate the frame and decided to see what other embellishments I have on hand or recently purchased that I could use.

After some internal debate and discussion with my granddaughter, Victoria, it decided to continue with the wood flowers and butterflies. Figuring out a potential placement was then figured out.

I then got all of the wood flowers and butterflies I had painted together. As a very last minute purchased, I found some green leaf ribbon on Amazon that I thought would work perfect to add vines and a little more character to the frame.

Before I attached the ribbon, flowers, and butterflies, I decided to rub some green metallic paint to the bottom slat of the frame.

It did not take long for the small amount of paint I rubbed onto the frame to dry and in no time at all, the frame was completed.

Now it is time to make another small wreath for the Spring pre-decorations to go with the frame.

Craft Project #10 – Wooden Flowers

I decided to continue making what I call pre-decoration signs before the actual decorations are put up. So, I’m working on the spring sign but there is some pieces that are made separately. The first part are the flowers that will adorn the sign. I found these flowers on Amazon and the they came in a package of 100. I will be using 6 separate wood flower designs each in their own individual color. At least for this project.

Flower number one was created using Apple Barrel matte acrylic paint in pink polish as a base coat. I then topped the base coat with 2 coats of FolkArt multi-surface glitter acrylic paint. I love how the flower has turned out. I have high hopes for the remainder flowers.

Flower number two was created using delta Ceramcoat matte acrylic paint in the color Calypso Coral. I topped the base coat with 1 coat of FolkArt Glitterific acrylic paint in the color Neon Tangerine. This paint is thick so it really only took one coat with a few touch ups here and there.

Flower number three was created using Apple Barrel matte acrylic paint in the color Cameo Pink as the base coat and topping it with Recollections fine glitter in the color blush. I love how subtle the color turned out.

Flower number four was created using Apple Barrel matte acrylic paint in the color Sunny Day as the base coat and topping it with Recollections fine glitter in the color Sunflower.

Flower number five was created using Apple Barrel matte acrylic paint in the color Pink Polish as the base coat and topping it with Recollections fine glitter in the color Bubblegum.

Last, but not least, is flower number six. This flower splash was created using FolkArt matte acrylic paint in the color Soft Apple as the base coat. I topped it with Recollections fine glitter in the color Mint. For some reason, this particular flower looks more like a paint splash than a flower which made me think it would be more appropriate as greenery than what would normally be considered a flower color.

In the end, all of the flowers were finished with a thick coat of Mod Podge to keep the glitter in place and to make them shine!

Now it is on to the next wooden project… Butterflies!!!!

Craft Project #3 – part one: Mardi Gras inspired wreath

Once Valentine’s is over, it will be time for Mardi Gras. I have decided to decorate mom’s door with a Mardi Gras inspired wreath. It will be a rag wreath similar to the Valentine wreath, but this one will be on a larger wreath frame I purchased at Dollar Tree and, of course, in colors that are a Mardi Gras staple.

My plan is to use the single knot method on the frame with fabric being placed on all four rings. I’m not sure how it will turn out. And there is a possibility I will change my mind while I working on it, but I guess we will see how it ends.

I selected 3 solid color fabrics in green, purple, and gold. I initially selected 6 patterned fabrics but I decided to eliminate one of the purple patterned fabric. The fabrics were found at Walmart and Joann’s.

Once the final decision had been made, I started cutting the fabric in 1″ x 9″ strips using my pinking shears. I’m not looking for a rotary cutter with a pinking shear blade. I currently have one in my Amazon cart, I just hadn’t decided if it is what I really want. In any case, I will be making a decision very soon as I have several more wreaths to make and my hands will strike if I continue to use the pinking shears!

Now that all the strips are ready and are in the order I want to place them in, it is time to start tying them on the frame.

To see how it turned out, please come back tomorrow to see the final product!

Craft Project #2: Nautical rag wreath – part two

The final outcome. I did make some changes to the fabrics I selected. I decided this project needed one additional print fabric and one additional solid color fabric and decided against using any of the ribbon I had purchased. The fabric with the stars definitely would not work with what I had in mind.

The solid fabrics and the red fabric with white dots were purchased at Joann’s.

The fat quarters with the anchors were purchased at WalMart.

Once the item I purchased from Party City arrived, I decided on using the smaller 8 inch wreath I purchased at Dollar Tree.

As with all rag wreaths, I first ironed all of the fabric I would be using then cut them in strips of 1/4 inch by 8 inches. I feel that this size of fabric strips works best on the small frame.

Now the fun begins starting with the outer ring.

Then the center ring.

And finally the inner ring to finish the wreath.

Making rag wreaths is quickly becoming a favorite past time. Especially since it is something I can easily make for my mom as well as for myself.

The next rag wreath I will be making will have a Mardi Gras theme as far as the colors are concerned. I hope you will return to see how it looks or to read my other blogs.

2022 Decorating Mom’s Door – Episode 1 – All things Valentines!

My mother lives in at assisted living facility approximately one mile from my home. This location makes it easy for me to get to her should she need anything. Most of the time, she needs me to get her Cokes, Kleenex, Charmin toilet paper, Bounty paper towels, and cookes. Especially Oreo’s and Nabisco Nilla wafers. And the occasional Snickers bar!!! She is very particular about her things!

While living in an assisted living facility has it’s advantages and we love where she is at, the hallways seem like that are lacking in something. A lot of the residents have wreaths on their door but nothing that really stands out.

The first year she was there at Christmas, I went all out on decorating her door and continued doing it for her. It brings her joy. And if my mother is happy, I am happy!

So I started thinking, why not decorate her door for all of the occasions? I decided I would decorate for all the season and occasional happenings during the year. And I will be starting With Valentines Day.

Of course, that would mean shopping for all the goodies at Dollar Tree, Hobby Lobby, WalMart, and Joanns. I want to make her door look like Cupid paid her a visit. Here are all the goodies I will be using.

From Dollar Tree:

From Hobby Lobby:

From Joanns

In this photo, the bows are from Joann’s, the red heart picks are from Dollar Tree, and the Happy Valentine’s Day teddy bear is from WalMart.

Unfortunately I am not able to decorate her door just yet as they are having a temporary lockdown of sorts. But I hope to be able to make her door stand out on January 30th.

Wish me luck and please come back to see the final outcome.

2022 Craft Project #1 – Valentine Wreath for mom… part 2

This has definitely been a real learning experience as I have never done anything like this before.

I wasn’t sure how to start this project so the first thing I did after ironing the pieces, was to cut the cloth to sections of 8″ x 21″ with some left over.

Then I trimmed it down to 8″ x 1″ then trimming those down to 8″ x 1/4″. When the strips of material were 1″ wide, it just did not look right. Probably because the wreath form is small. I thing the 1/4″ width works perfectly for this size wreath form. At least it did for me.

Once all of the strips were cut and laid them out in the order I wanted to put them on the wreath.

I started putting the strips on the wreath with the outer ring first.

And several hours later, the wreath was finished with strips of material left over. Actually lots of material left over, but I will find a use for it, that is for certain.

Now, this was my first attempt at making a rag wreath and I’m happy that it is one that does not have to be or look perfect because this one does not look perfect.

I may or may not add some things to it but I’m not 100% certain about it, at least not yet. Only time will tell and that time will be coming up on February 27th when I decorate the outside of her door for Valentines!

Please be sure to return to see how it looks when her door decorations are complete.