Craft Project #17 – creating a tree topper

My mom’s little Christmas tree that sits outside her apartment door needs to be decorated for spring as well. I decided to make some picks to use as a tree topper.

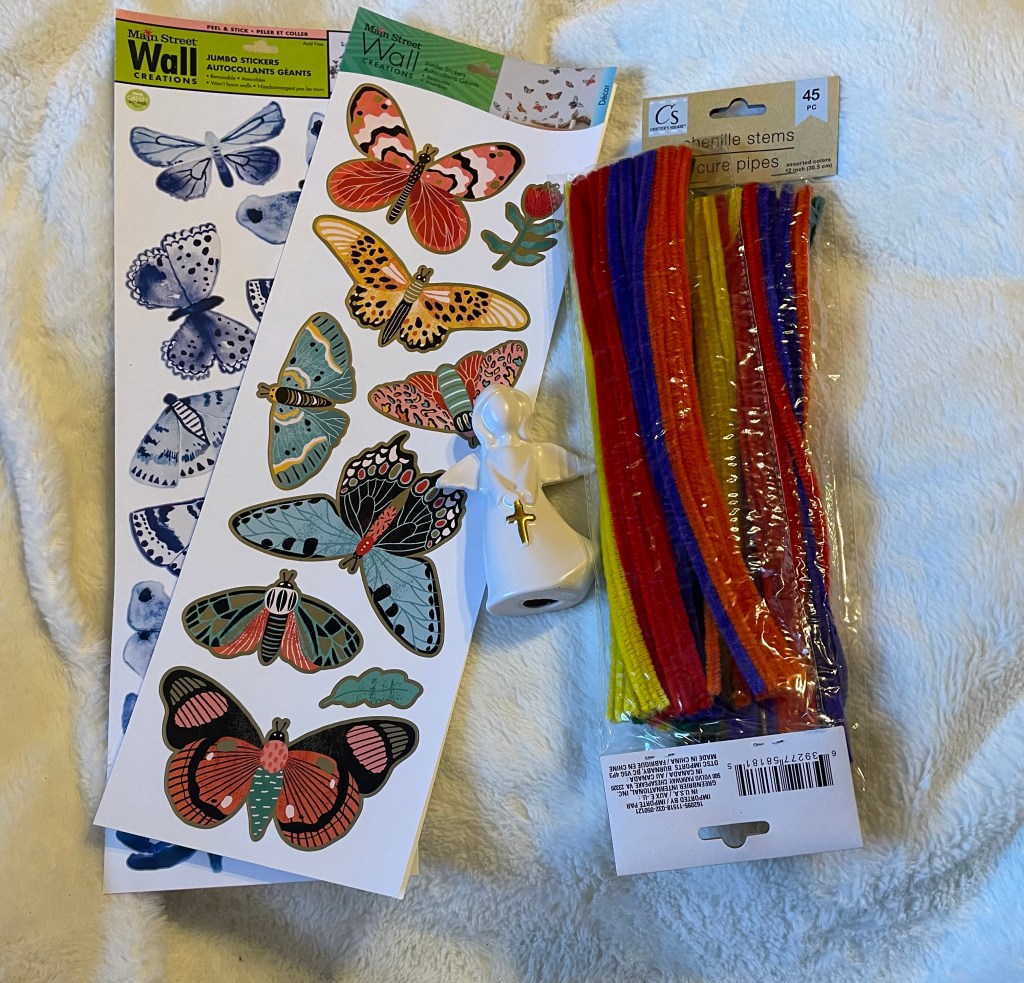
While shopping for things at Dollar Tree, I picked up a pink baby headband that has a flower on it, some Main Street Wall creations Jumbo Stickers in pink flowers, and some floral wire. I will also be using 3 wood butterflies left over from other craft projects.

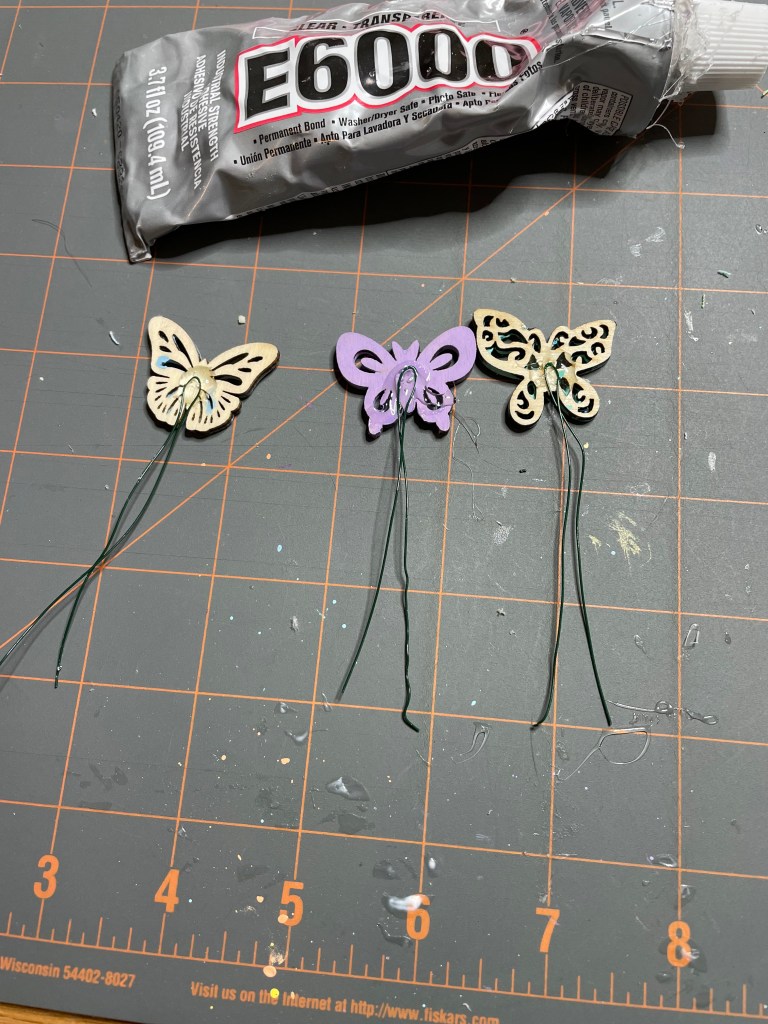
The first part of this project was to attach 3 wood butterflies to the pink baby headband. The supplies I used for this are E6000 adhesive, floral wire, 3 left over wood butterflies, and wire cutters.

The first step was to cut 6 inch pieces of the floral wire.

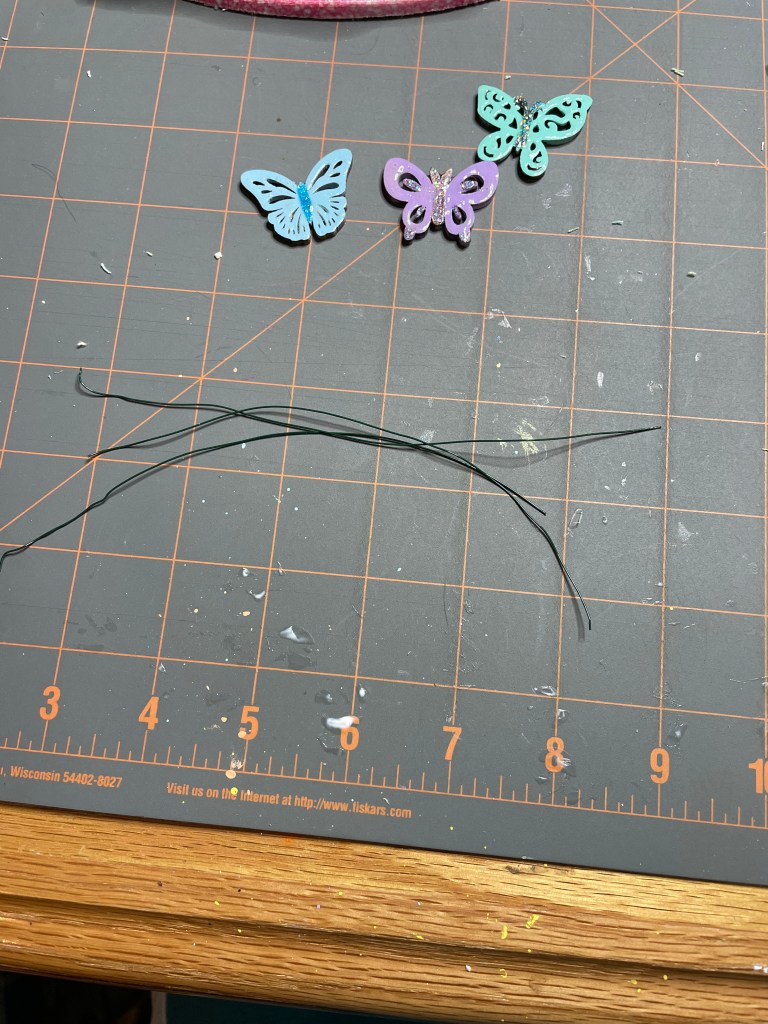
I then folded the floral wire in half and attach the wire to the back of the wood butterflies using E6000 adhesive. I then set them aside to dry.

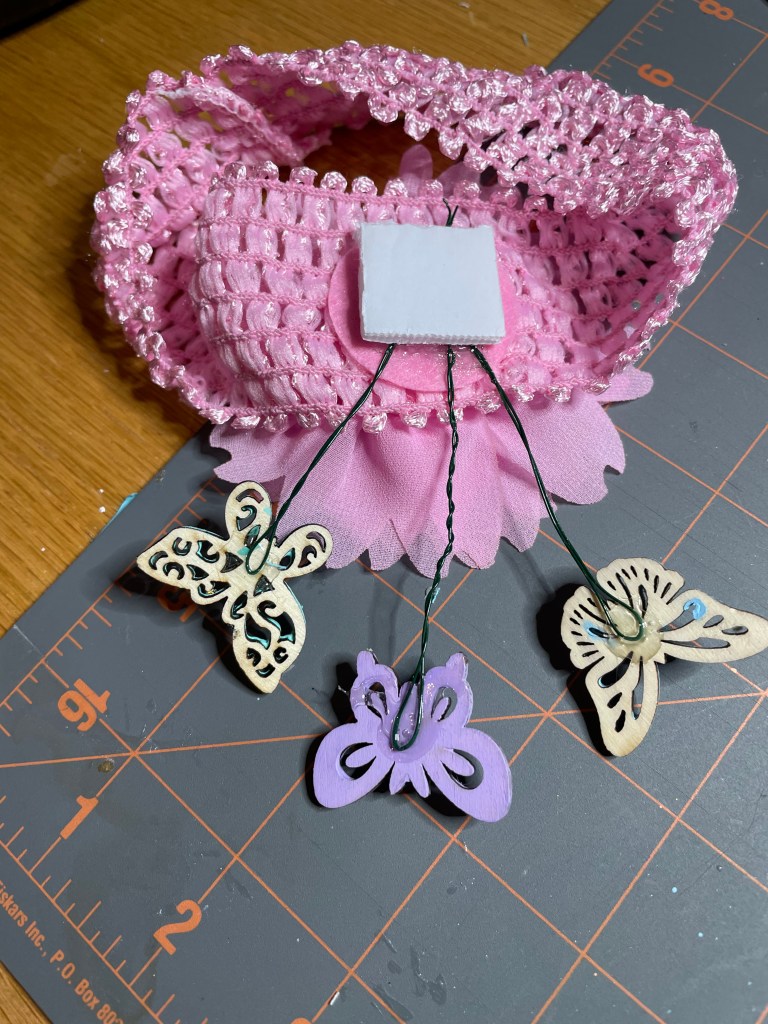
Once the adhesive was dry, I then attached the wood butterflies to the baby headband using E6000 adhesive. To make sure the butterflies did not slip, I used a small piece of foam board that I pressed down onto of the wires and excess adhesive.

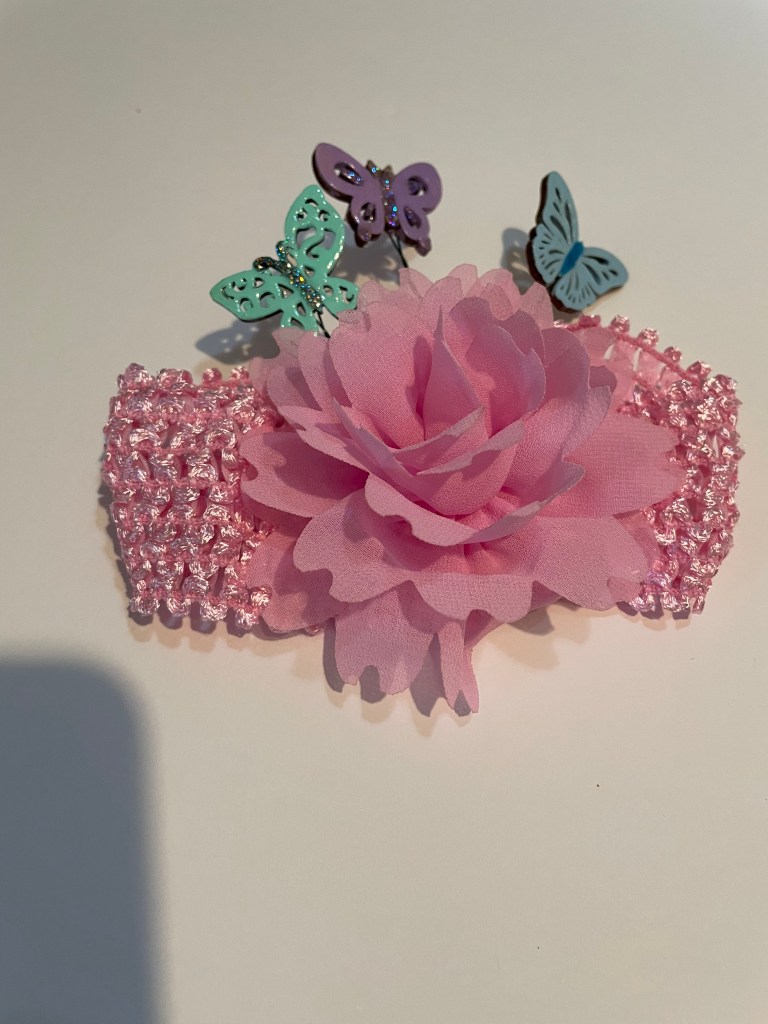
I have happy with the outcome. I plan to wrap the headband on the top stem of the tree but without something else around it, the tree would look like it has a pony tail. So, I will be using the pink flower jumbo stickers to make picks out of and place them around the top of the tree as well.

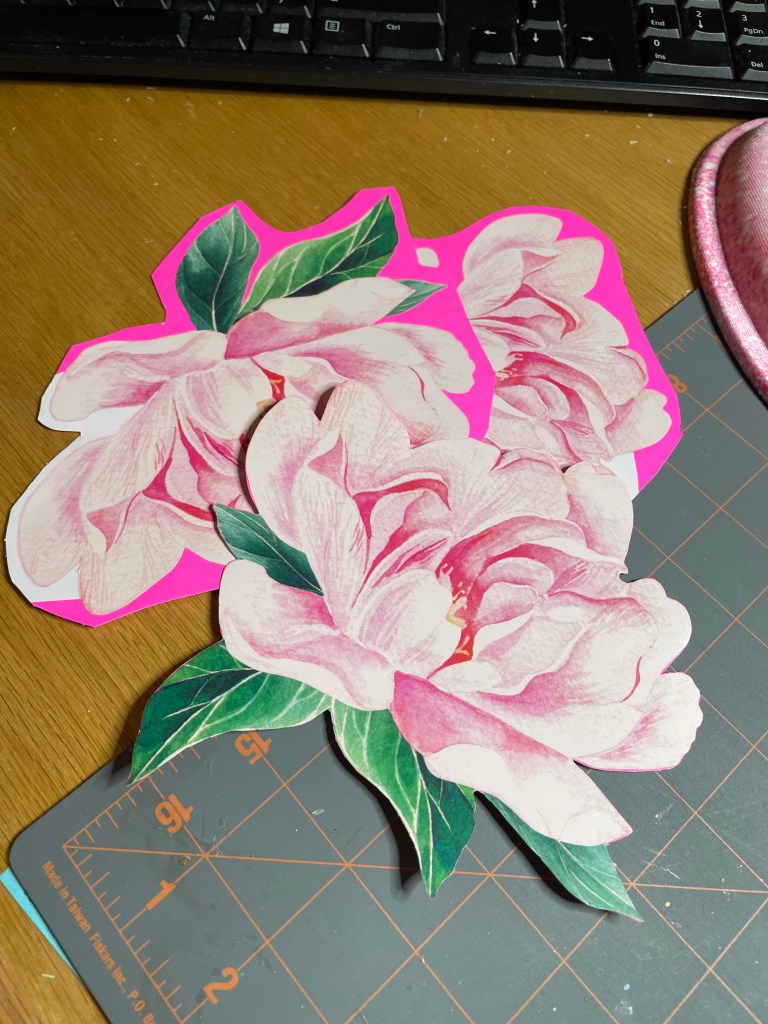
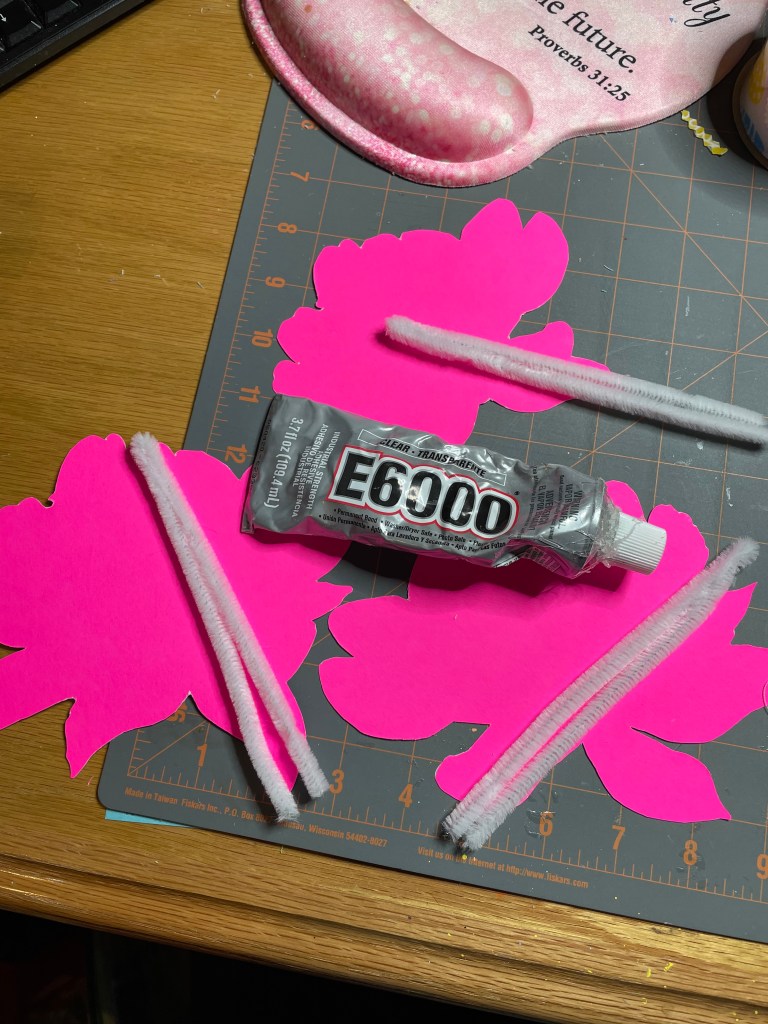
I used the same process for making the flower picks as I did for the butterfly picks. The first thing I did was to put the stickers onto pink poster board.

I then separated each flower but cutting them into single flowers. Then trimming off the excess poster board from each flower.

After that was done, it was time to add chenille stems/pipe cleaners to the back of the flowers. I used white chenille stems as that is what I had on hand.

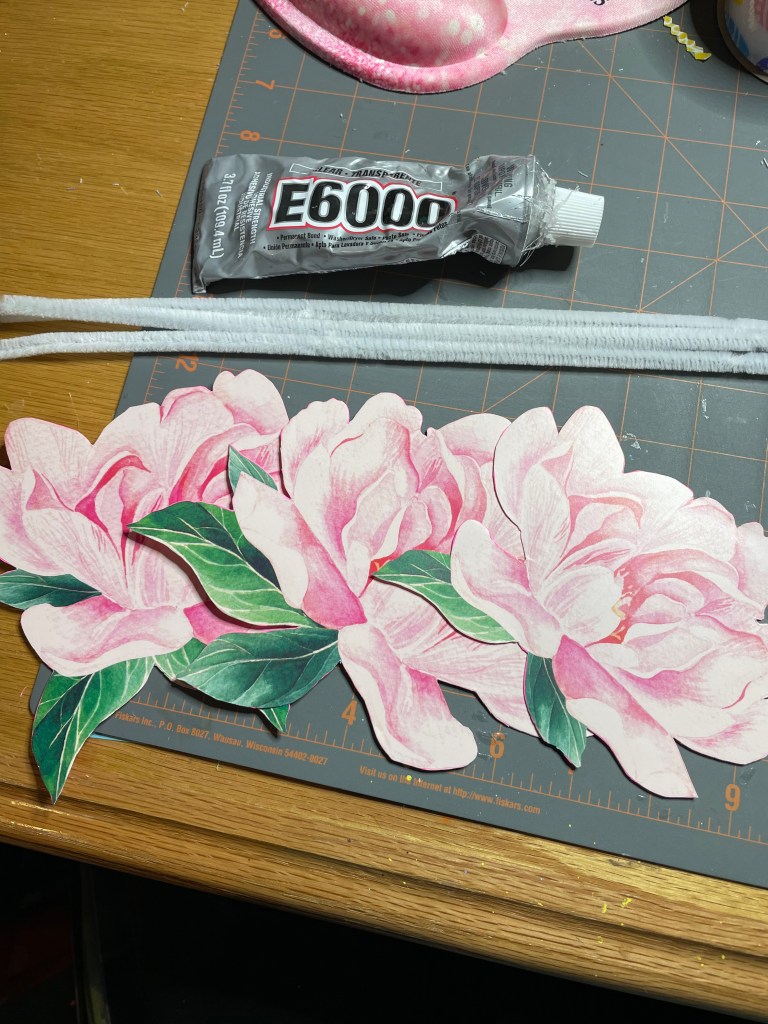
I folded each stem in half and attached it to the back of the flowers using E6000 adhesive. I also place a small piece of foam board on top of the stem and excess adhesive. They were then set aside to dry overnight.

Now, I have 3 large flowers to place around the headband to make a unique tree topper. I cannot wait to see how it looks.

I wonder how many more spring craft projects I will make. I guess only time will tell!

Craft Project #13 – small wreath

I really enjoy making rag wreaths. While thinking about the decorations I would be using for mom’s door, I decided I would do so pre-decorating decorations to put around the door area. Since I have made the small spring sign, I decided that she would need a small wreath as well.

I decided on one fabric that reminds me of spring and Easter that I found at Hobby Lobby. I will be using an eight inch round wire wreath form that I purchased at Dollar Tree.

I started by ironing the fabric.

Once this was done, I cut the fabric into 1/2 to 3/4 inch by 7 inch strips. I find this is the perfect size that works best for me. Each fabric was attached using the larks head knot starting with the outer ring and moving inward.

I actually kept track of the number of strips used for this project. The outer ring has 76 fabric strips, the middle ring has 64 fabric strips, and the inner ring has 55 fabric strips. So, it too a total of 195 fabric strips to make this wreath.

After all of the strips were put on the wreath form, I was beginning to wonder if it needed a litte something extra. First I thought I could use some pink pom poms, but my granddaughter voted that down. Then I thought maybe I could use the left over letters I had from the sign and spell out the word spring, but she voted that one down as well. So, it was decided to just leave it as is.

I will using spray starch on the wreath before I put it up so help keep the strips in place.

Coming up next is another craft project to add to mom’s Spring decorations.

Craft Project #12 – Sign

Time to make a pre-decorating sign for my moms door area! I find that it keeps her door area somewhat decorated before we put up the next seasonal/holiday decorations up. This time, I decided on a wood frame that has slats. I found it at Hobby Lobby and it is the perfect size!!!!

I decided to use Varathane wood enhancer in the color Whitewash to tone down the appearance of the frame and to make sure the embellishments would not get lost in the natural wood tone.

I purchased unfinished wood letters that are 2 inches in height at Hobby Lobby. I initially thought I would spell out SPRINGTIME but once I got everything at home, I realized that would not work and decided I would just spell out SPRING.

I was not sure what color I wanted to paint the letters since there are so many pastel colors that I thought I might use. I even thought about using a different color for each letter.

In the end, I decided to use the color yellow after painting the back of the letters to see how the color would actually look.

Once everything was dry, I attached the letters to the frame using E6000 adhesive. These letters are not going anywhere!

I started second guessing myself about how I wanted to decorate the frame and decided to see what other embellishments I have on hand or recently purchased that I could use.

After some internal debate and discussion with my granddaughter, Victoria, it decided to continue with the wood flowers and butterflies. Figuring out a potential placement was then figured out.

I then got all of the wood flowers and butterflies I had painted together. As a very last minute purchased, I found some green leaf ribbon on Amazon that I thought would work perfect to add vines and a little more character to the frame.

Before I attached the ribbon, flowers, and butterflies, I decided to rub some green metallic paint to the bottom slat of the frame.

It did not take long for the small amount of paint I rubbed onto the frame to dry and in no time at all, the frame was completed.

Now it is time to make another small wreath for the Spring pre-decorations to go with the frame.

Things I have purchased for the spring craft projects and decorations.

I love shopping for decorations and things to use for craft projects. And the spring items are no exception.

Beginning with Amazon. I actually did not purchase as much as I usually do. I purchased several yellow rose garlands. Obviously more that I would usually purchased, but we will be using most of the garlands to decorate her very large window area. The wood flowers and butterflies will be used on several different projects. Of course I purchased a banner for the door as well.

Dollar Tree purchases was definitely on the small side for the spring season purchases.. From the Dollar General section in Dollar Tree, I purchased some floral garland that will adorn her walker as well as the tree. I also purchased some individual floral stems to use on the tree as well. I purchased some removable wall stickers that I want to try to use on the wall around the front door.

I purchased most of the spring items from Hobby Lobby this time. What can I say, when they have 50% off in their floral department, I do tend to go a little crazy, but not as crazy as I would have wanted to. I purchased wood letters and one word, for two separate projects. Other items included a lot of fabric for wreaths, scrapbook paper that may or may not be used on some letters, a wood frame which I have already started working on, wire ribbon, and pom poms.

I realize this appears that I only purchased one item from Michaels, but that is not the case.

I purchased a lot of acrylic paints for the spring projects. Some came from Hobby Lobby, some from Michaels, and some from Walmart.

I also purchased a lot of items for Easter while purchasing the spring items, but those will be in a different blog.

Thanks for reading my blog. I hope you have enjoyed it. Please return to see the craft project I make with these items and how I use them when decorating mom’s door, walker, and room.

Planning the spring craft projects needed for decorating mom’s door, walker, and her room!!!

I’m hoping to stick to a strict timeline!!!!! But some things may have to be adjusted ever so slightly. I hope to have most of the draft projects completed by March 23rd. But if I miss it, I have given myself a little wiggle room.

As you can see, my list of projects is rather long, but luckily, I think I have almost everything I need to at least begin the projects.

Can you think of any craft projects I should add to the list??? Please let me know.