Note to self… I need more counter space for projects like this!!!
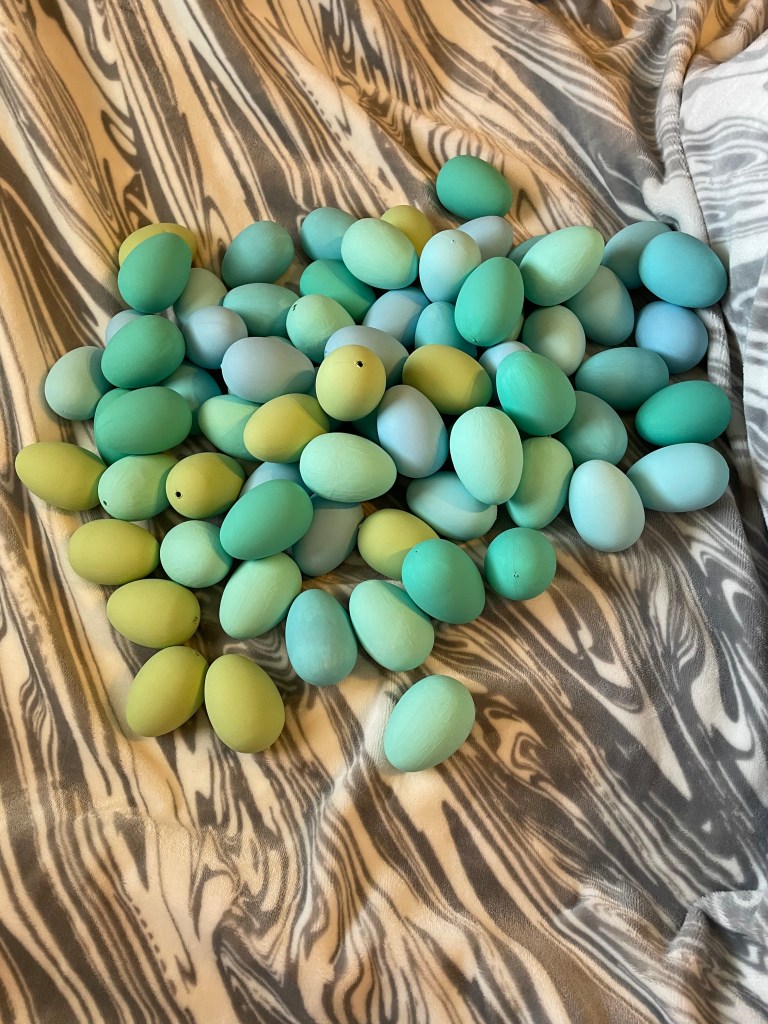
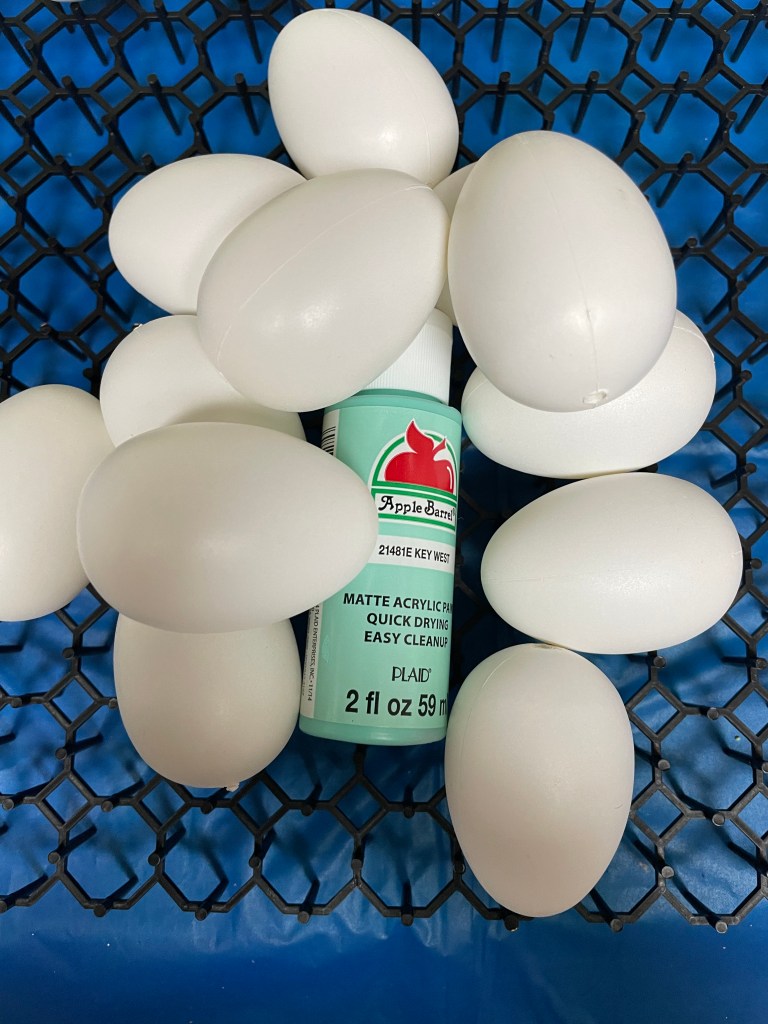
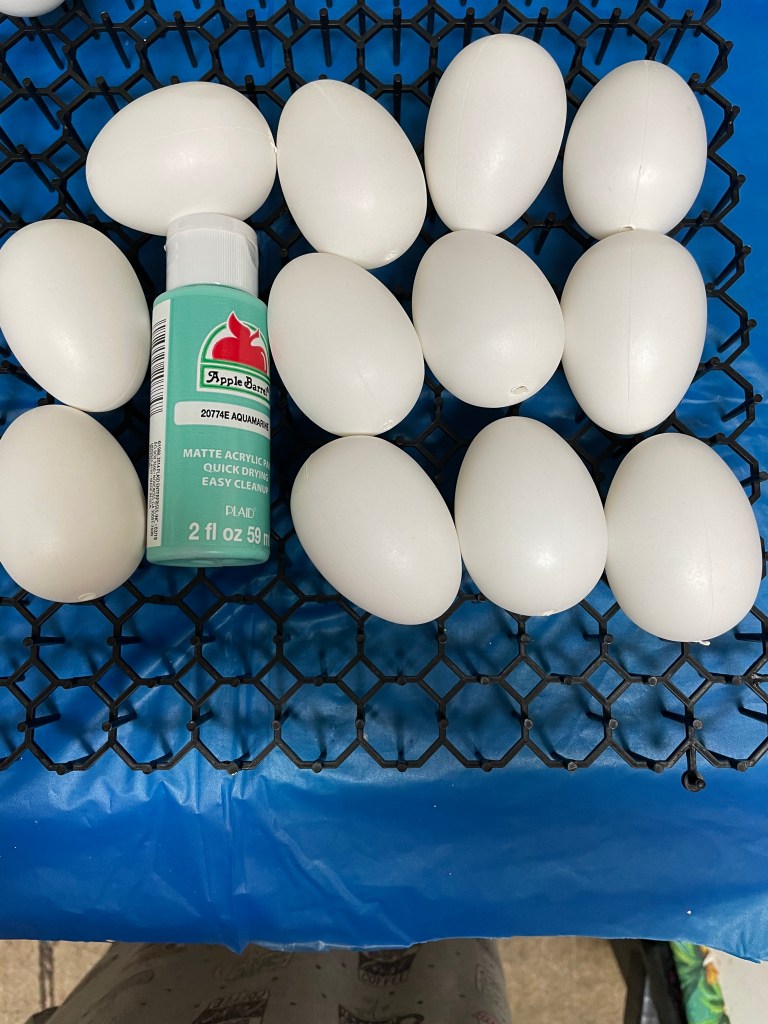
I started with the greens. I chose Folk Art Matte acrylic paint in the color Soft Apple, and Apple Barrel Matte acrylic paint in the colors Aquamarine and Key West. I applied three coats for each one.
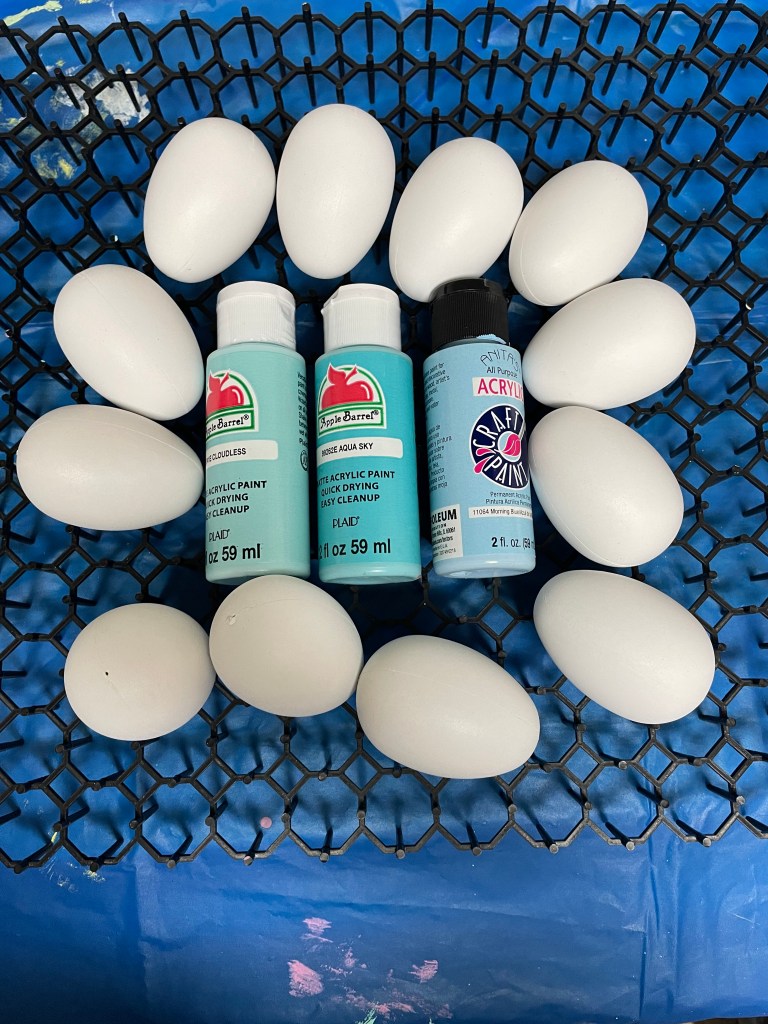
For the blues, I chose Apple Barrel Matte Acrylic Paint in the colors Cloudless and Aqua Sky, and Anita’s All Purpose Acrylic craft paint in the color Morning Blue. I also used three coats for each one as well.
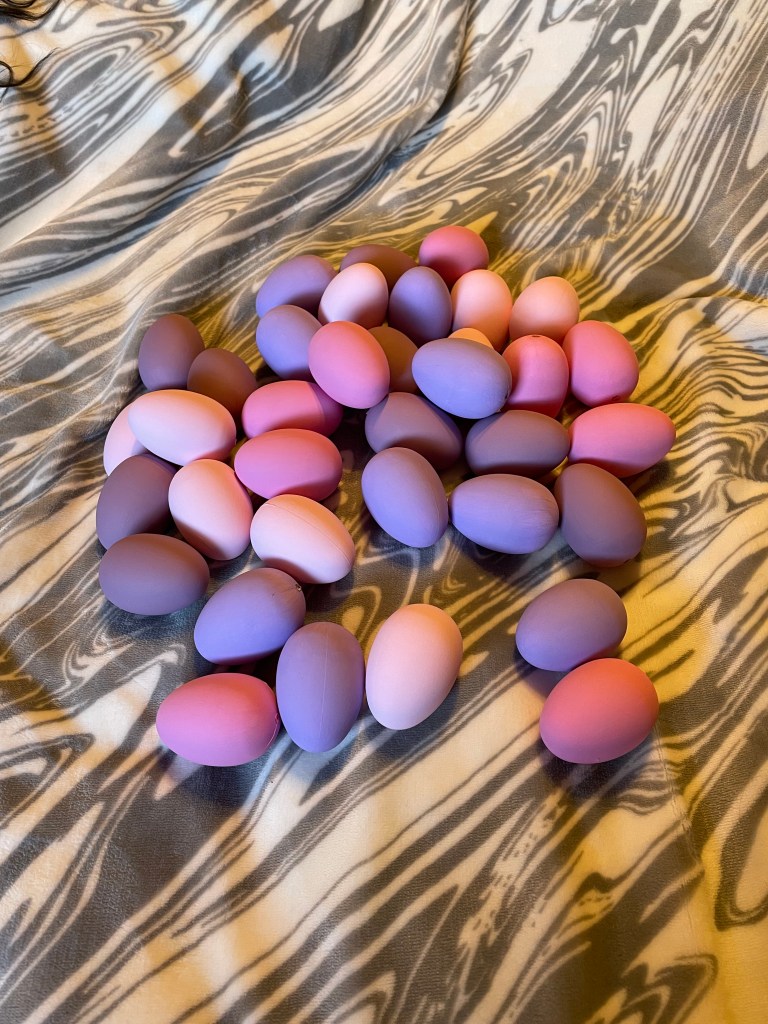
And now there is only one dozen eggs left. There is a possibility that I might try some glitter on them. I guess only time will tell.
This group of eggs took more than 2 coats to achieve the coverage I was wanting.
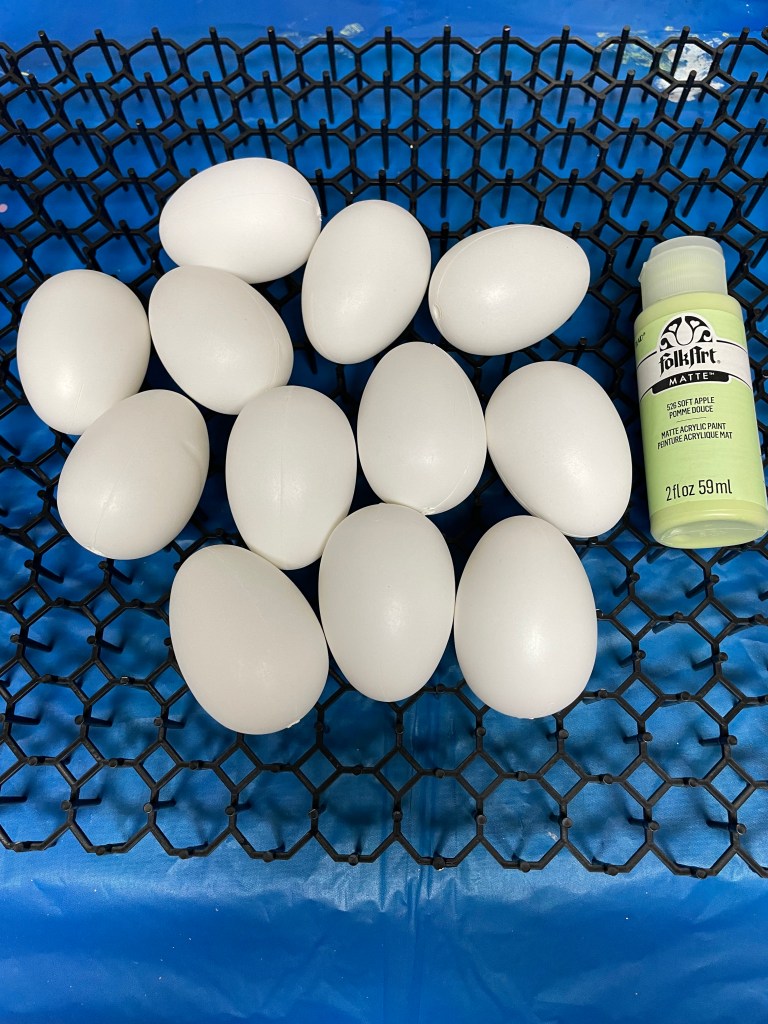
Started with 3 dozen plain white plastic eggs purchased on Amazon. I decided on 4 colors of acrylic paints I want to use. So, there will be 9 eggs of each color.
Group 1 paint color is Anita’s All Purpose Acrylic Craft Paint in the color Princess Pink.
Group 2 paint color is Apple Barrel matte acrylic paint in the color Pink Polish.
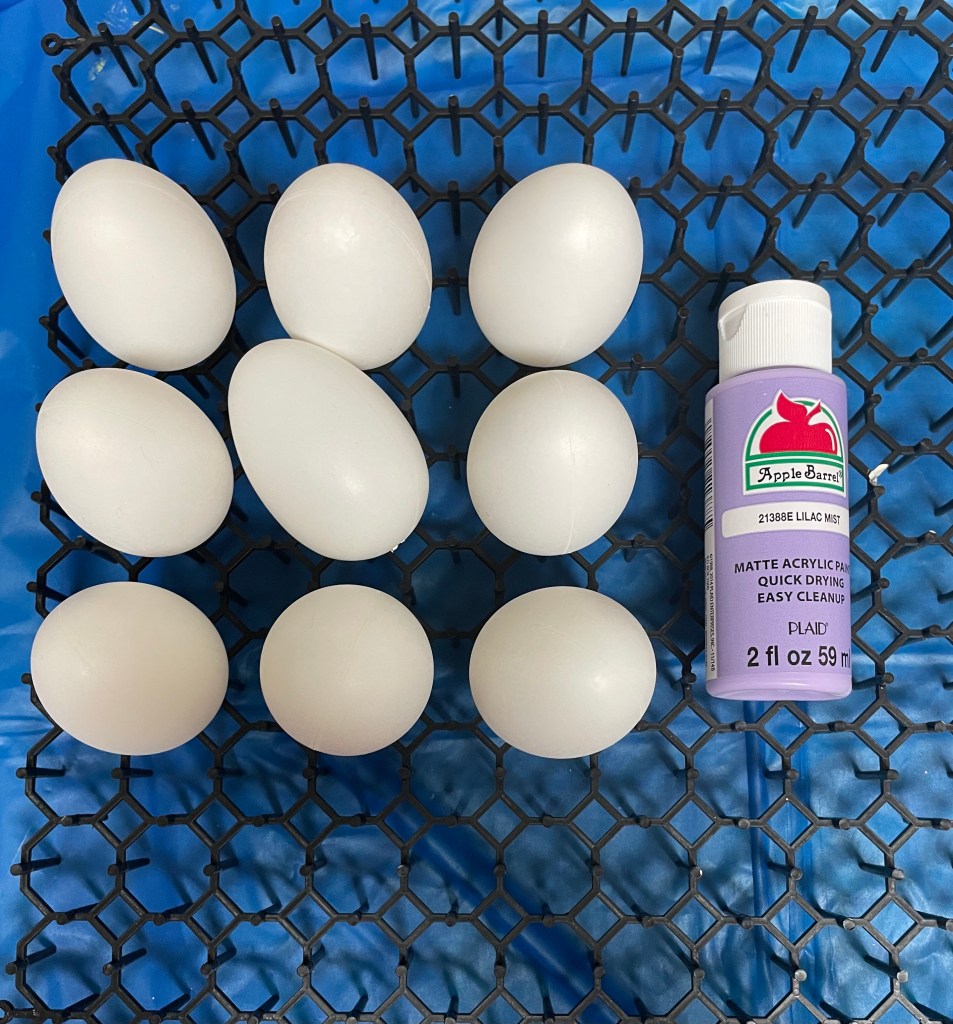
Group 3 paint color is Apple Barrel matte acrylic paint in the color Lilac Mist.
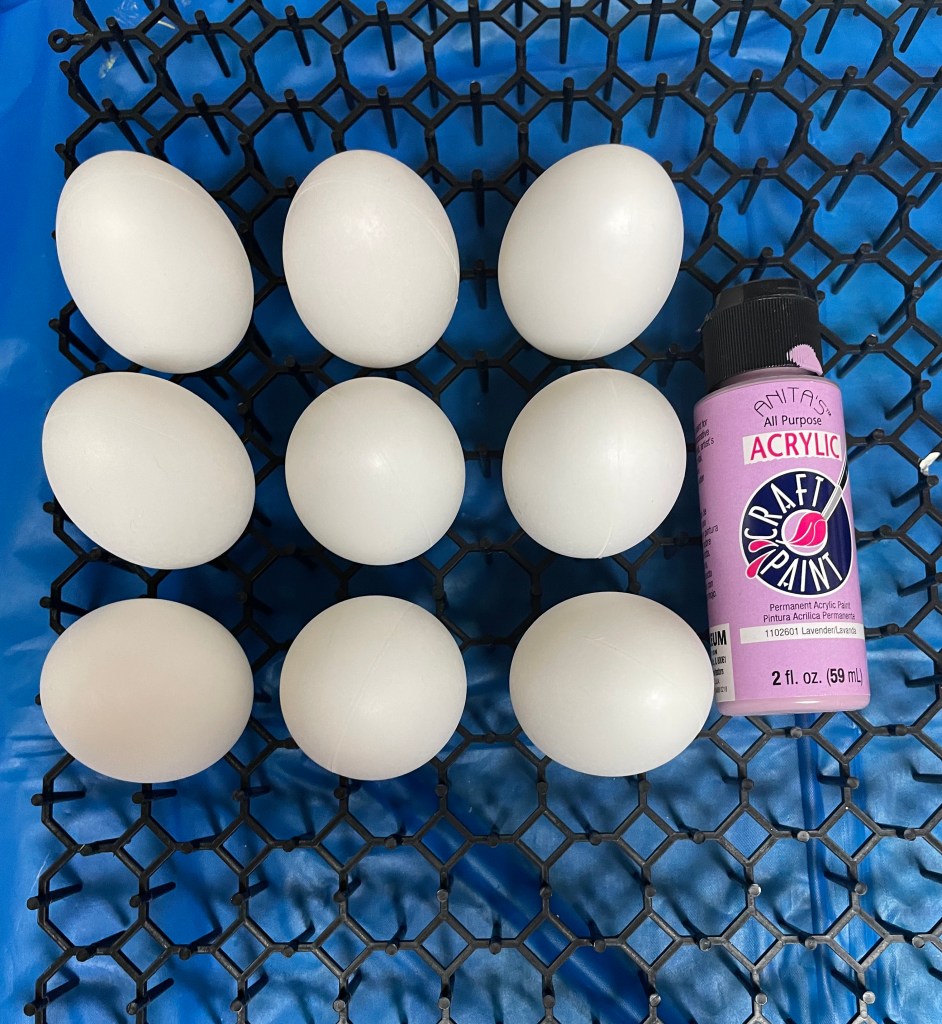
And the final group, group 4, paint color is Anita’s All Purpose Acrylic Craft Paint in the color Lavender.
I ended up doing one additional coat of paint on each egg. This seems to achieve the coverage I was looking for.
Now it is time to start the next group of paint colors. This will definitely take longer than the first 2 as I will be doing 6 dozen eggs using 6 different colors of paints.
Time to make a pre-decorating sign for my moms door area! I find that it keeps her door area somewhat decorated before we put up the next seasonal/holiday decorations up. This time, I decided on a wood frame that has slats. I found it at Hobby Lobby and it is the perfect size!!!!
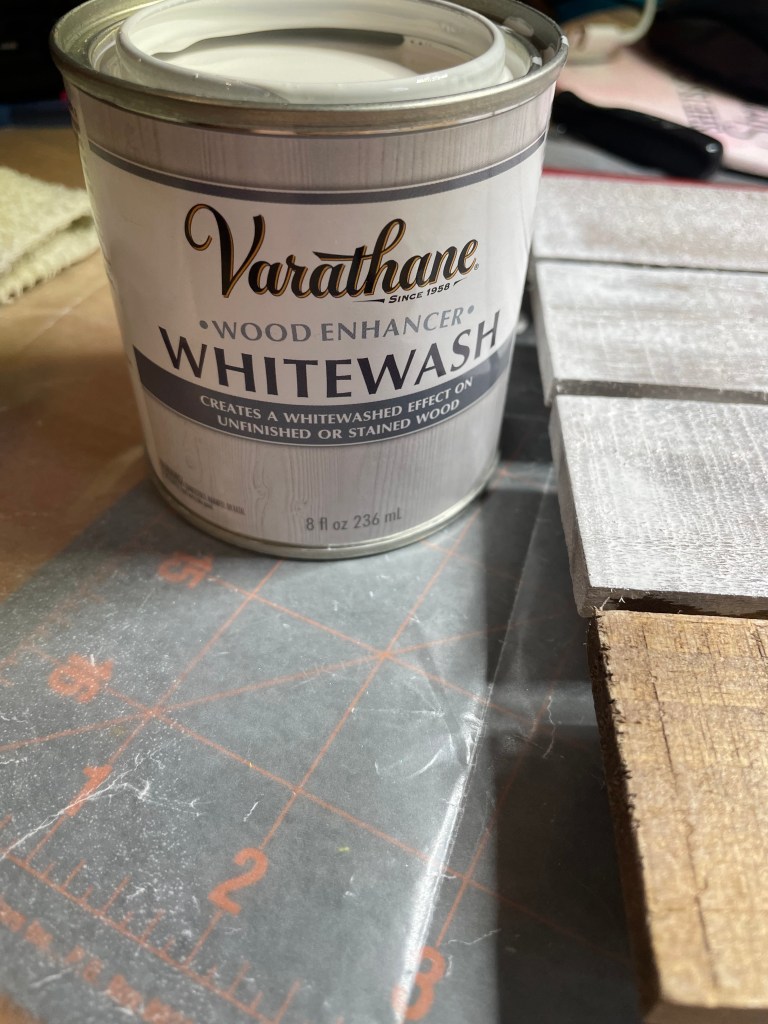
I decided to use Varathane wood enhancer in the color Whitewash to tone down the appearance of the frame and to make sure the embellishments would not get lost in the natural wood tone.
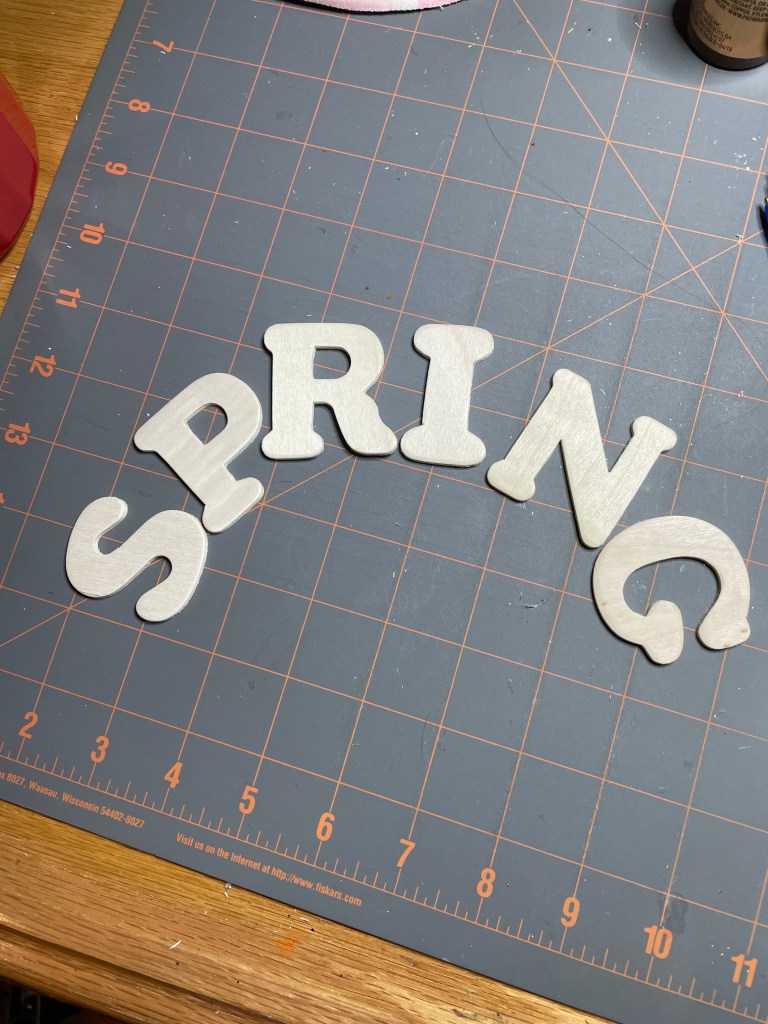
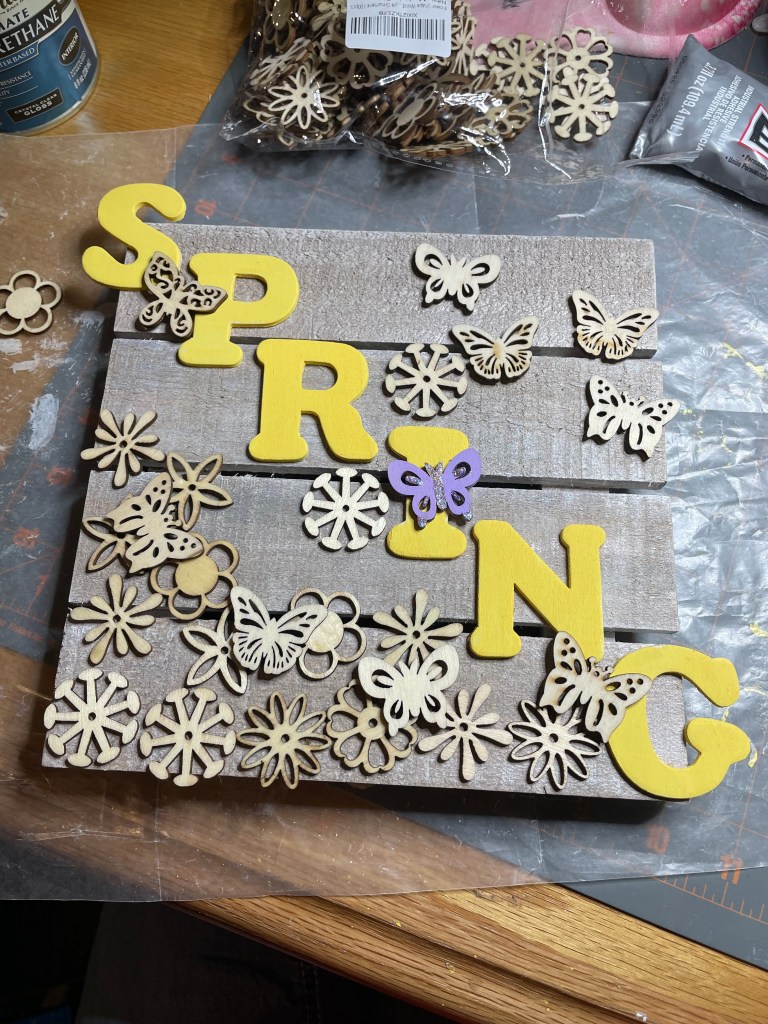
I purchased unfinished wood letters that are 2 inches in height at Hobby Lobby. I initially thought I would spell out SPRINGTIME but once I got everything at home, I realized that would not work and decided I would just spell out SPRING.
I was not sure what color I wanted to paint the letters since there are so many pastel colors that I thought I might use. I even thought about using a different color for each letter.
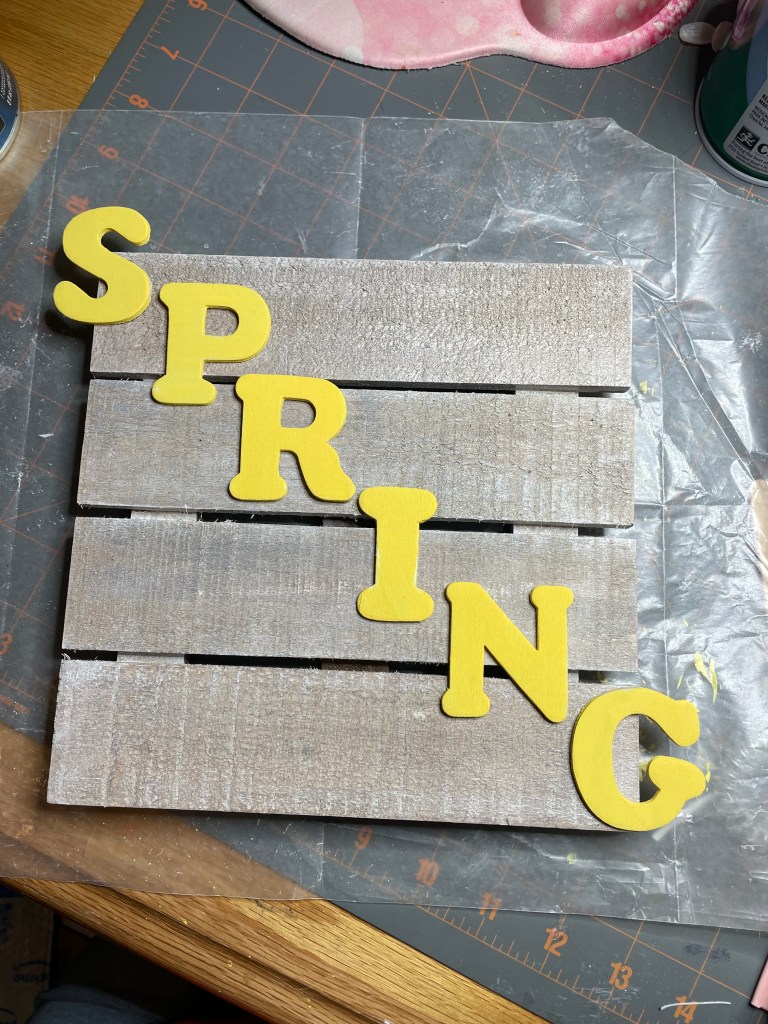
In the end, I decided to use the color yellow after painting the back of the letters to see how the color would actually look.
Once everything was dry, I attached the letters to the frame using E6000 adhesive. These letters are not going anywhere!
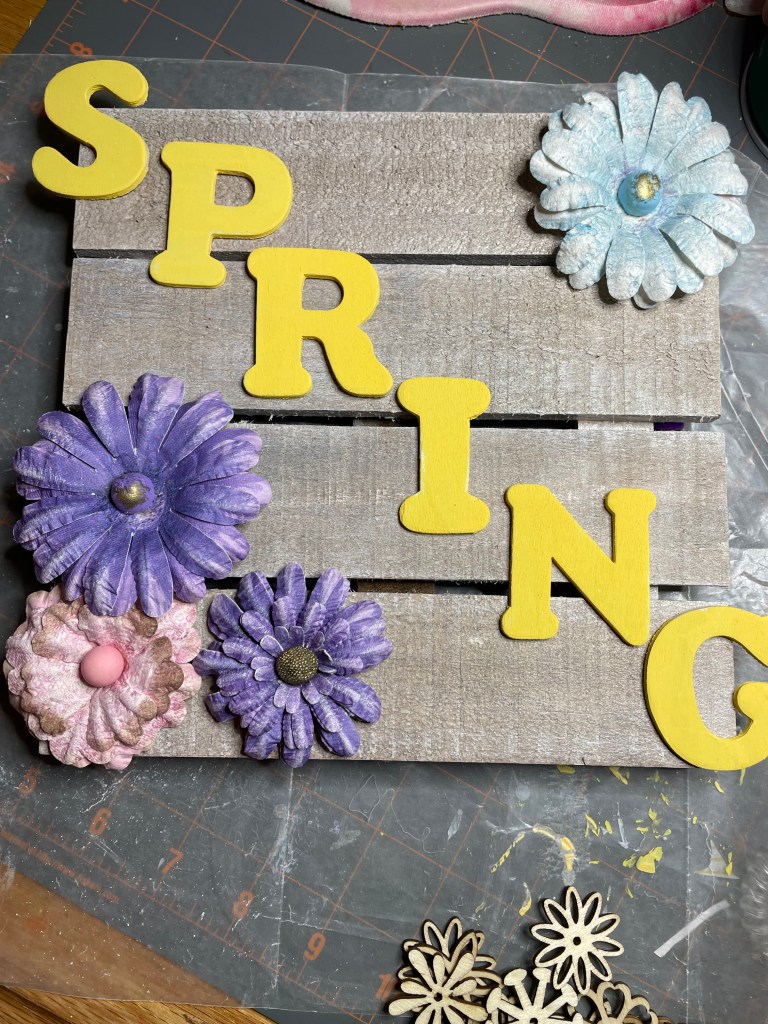
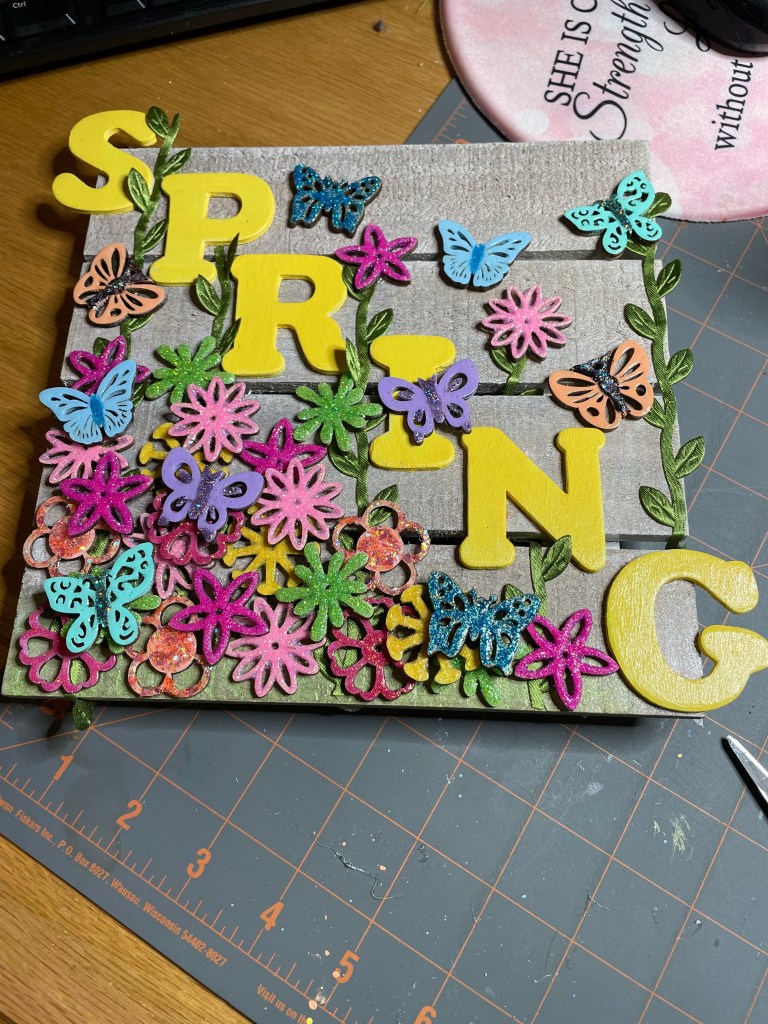
I started second guessing myself about how I wanted to decorate the frame and decided to see what other embellishments I have on hand or recently purchased that I could use.
After some internal debate and discussion with my granddaughter, Victoria, it decided to continue with the wood flowers and butterflies. Figuring out a potential placement was then figured out.
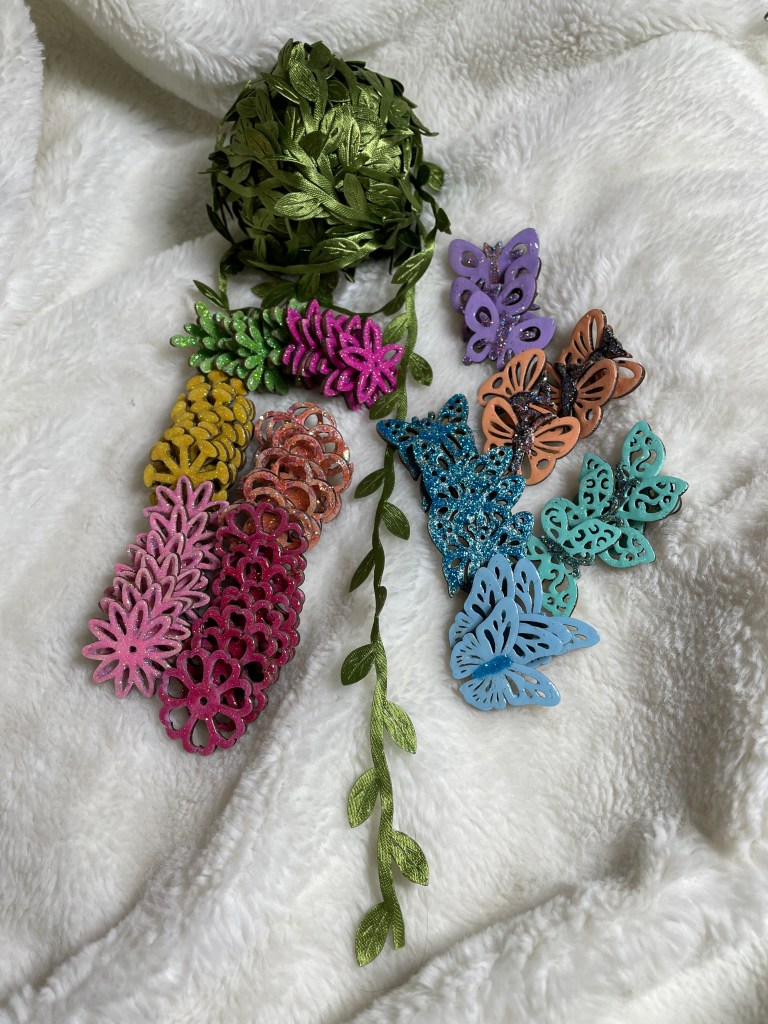
I then got all of the wood flowers and butterflies I had painted together. As a very last minute purchased, I found some green leaf ribbon on Amazon that I thought would work perfect to add vines and a little more character to the frame.
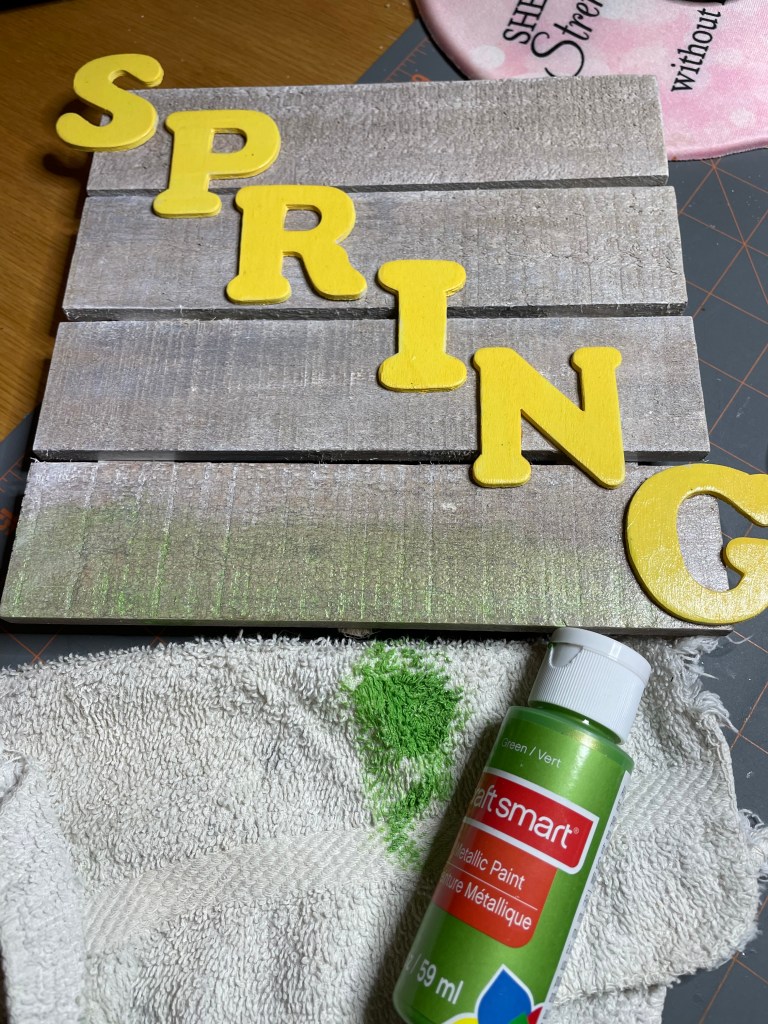
Before I attached the ribbon, flowers, and butterflies, I decided to rub some green metallic paint to the bottom slat of the frame.
It did not take long for the small amount of paint I rubbed onto the frame to dry and in no time at all, the frame was completed.
Now it is time to make another small wreath for the Spring pre-decorations to go with the frame.
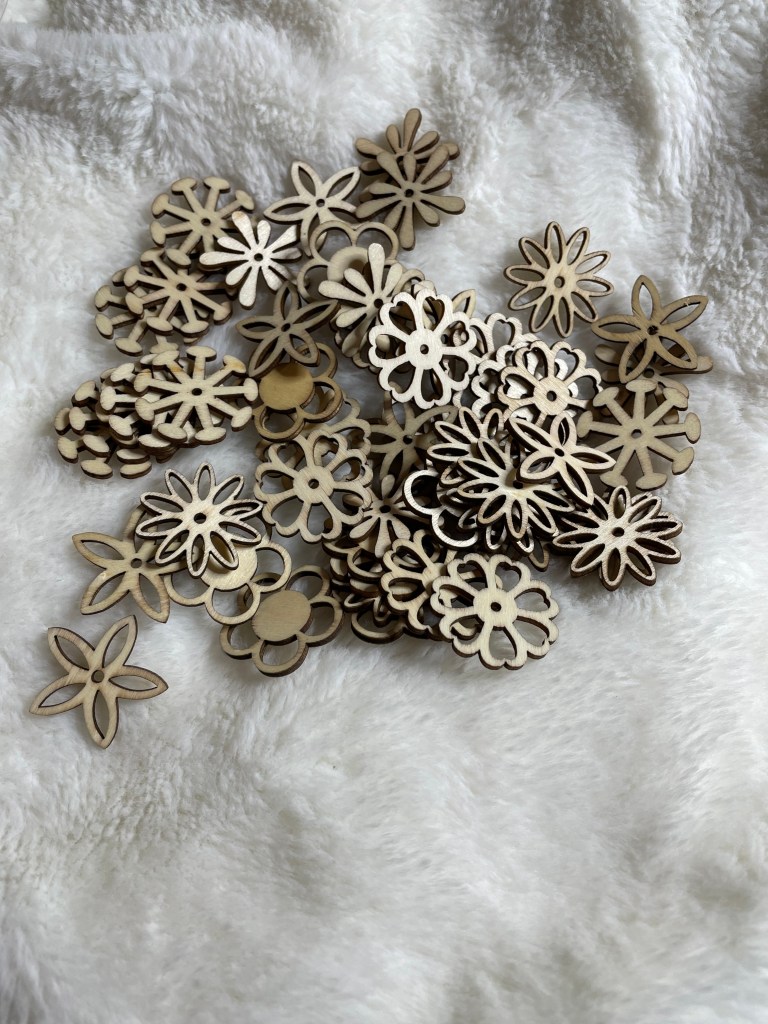
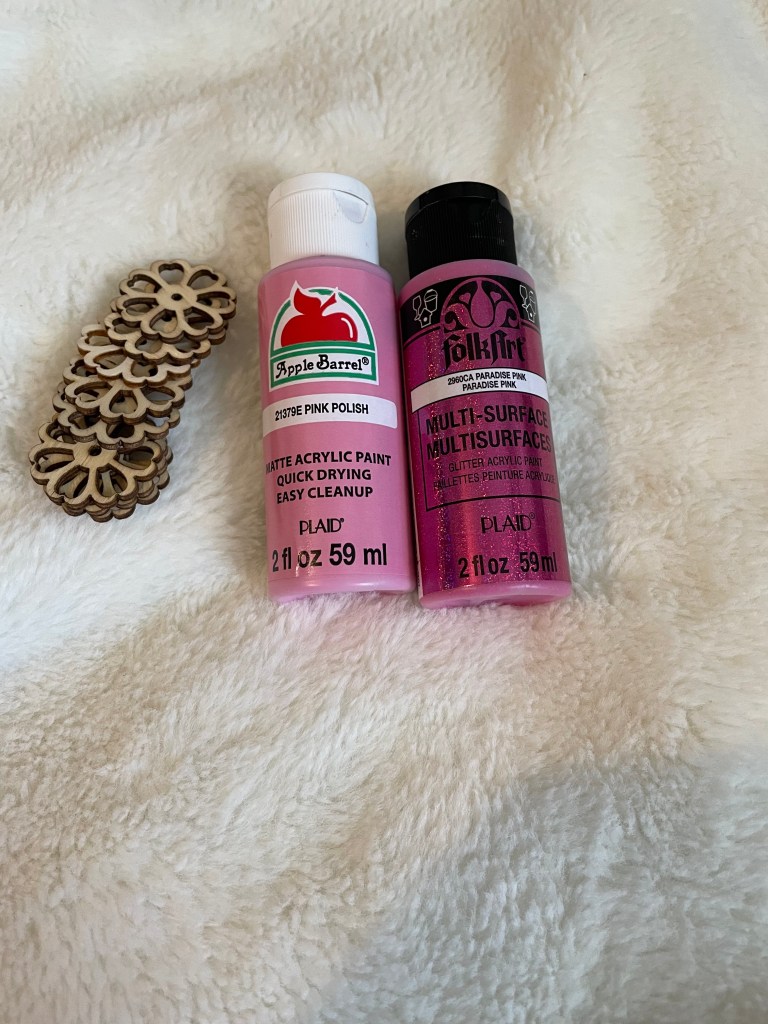
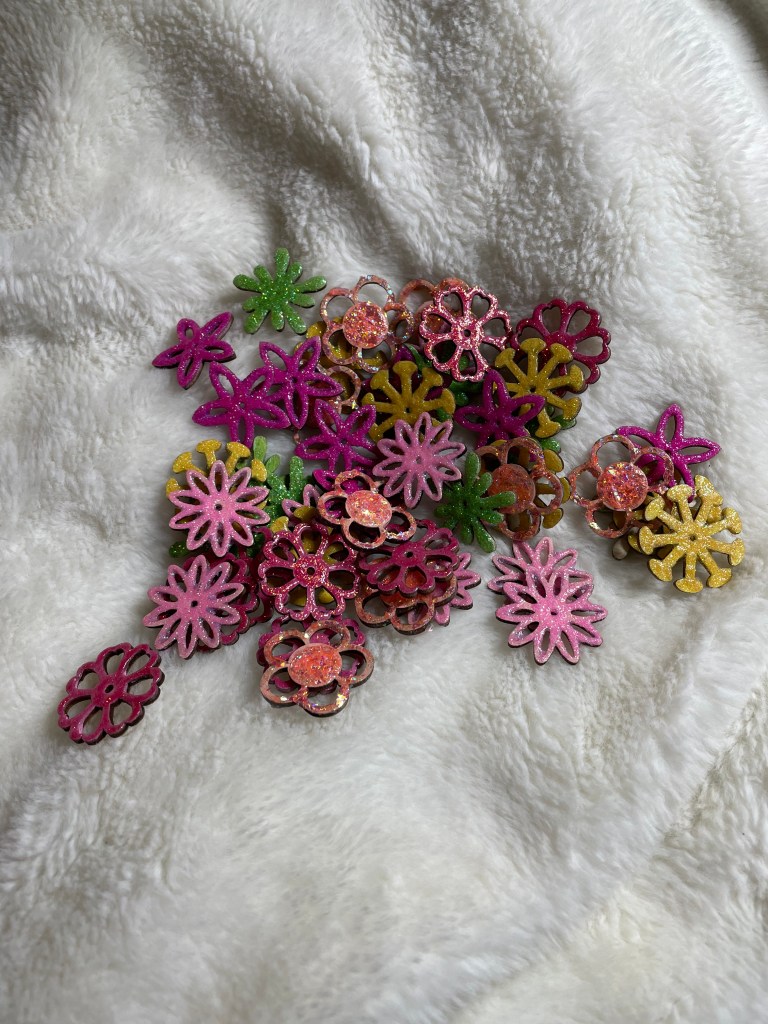
I decided to continue making what I call pre-decoration signs before the actual decorations are put up. So, I’m working on the spring sign but there is some pieces that are made separately. The first part are the flowers that will adorn the sign. I found these flowers on Amazon and the they came in a package of 100. I will be using 6 separate wood flower designs each in their own individual color. At least for this project.
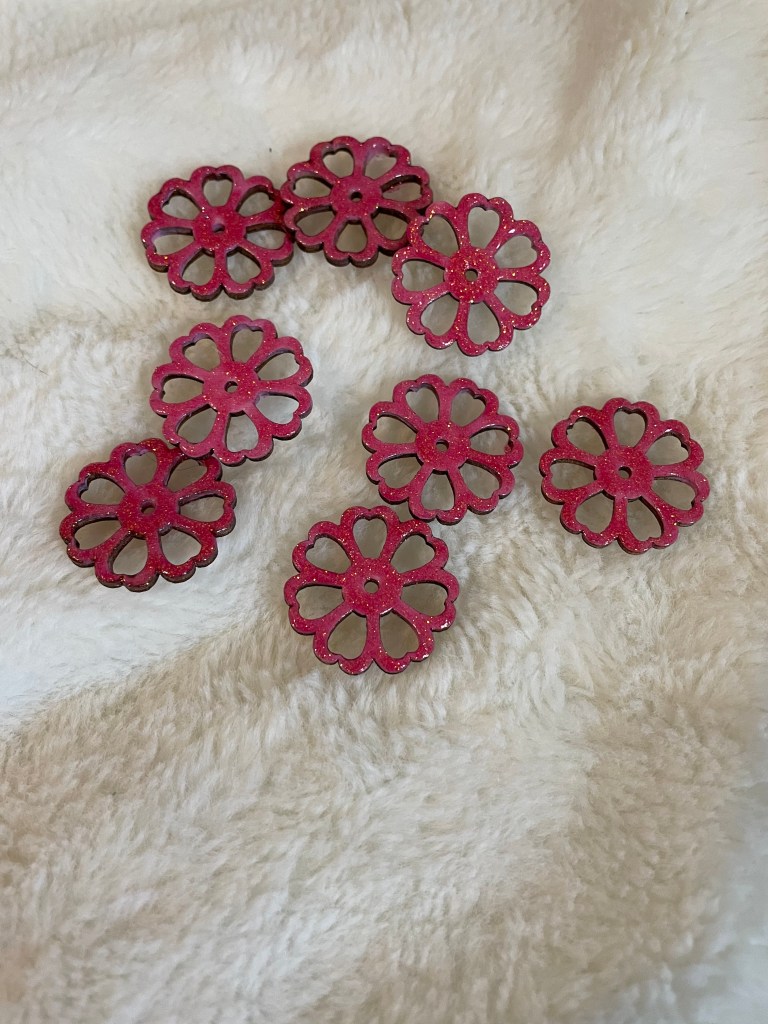
Flower number one was created using Apple Barrel matte acrylic paint in pink polish as a base coat. I then topped the base coat with 2 coats of FolkArt multi-surface glitter acrylic paint. I love how the flower has turned out. I have high hopes for the remainder flowers.
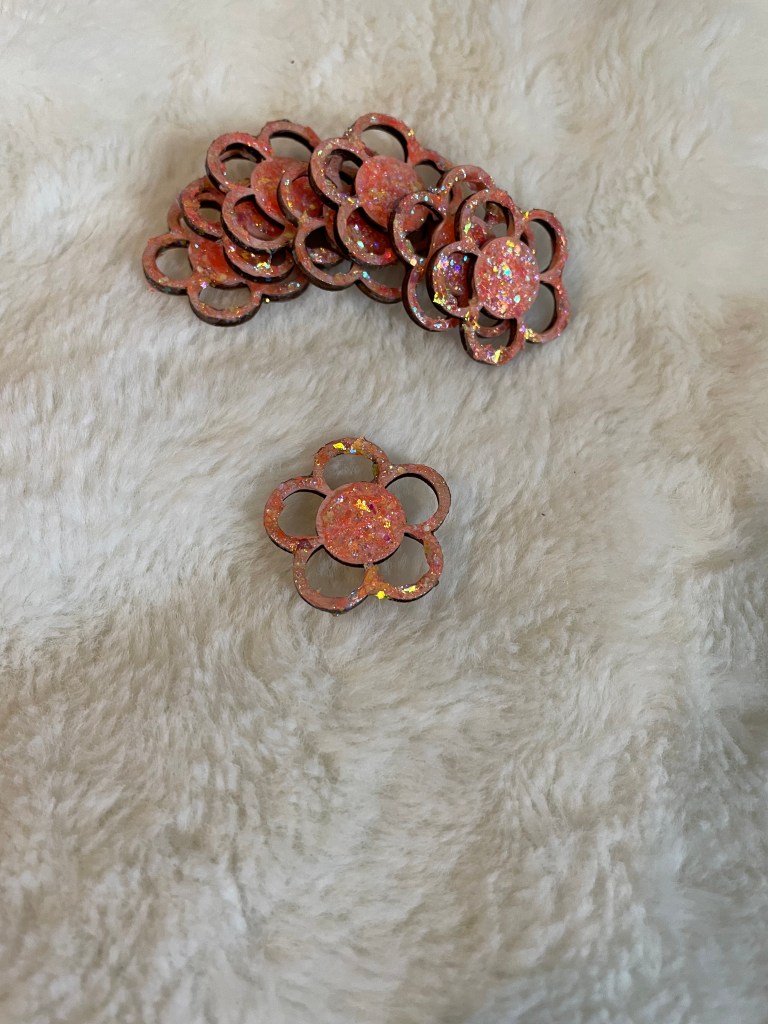
Flower number two was created using delta Ceramcoat matte acrylic paint in the color Calypso Coral. I topped the base coat with 1 coat of FolkArt Glitterific acrylic paint in the color Neon Tangerine. This paint is thick so it really only took one coat with a few touch ups here and there.
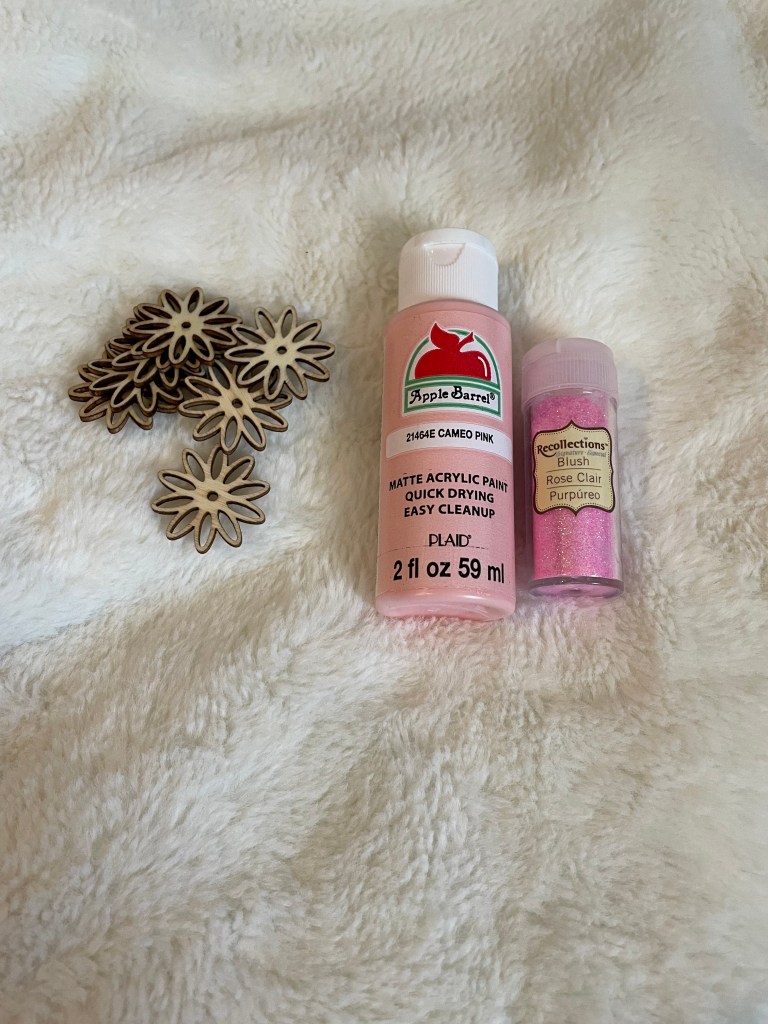
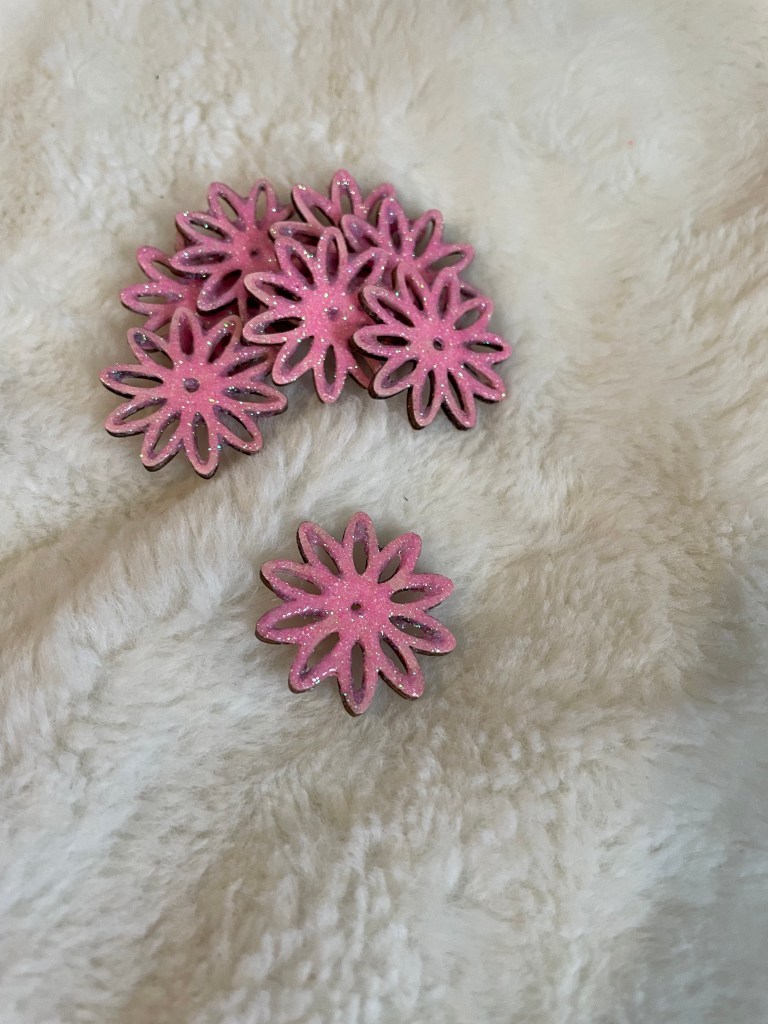
Flower number three was created using Apple Barrel matte acrylic paint in the color Cameo Pink as the base coat and topping it with Recollections fine glitter in the color blush. I love how subtle the color turned out.
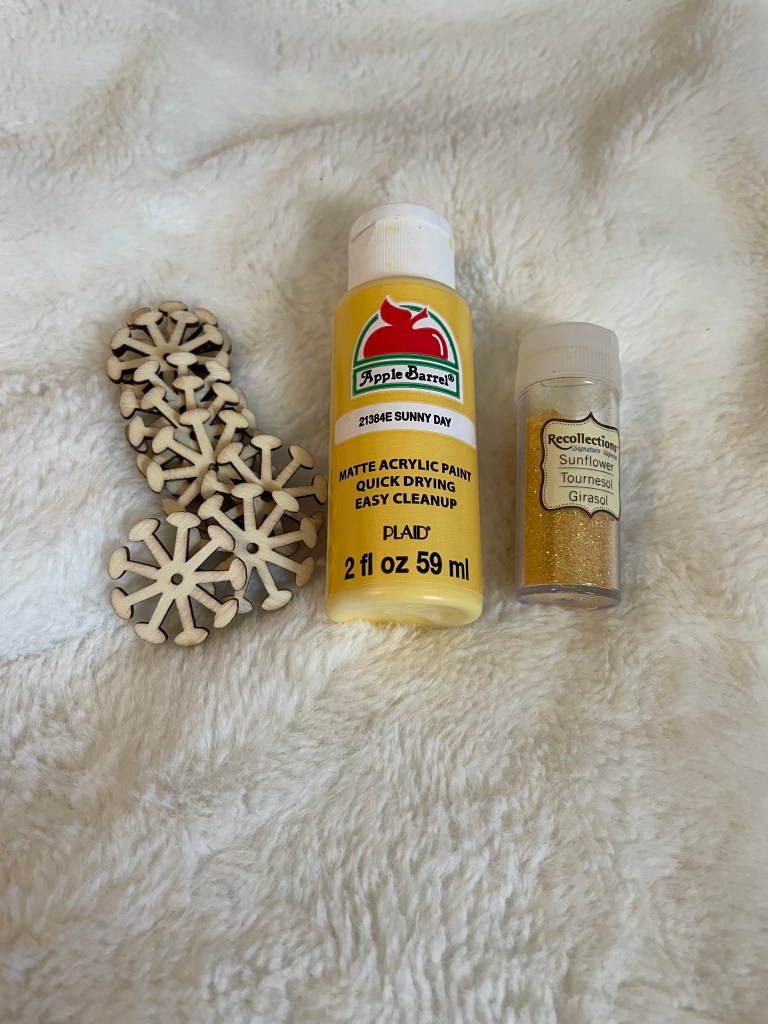
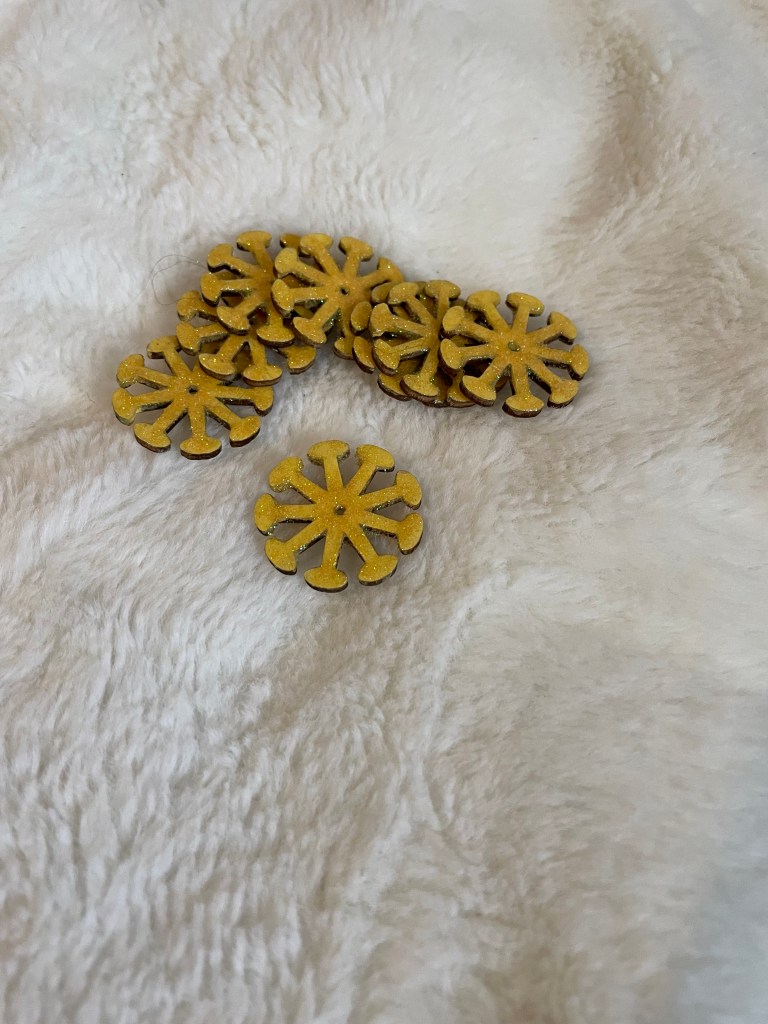
Flower number four was created using Apple Barrel matte acrylic paint in the color Sunny Day as the base coat and topping it with Recollections fine glitter in the color Sunflower.
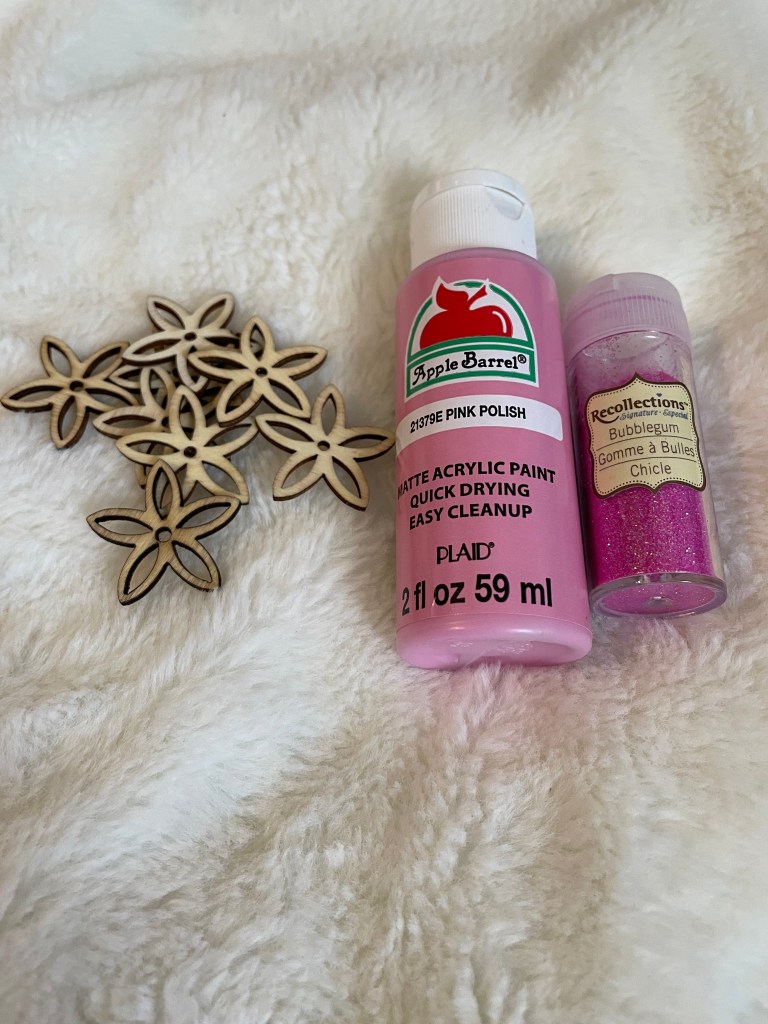
Flower number five was created using Apple Barrel matte acrylic paint in the color Pink Polish as the base coat and topping it with Recollections fine glitter in the color Bubblegum.
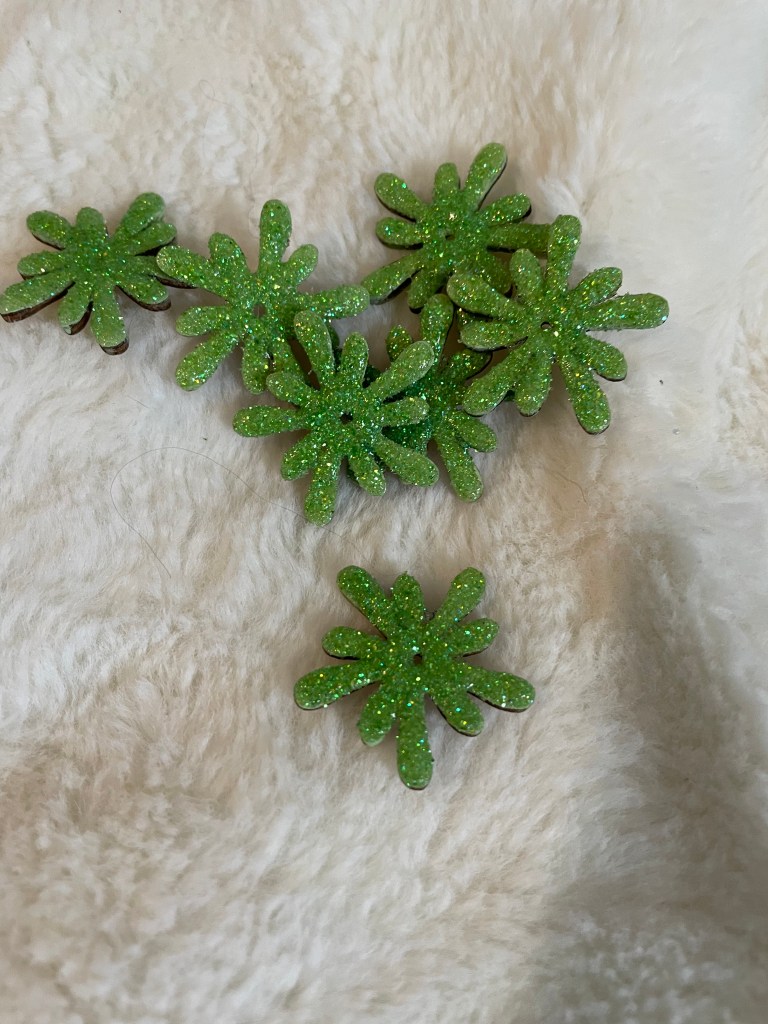
Last, but not least, is flower number six. This flower splash was created using FolkArt matte acrylic paint in the color Soft Apple as the base coat. I topped it with Recollections fine glitter in the color Mint. For some reason, this particular flower looks more like a paint splash than a flower which made me think it would be more appropriate as greenery than what would normally be considered a flower color.
In the end, all of the flowers were finished with a thick coat of Mod Podge to keep the glitter in place and to make them shine!
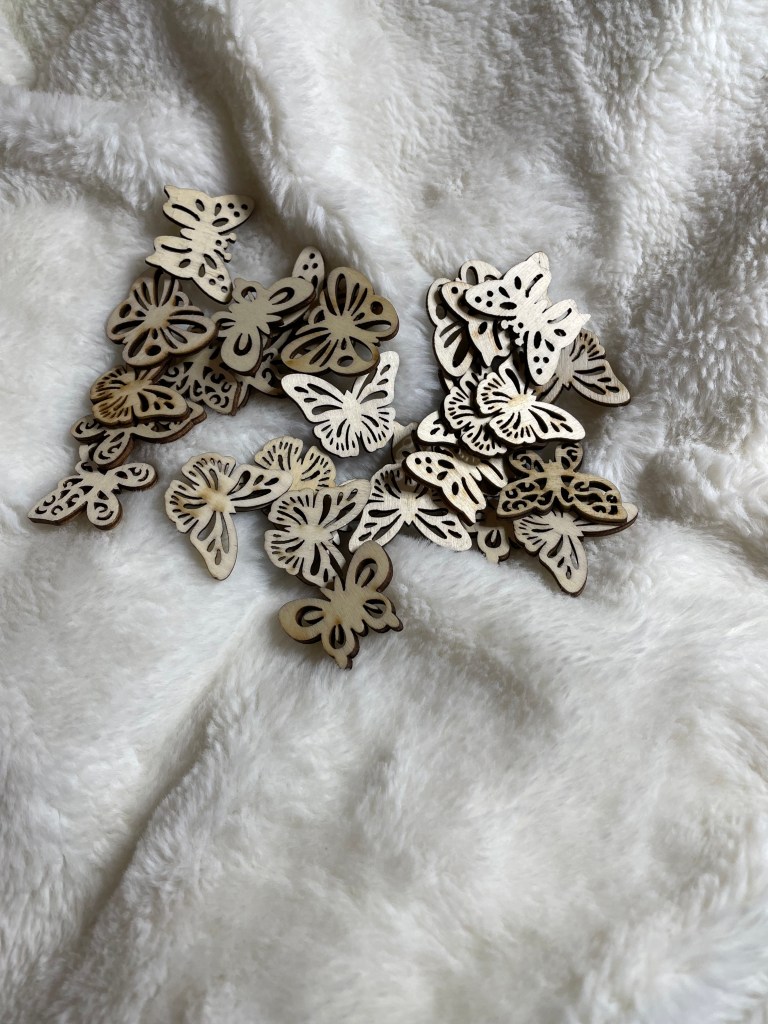
Now it is on to the next wooden project… Butterflies!!!!
I love shopping for decorations and things to use for craft projects. And the spring items are no exception.
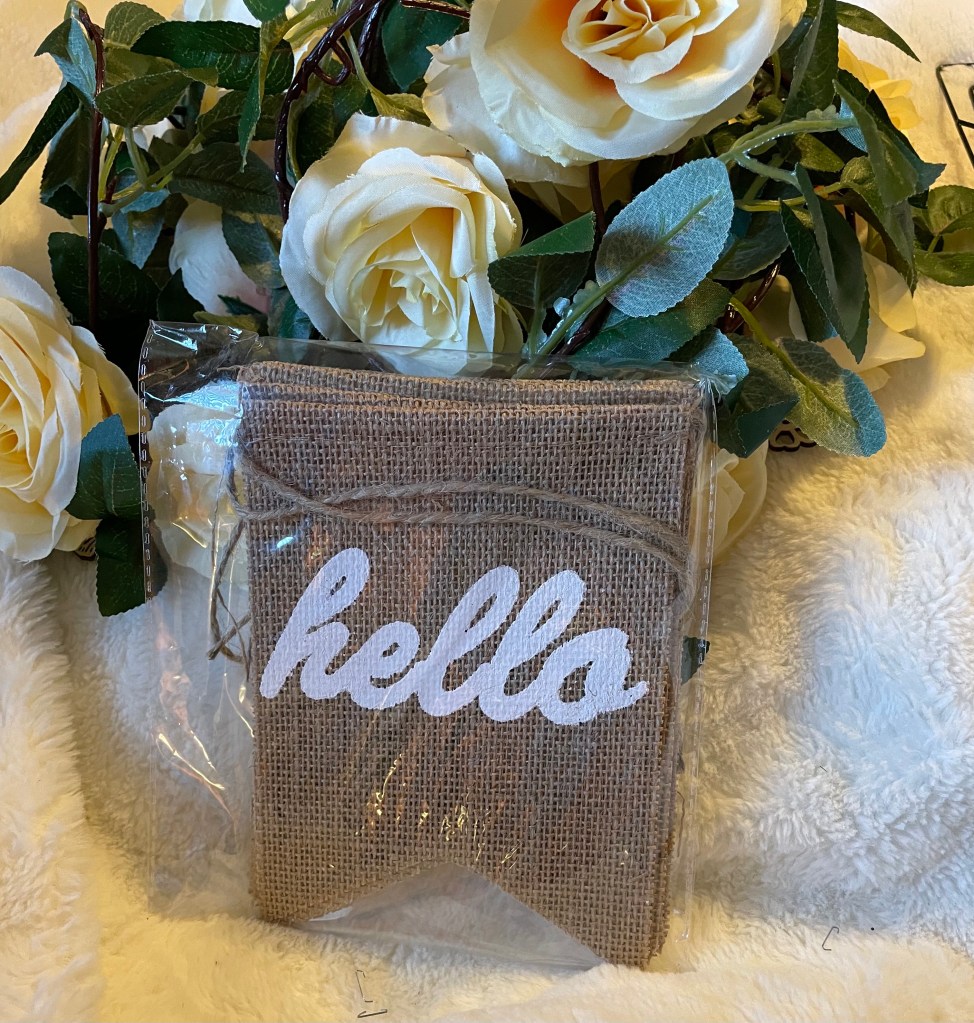
Beginning with Amazon. I actually did not purchase as much as I usually do. I purchased several yellow rose garlands. Obviously more that I would usually purchased, but we will be using most of the garlands to decorate her very large window area. The wood flowers and butterflies will be used on several different projects. Of course I purchased a banner for the door as well.
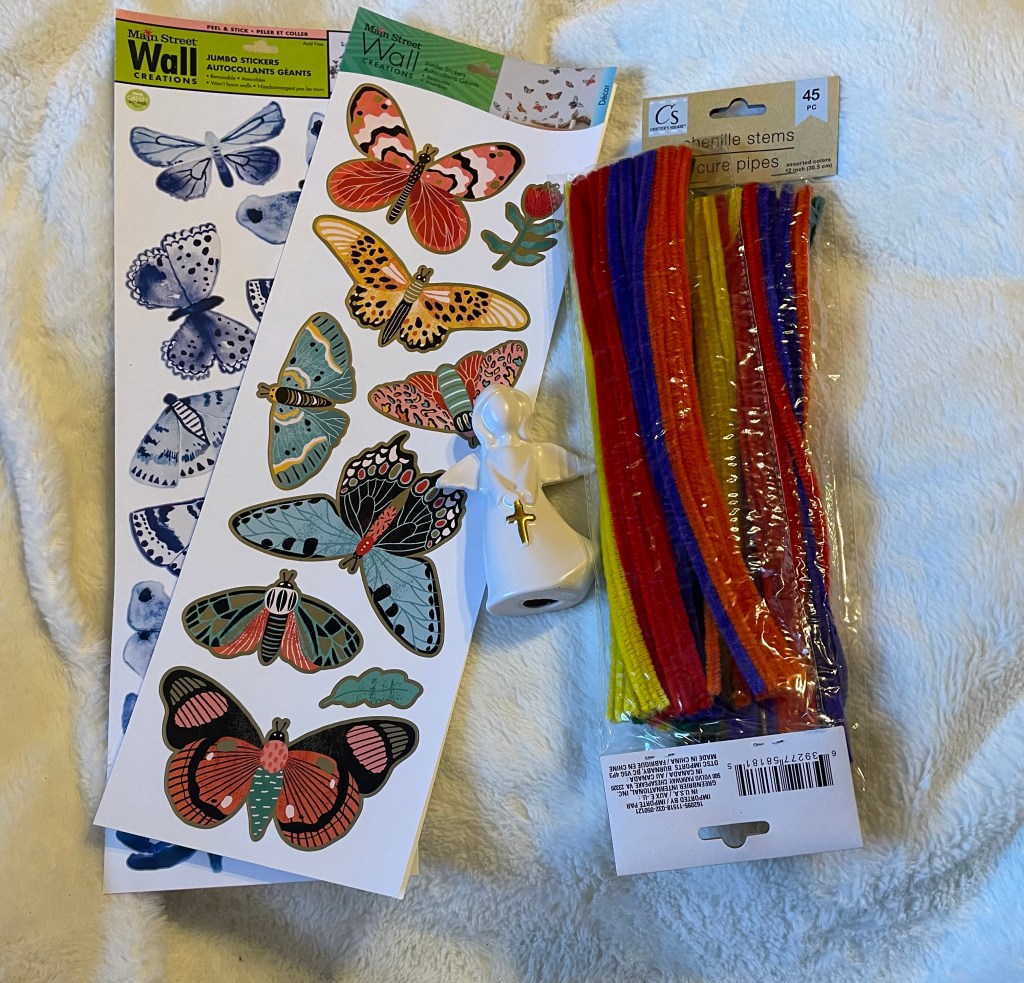
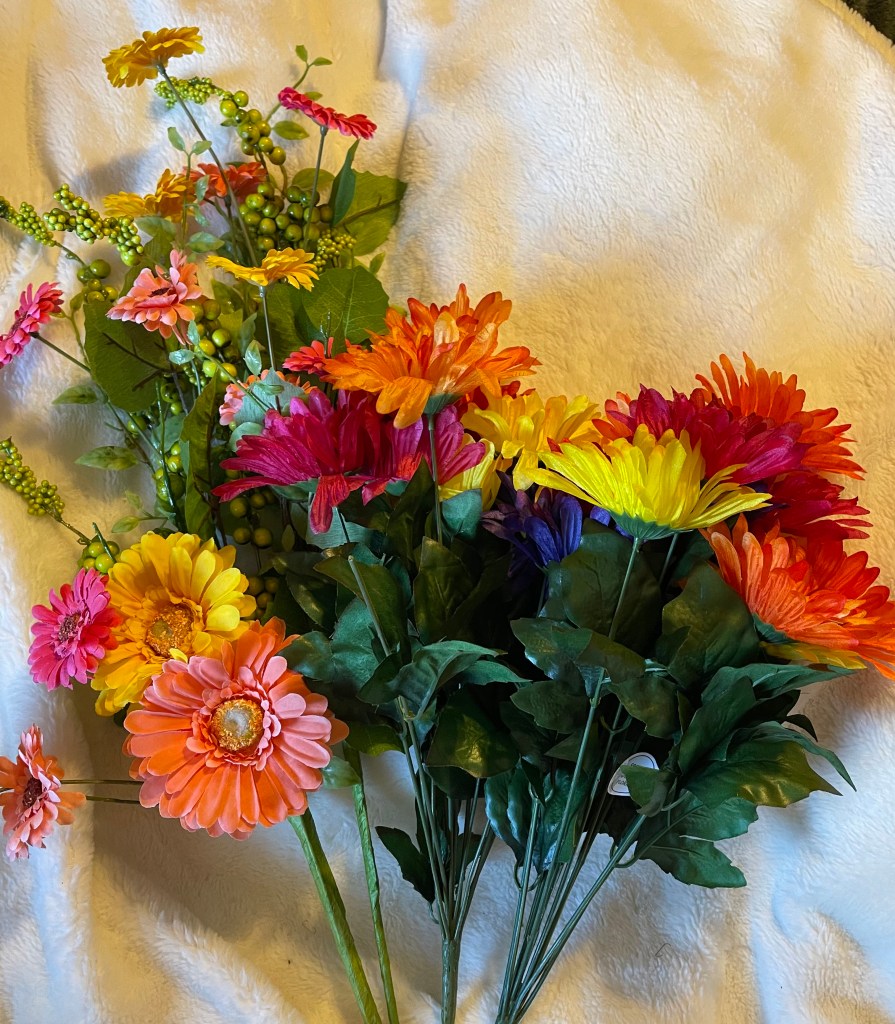
Dollar Tree purchases was definitely on the small side for the spring season purchases.. From the Dollar General section in Dollar Tree, I purchased some floral garland that will adorn her walker as well as the tree. I also purchased some individual floral stems to use on the tree as well. I purchased some removable wall stickers that I want to try to use on the wall around the front door.
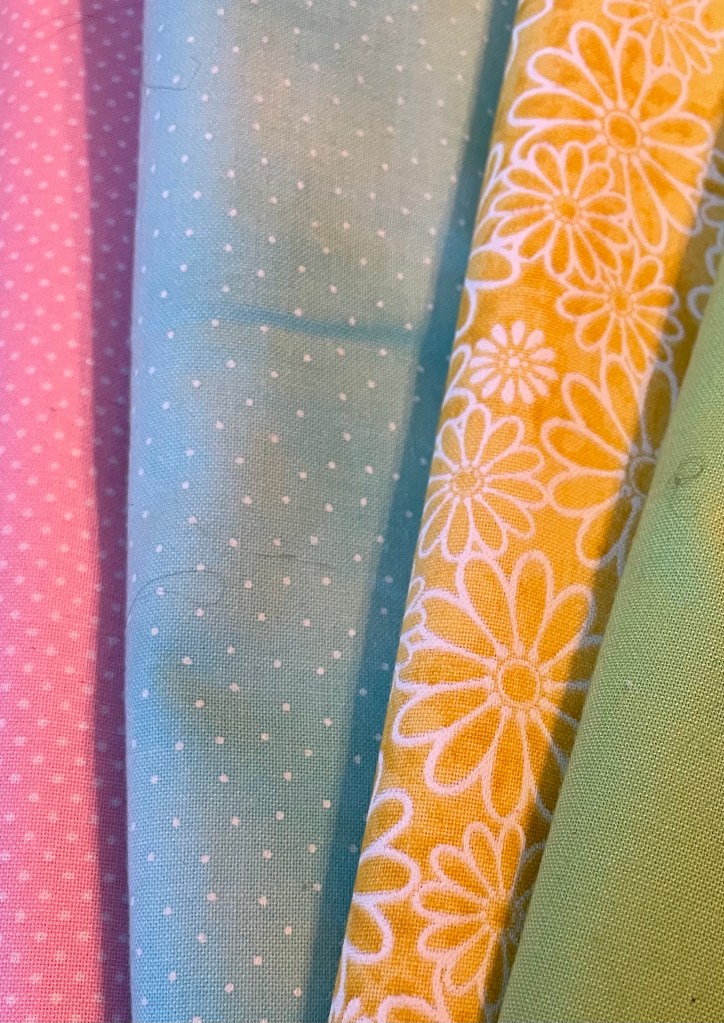
I purchased most of the spring items from Hobby Lobby this time. What can I say, when they have 50% off in their floral department, I do tend to go a little crazy, but not as crazy as I would have wanted to. I purchased wood letters and one word, for two separate projects. Other items included a lot of fabric for wreaths, scrapbook paper that may or may not be used on some letters, a wood frame which I have already started working on, wire ribbon, and pom poms.
I realize this appears that I only purchased one item from Michaels, but that is not the case.
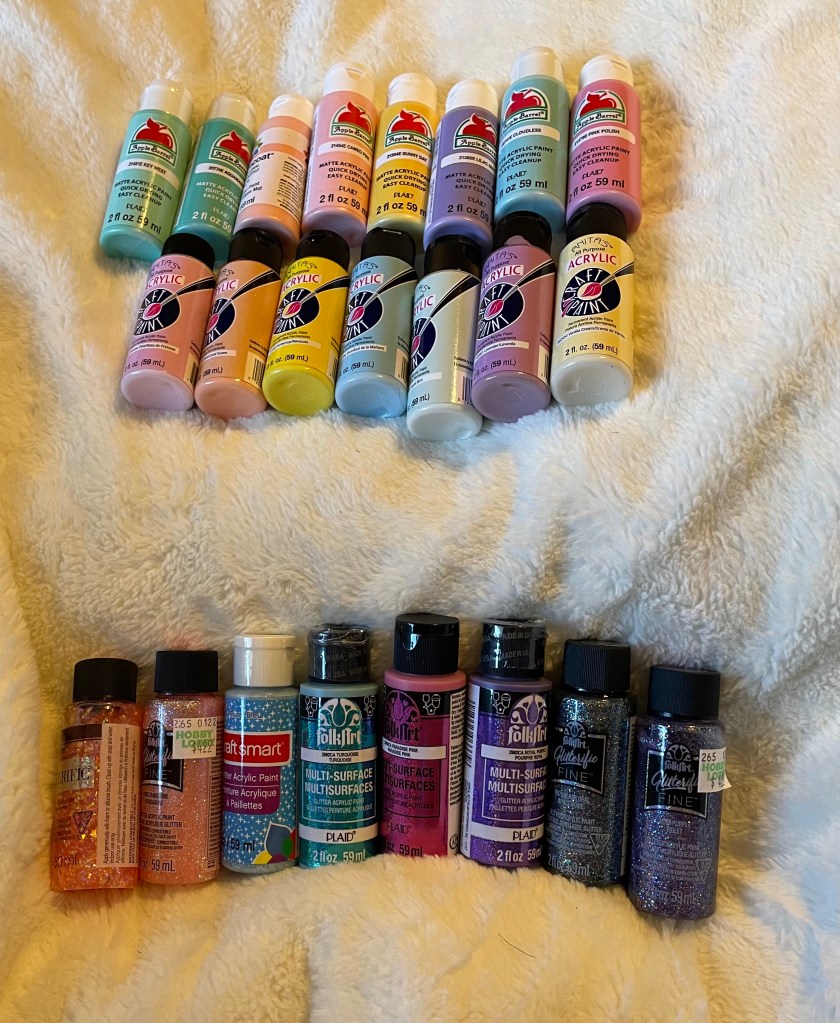
I purchased a lot of acrylic paints for the spring projects. Some came from Hobby Lobby, some from Michaels, and some from Walmart.
I also purchased a lot of items for Easter while purchasing the spring items, but those will be in a different blog.
Thanks for reading my blog. I hope you have enjoyed it. Please return to see the craft project I make with these items and how I use them when decorating mom’s door, walker, and room.
My mother is loving that her door gets decorated regularly for the different holidays. I will also be expanding to season decorating inside her apartment which she is thrilled about!!!! But now it is time to prepare for St. Patrick’s Day which means I will need to do some shopping!
First stop, Dollar Tree! Of course, I will need to go to Joann’s, Hobby Lobby, and Michaels. So let’s see what I purchased and how I plan on using them.
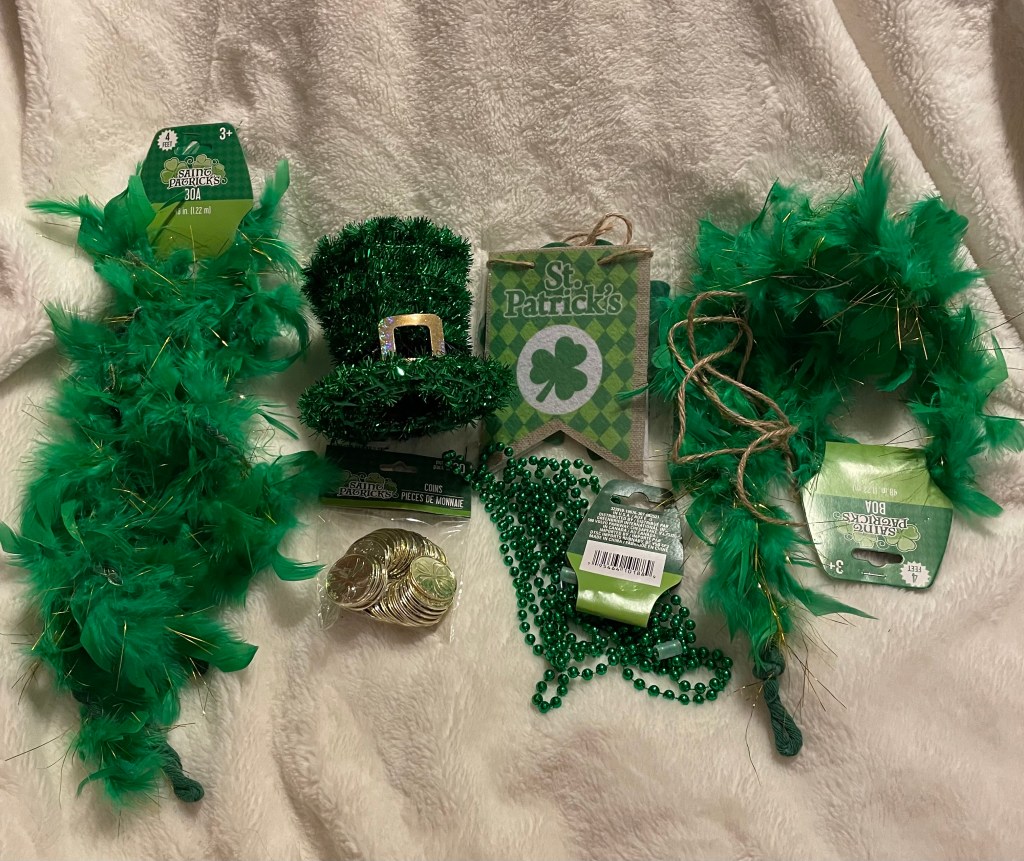
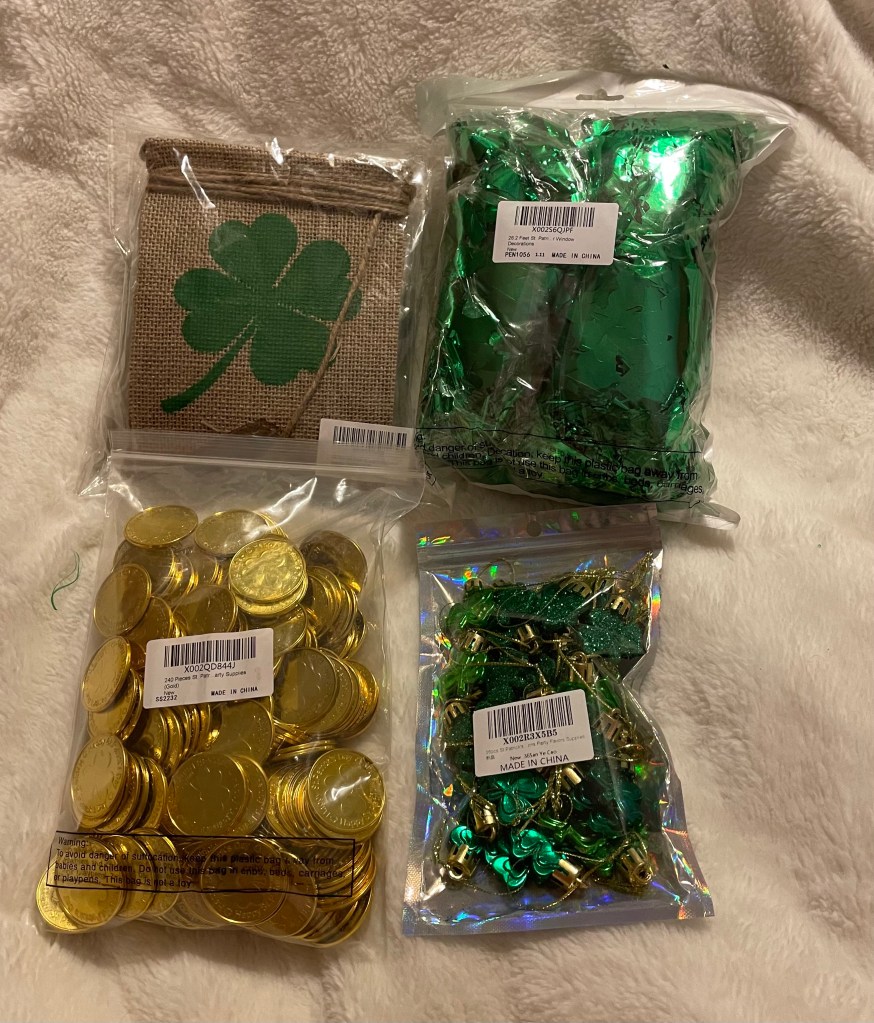
Dollar Tree always has a variety of items to use for decorating any holiday. This time, I purchased 2 feather boas, some green beads, gold coins, a small hat, and a banner. The boas will be used on the frog outside her door, the hat will be one top of the tree, and the beads will be used as garland on the tree. The banner will be modified to use on the front of her walker.
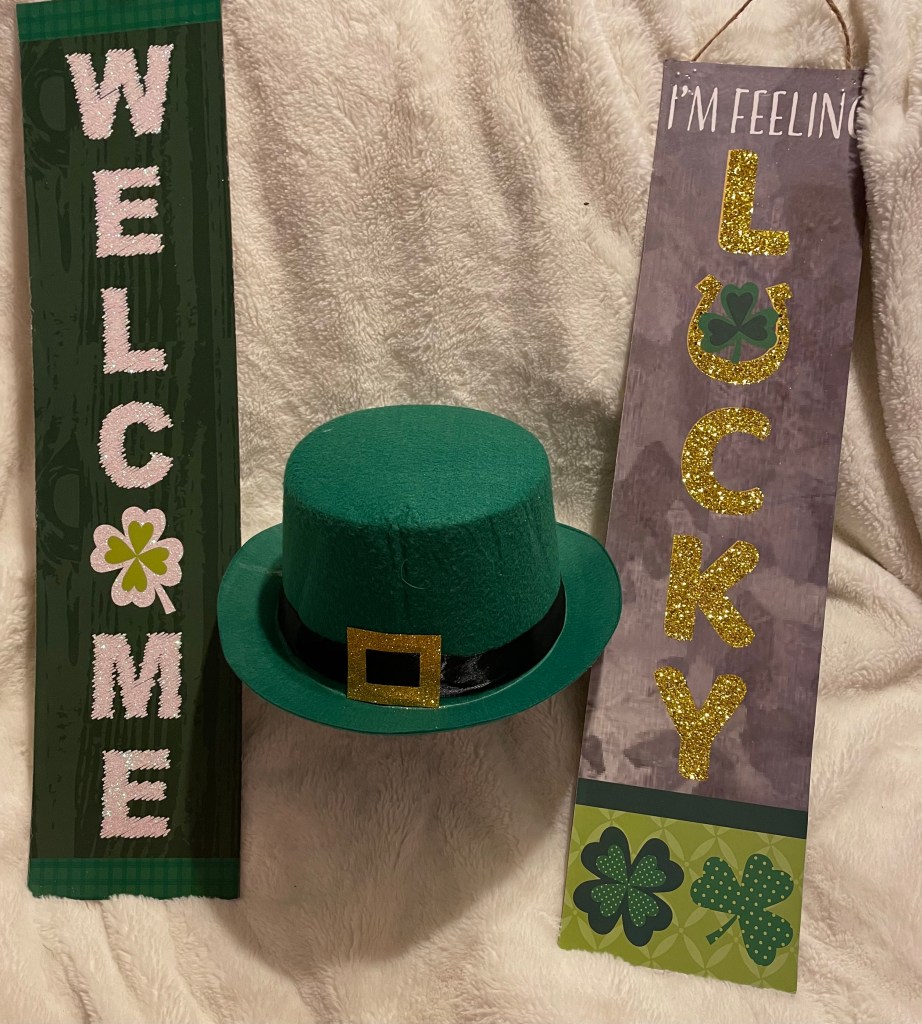
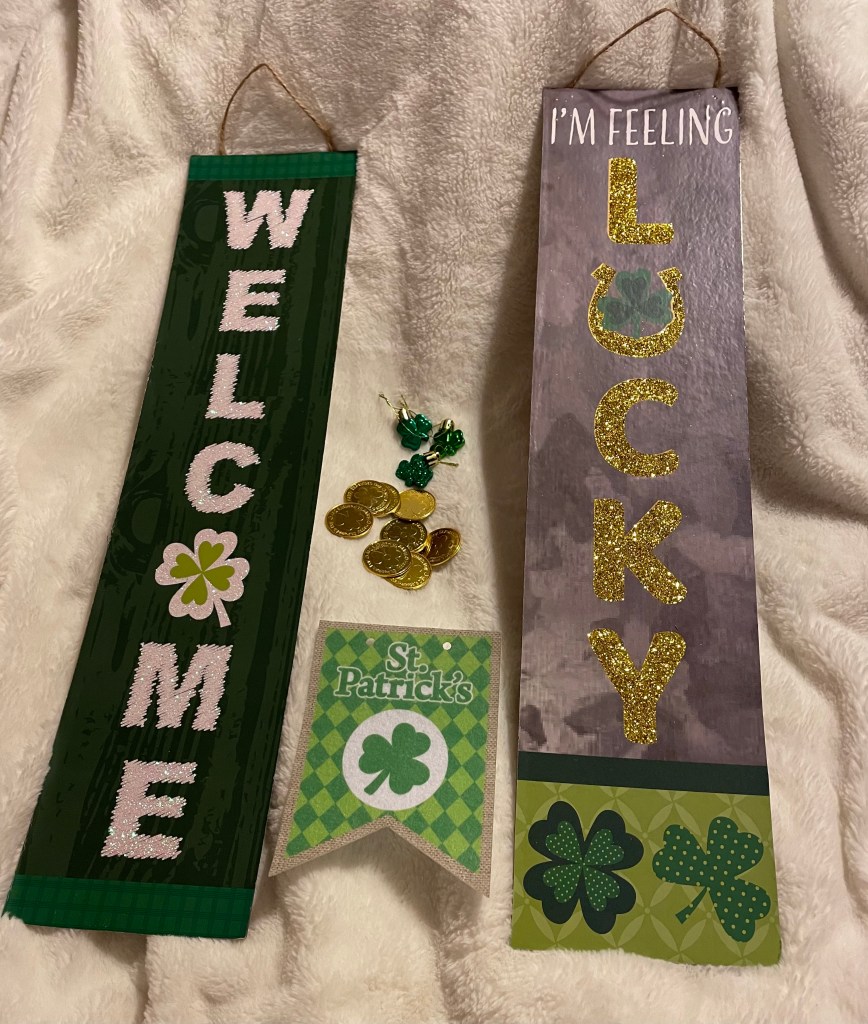
The signs will be placed around her door area and the hat will be placed on the frog.
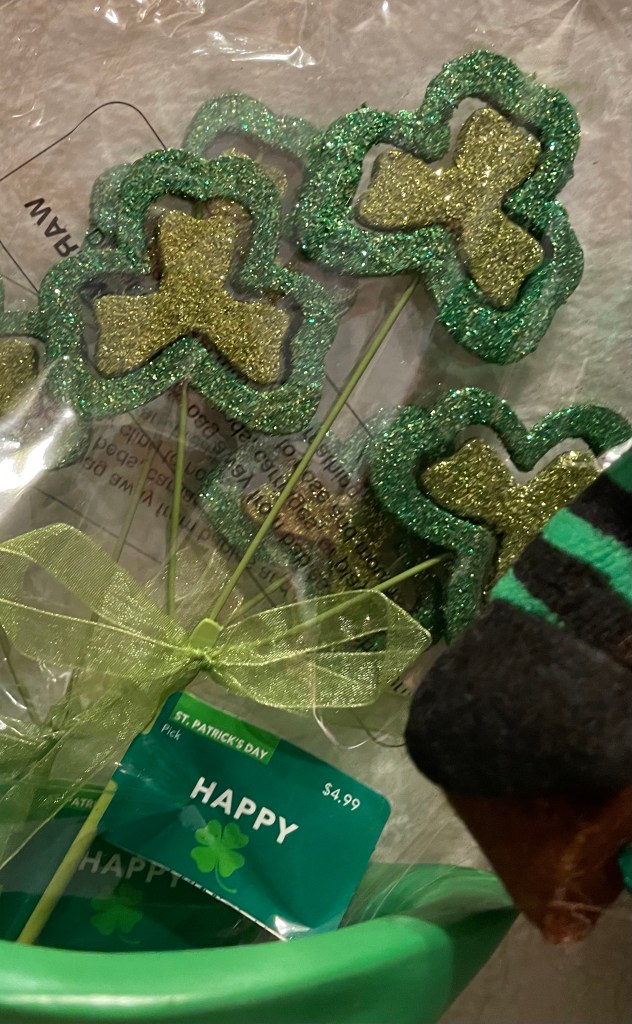
From Joann’s I purchased a stuffed Gnome, and green boot, some clover picks, and some green and gold beads. The Gnome will be on the table area outside her door as will the boot. The beads will be placed on the frog. I have not decided exactly what I will be doing with the picks. I might make a flower arrangement to use them in. But, then again, I might use them on the tree.
From Michaels I purchased this sign that I thought I would use on the wreath I’m currently making. I have not made a final decision on that. If it is not used on the wreath, it will be on the table by her door.
Amazon always has what I need to really make her door stand out! This time, I purchased a St. Patrick’s Day themed banner, some clover shaped garland, gold coins, and clover shaped ornaments. The banner and garland will go around her front door, the clover ornaments will be placed on the tree, and some of the gold ornaments will be used for a craft project or two and the remaining will be put around the frog and in the green boot.
I will need to do a few modifications to some of the items I purchased and make some decorations with some as well. But those will be shown and discussed in a separate blog.
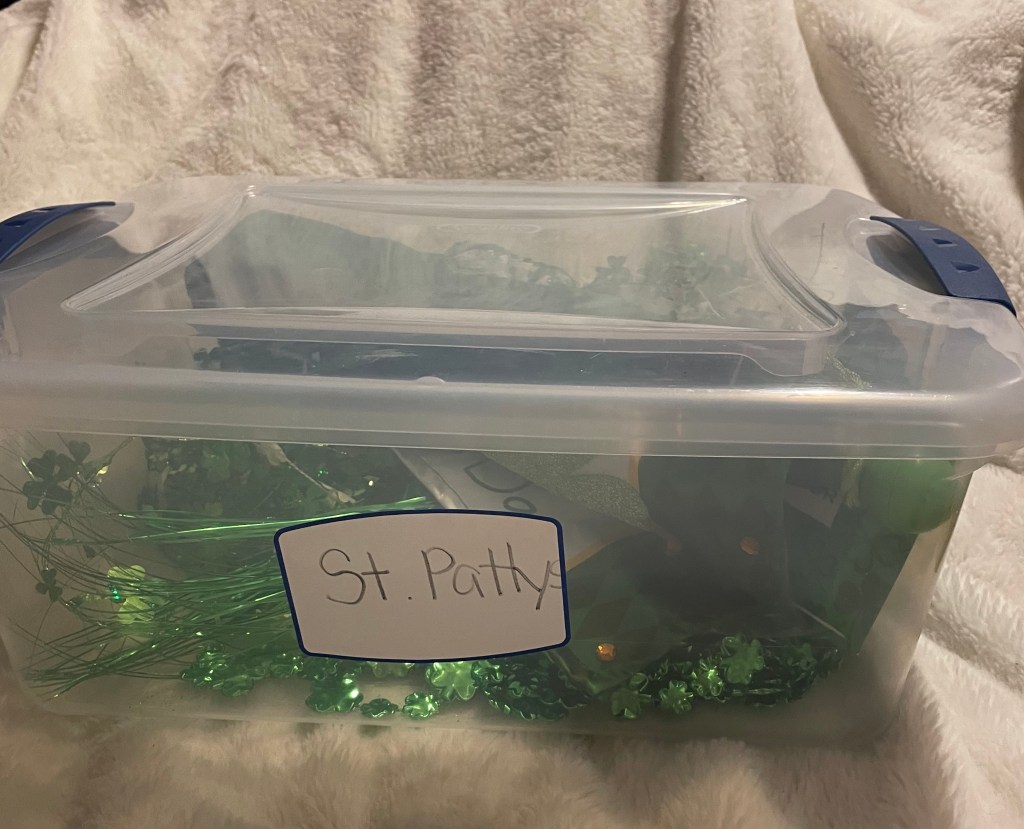
My mom had a small container in her closet that I brought home with me. I will be using these items inside her apartment.
Decorating will begin on Sunday so please stay come back on Monday to see how her door looks after we have finished decorating.
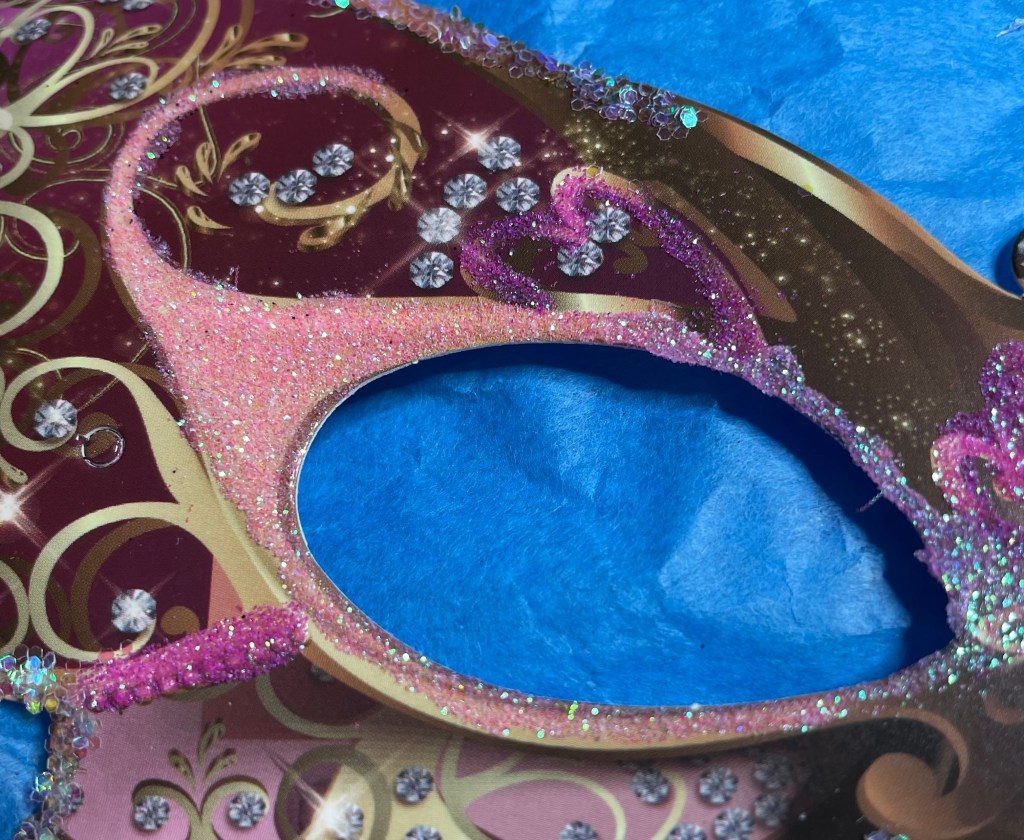
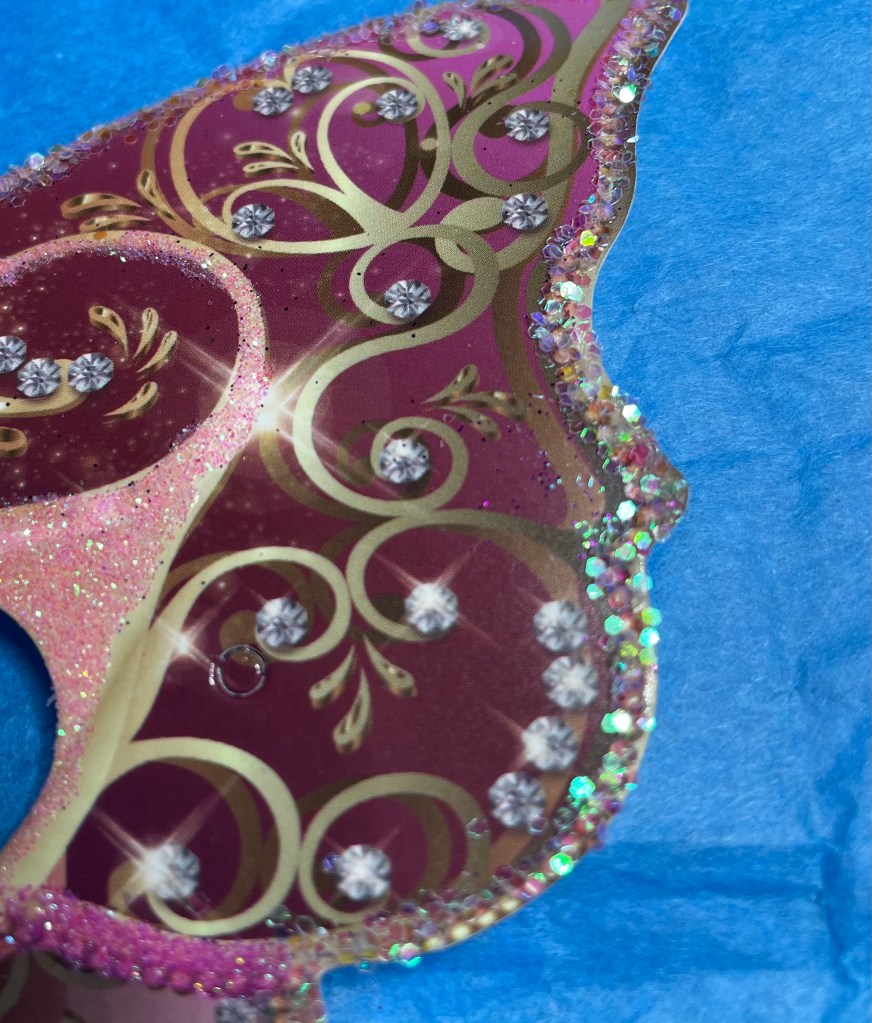
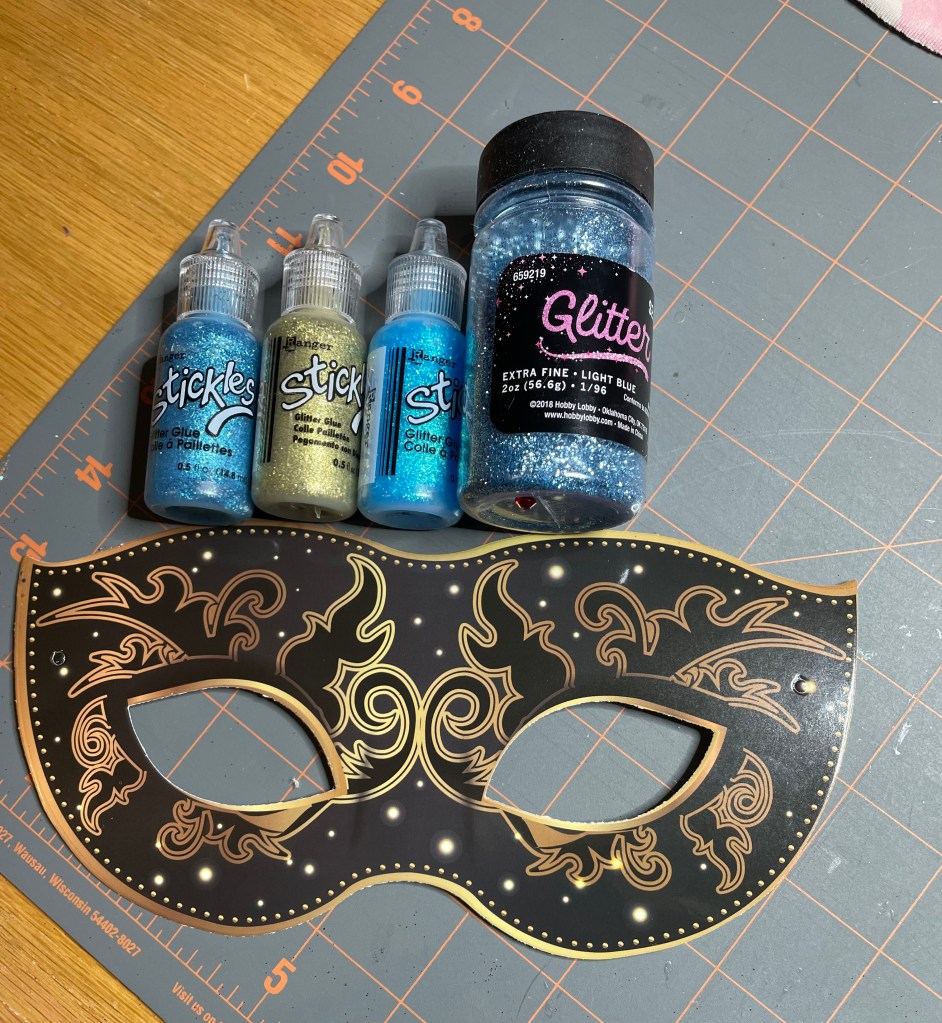
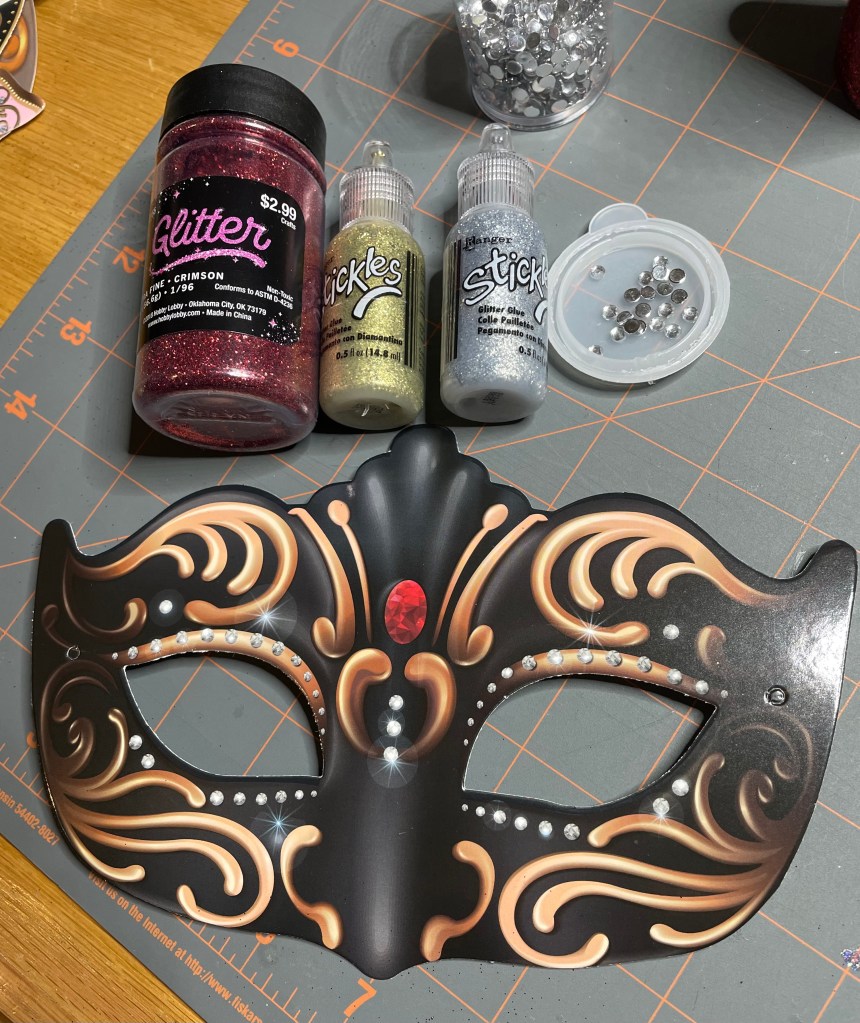
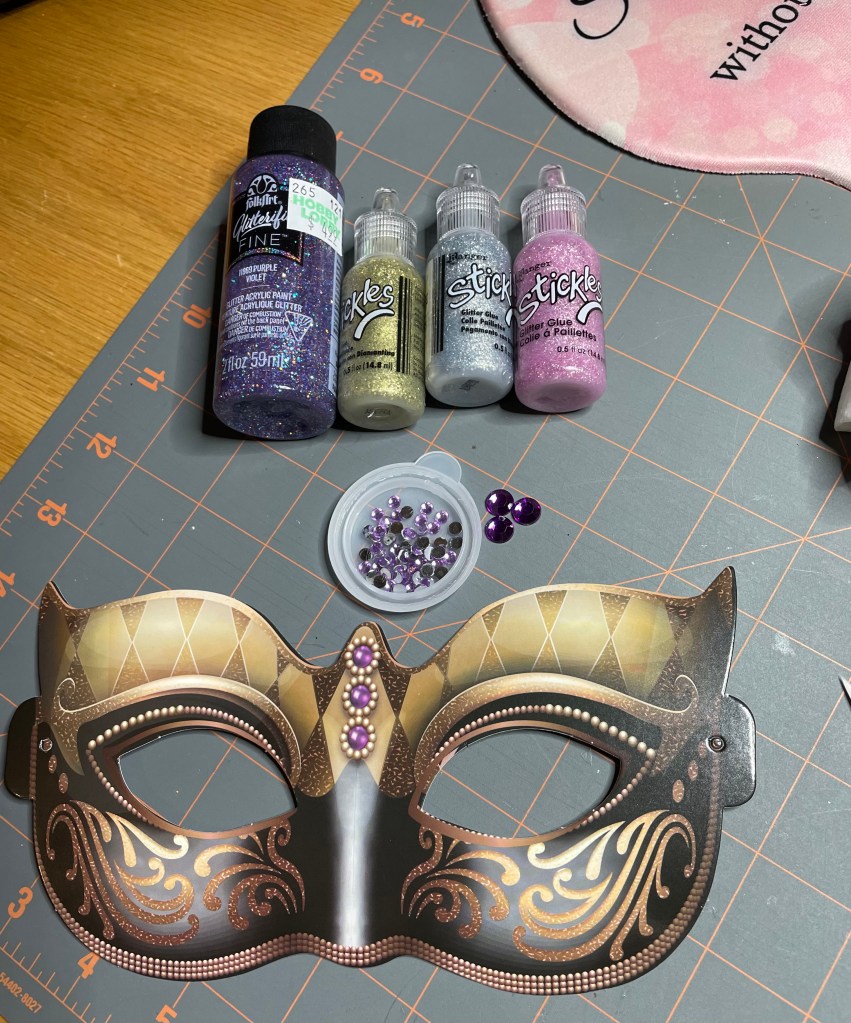
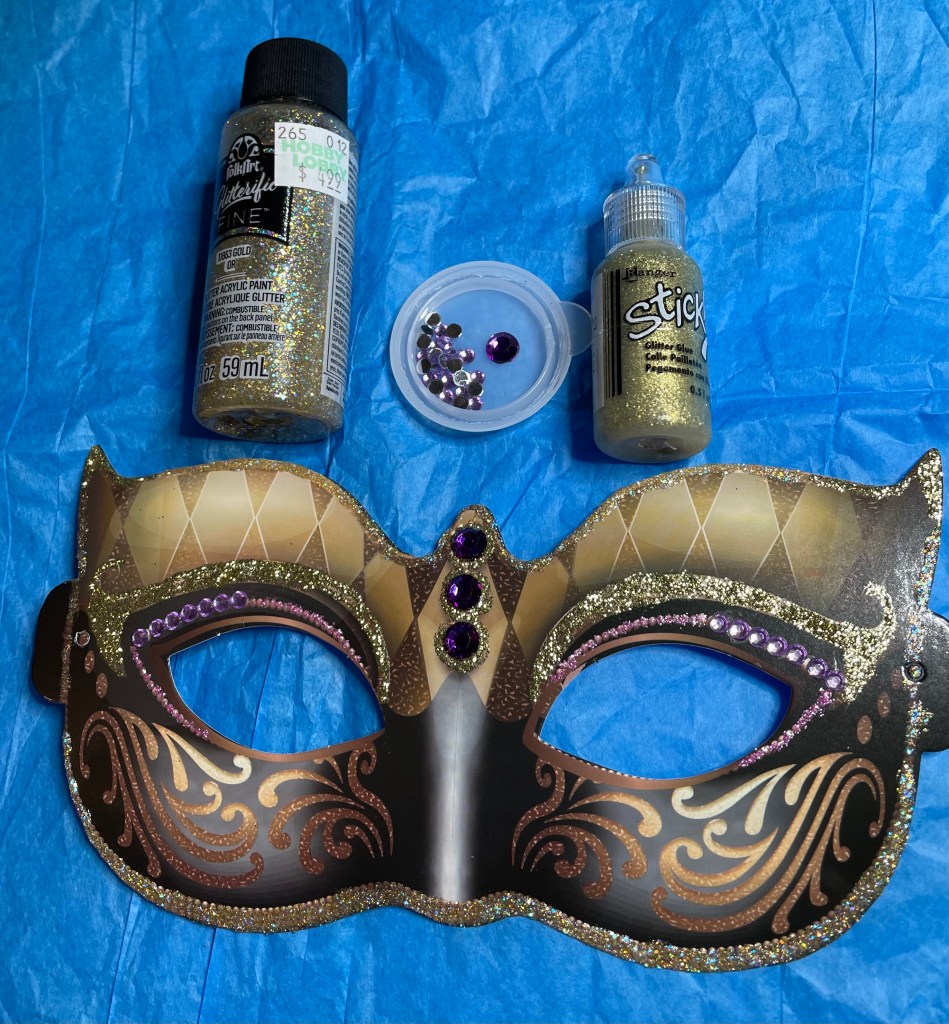
We are down to the final 4 masks!!!! To make this easy, I have decided that the will show what I originally had planned for the mask. Any changes will be noted on the first photo along with where each product is used. On with the masks!!!
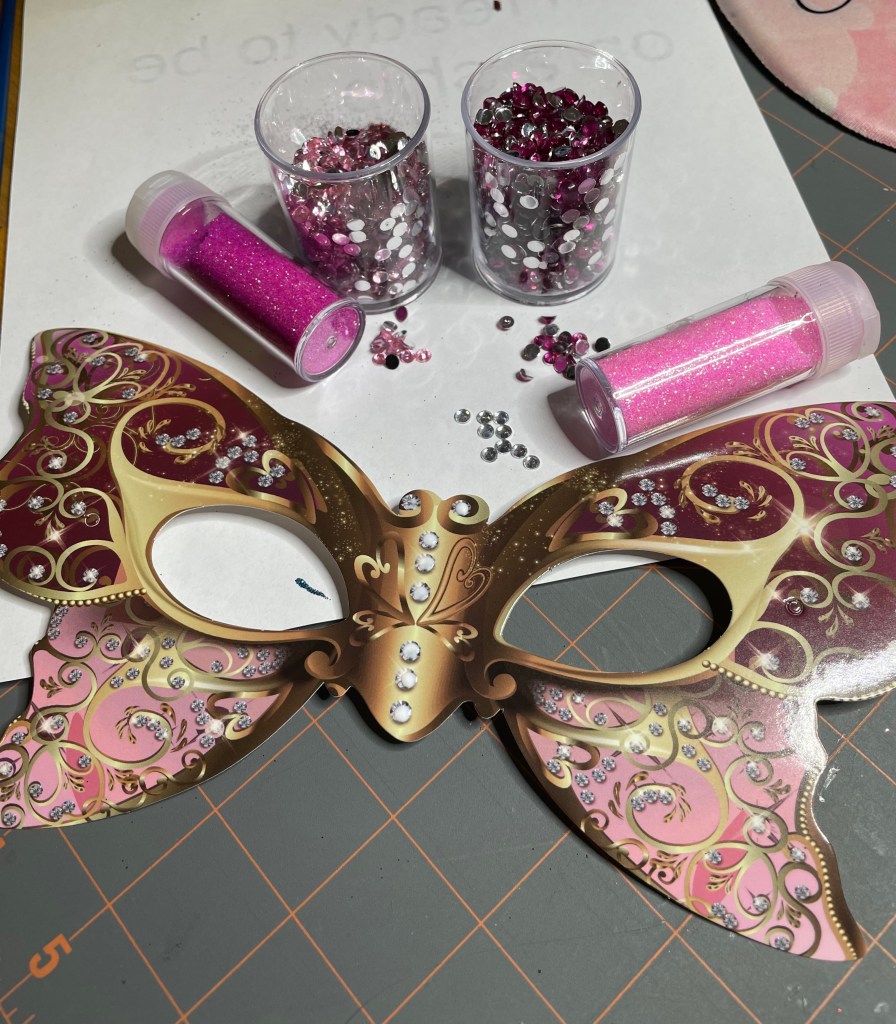
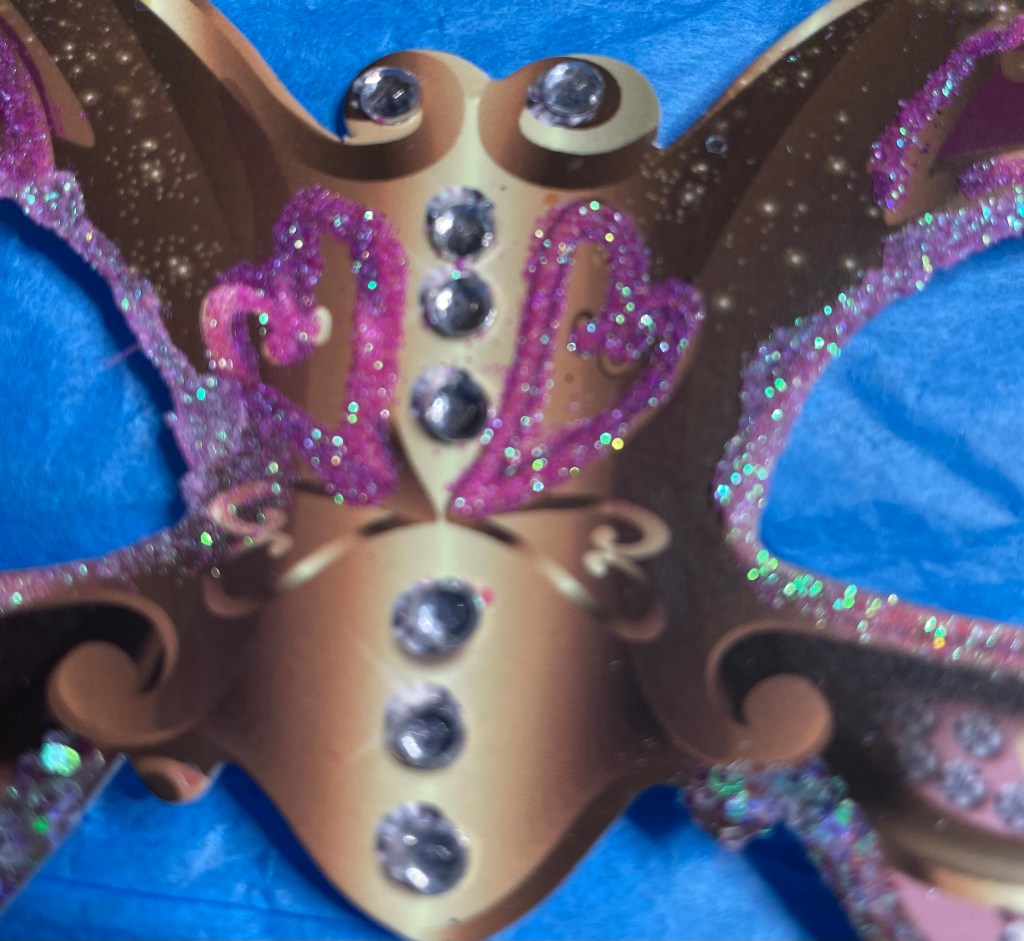
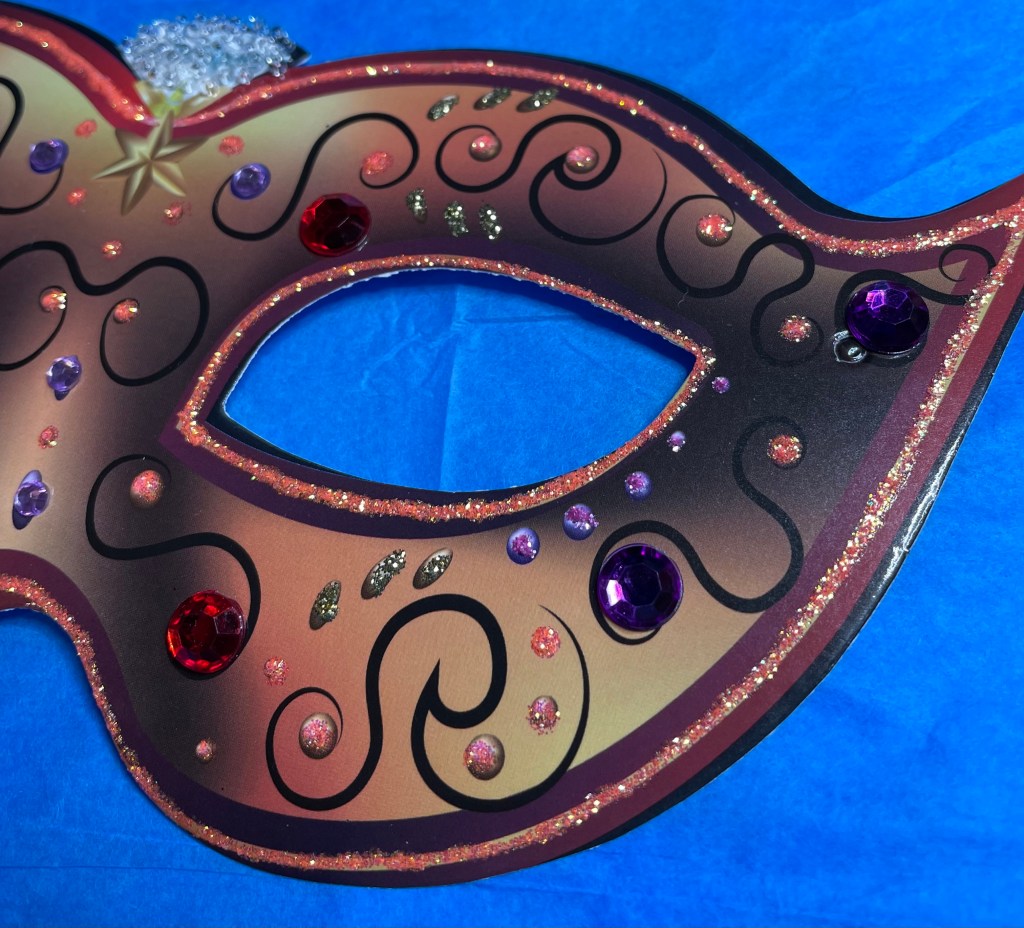
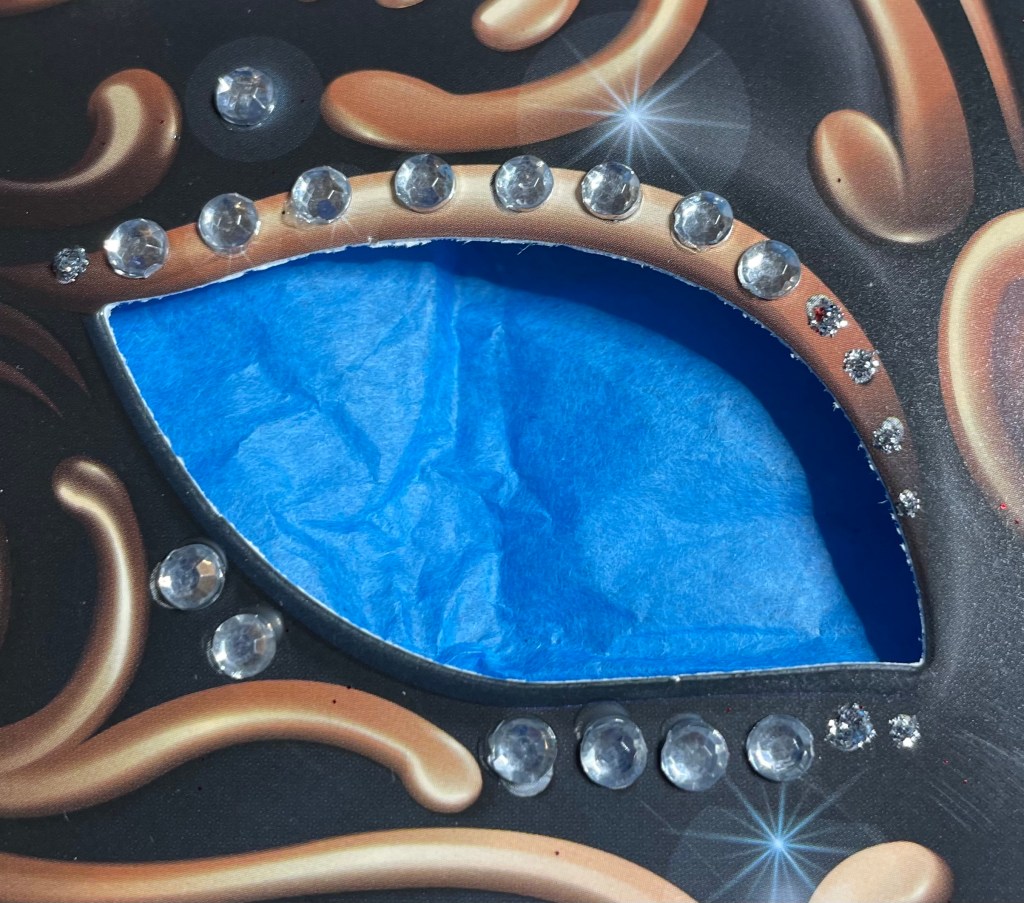
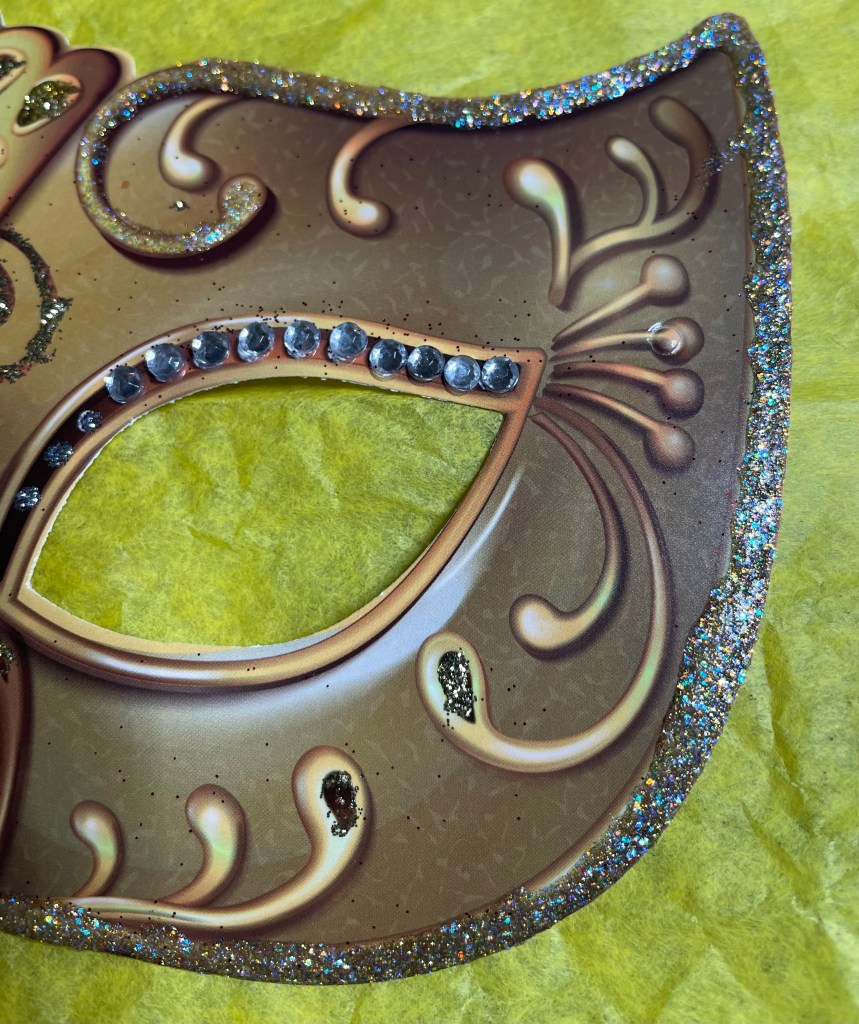
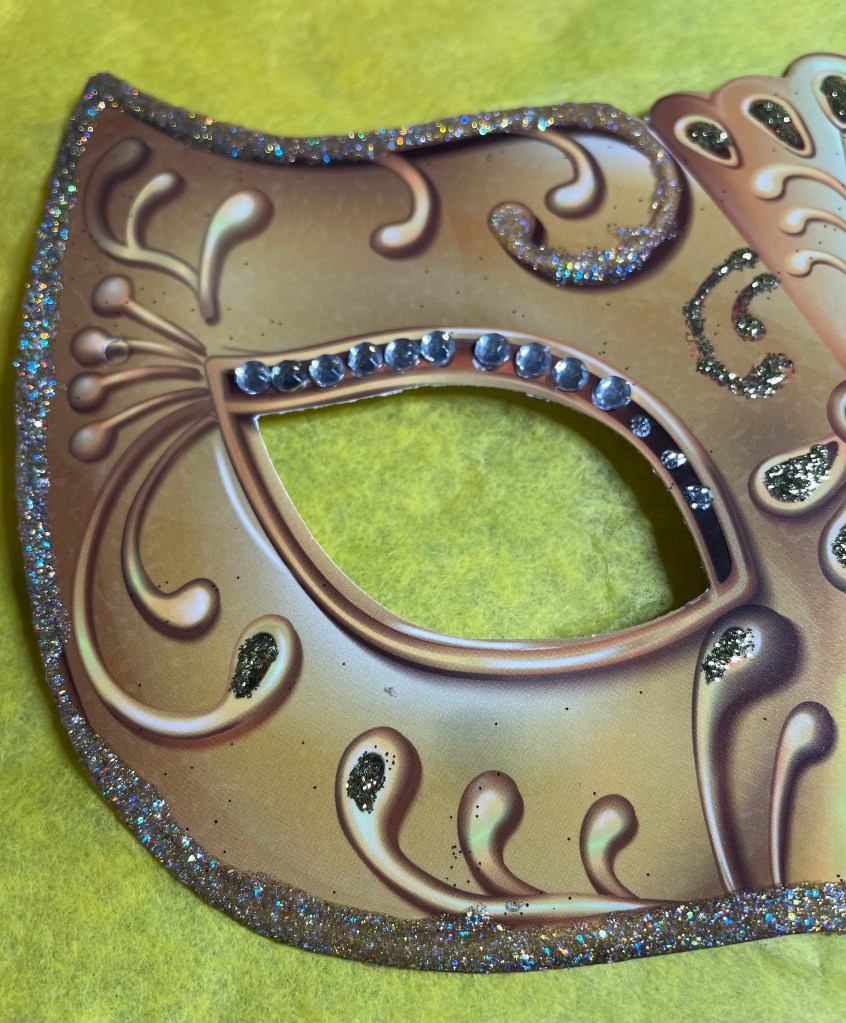
Mask #9 is the butterfly mask. It feels like there is so much going on with this mask that I decided to accent the eyes, of course and the hearts I saw on the mask. I used a soft pink glitter around most the outer edge to accent the wings. I did add some silver rhinestones to the center of the mask but that was the only area.
Mask #10 was an interesting challenge. I’m not sure why because it really did not need to be one but I took me some time to figure out exactly what I wanted to do with it. I ended up using rhinestones, Stickles in gold, mermaid tail, and tangerine. I also used some white Czech seed beads, size 10, to add some sparkle to the “diamond” in the top center.
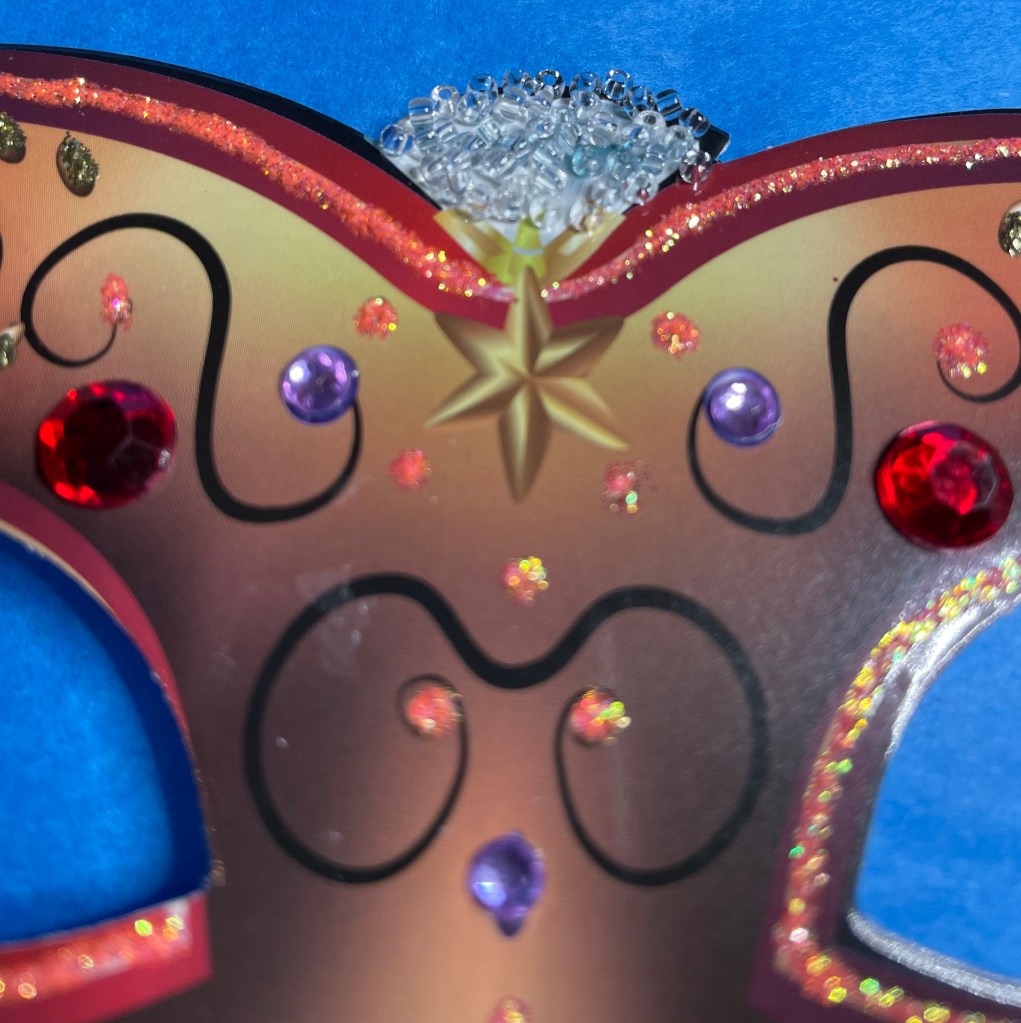
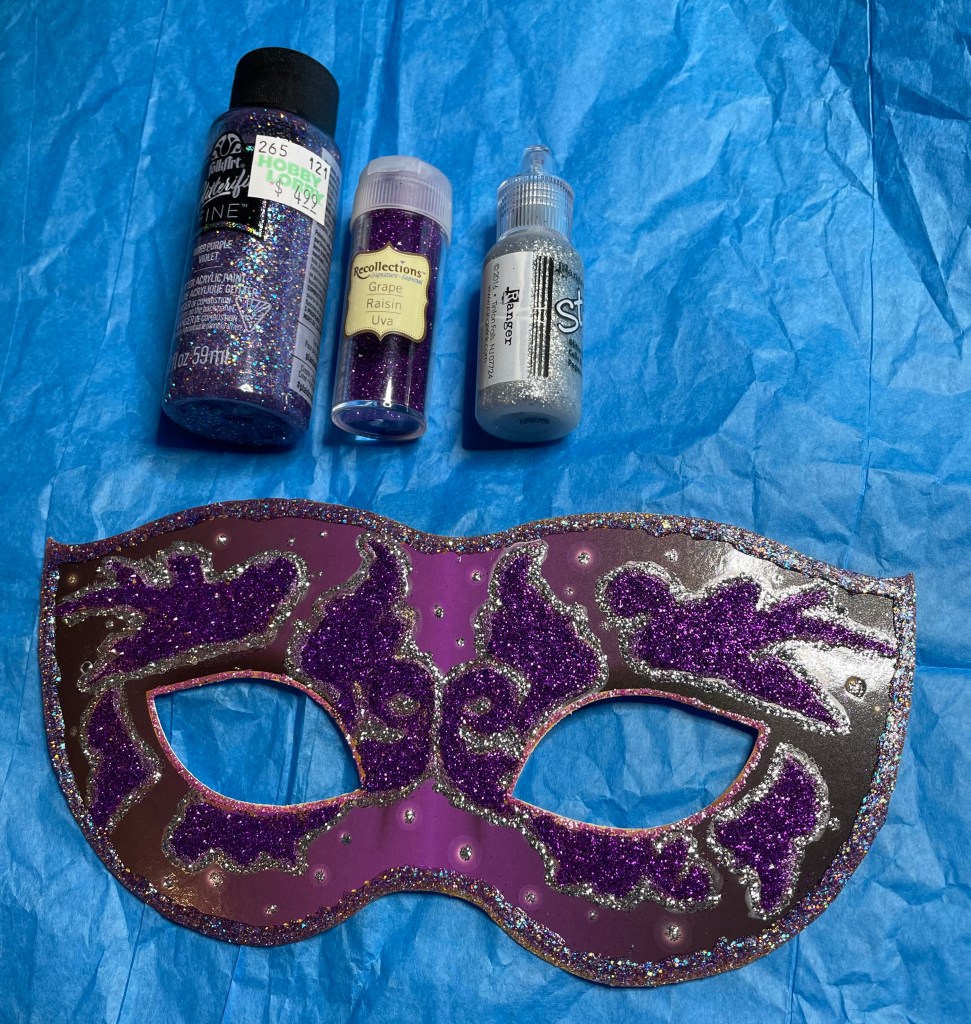
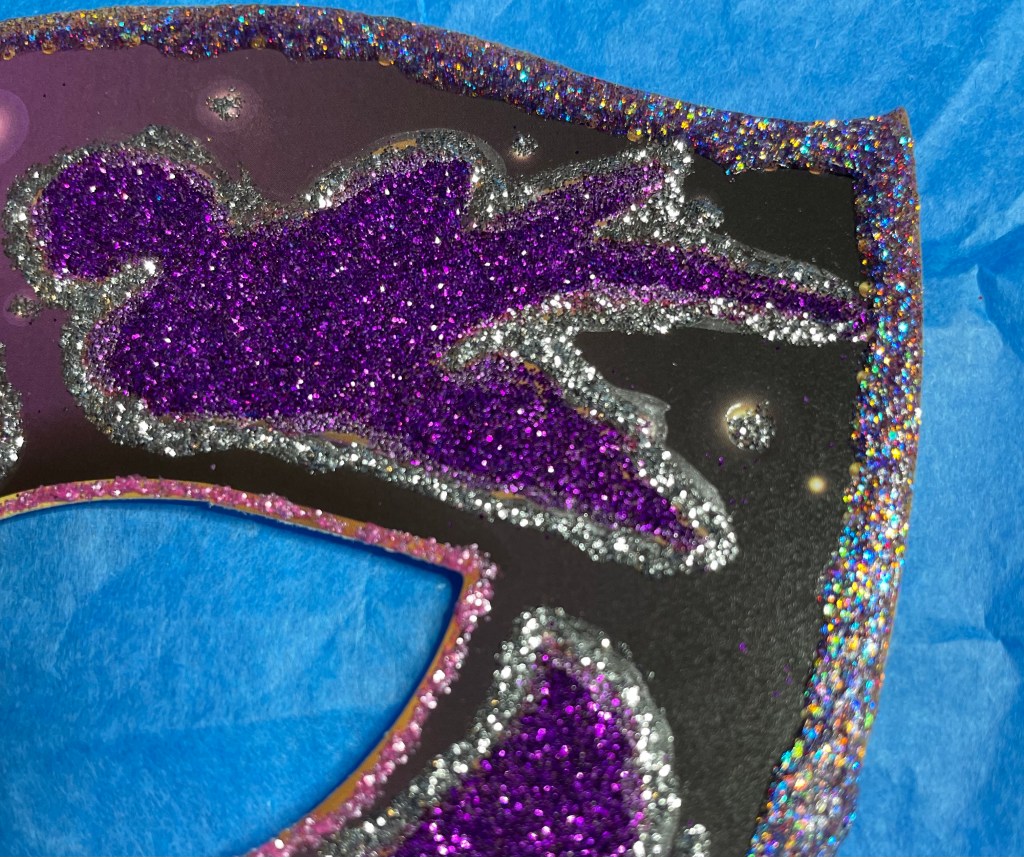
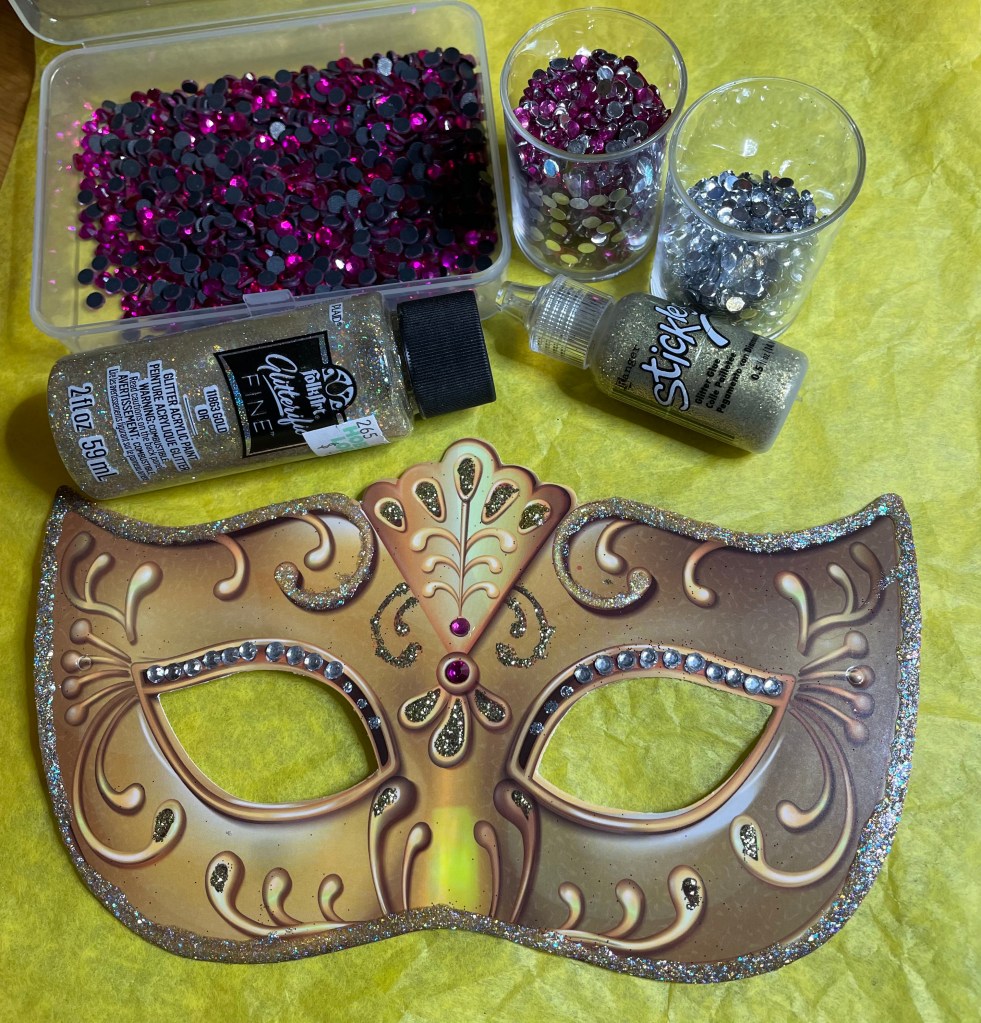
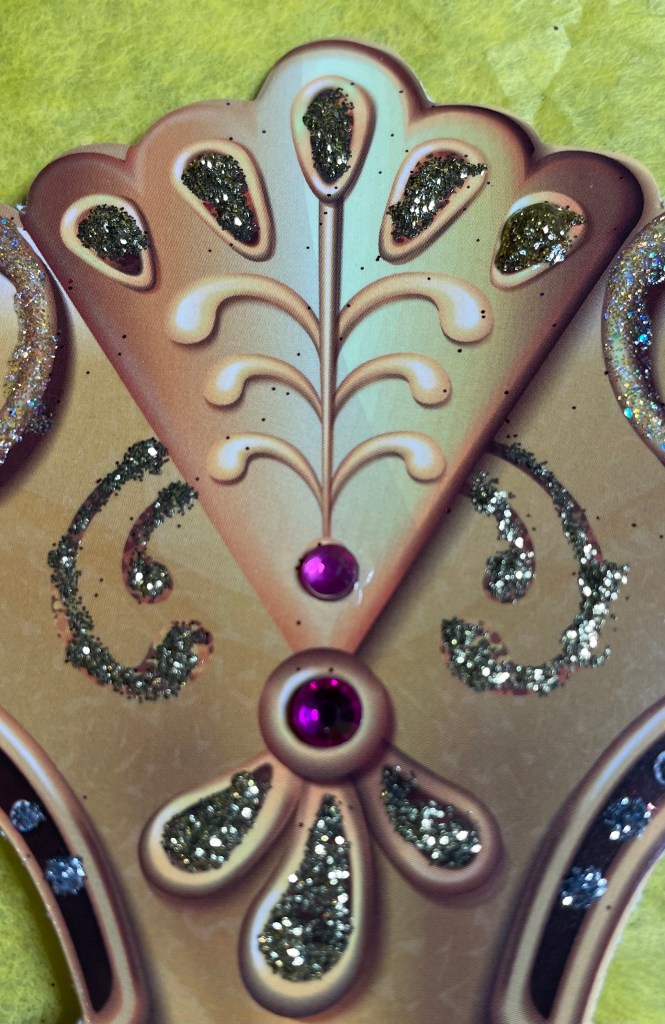
Mask #11 gave me a lot of trouble. There were a lot of things I thought would work but it just didn’t. I’m not sure I am even going to use this when I decorate my mom’s door. I guess I could put it on back of the tree where no one can see it. That might work. The used fine glitter in the color grape, silver Stickles, and purple Glitterific paint around the out edge. This one was tough but the last mask was the real challenge.
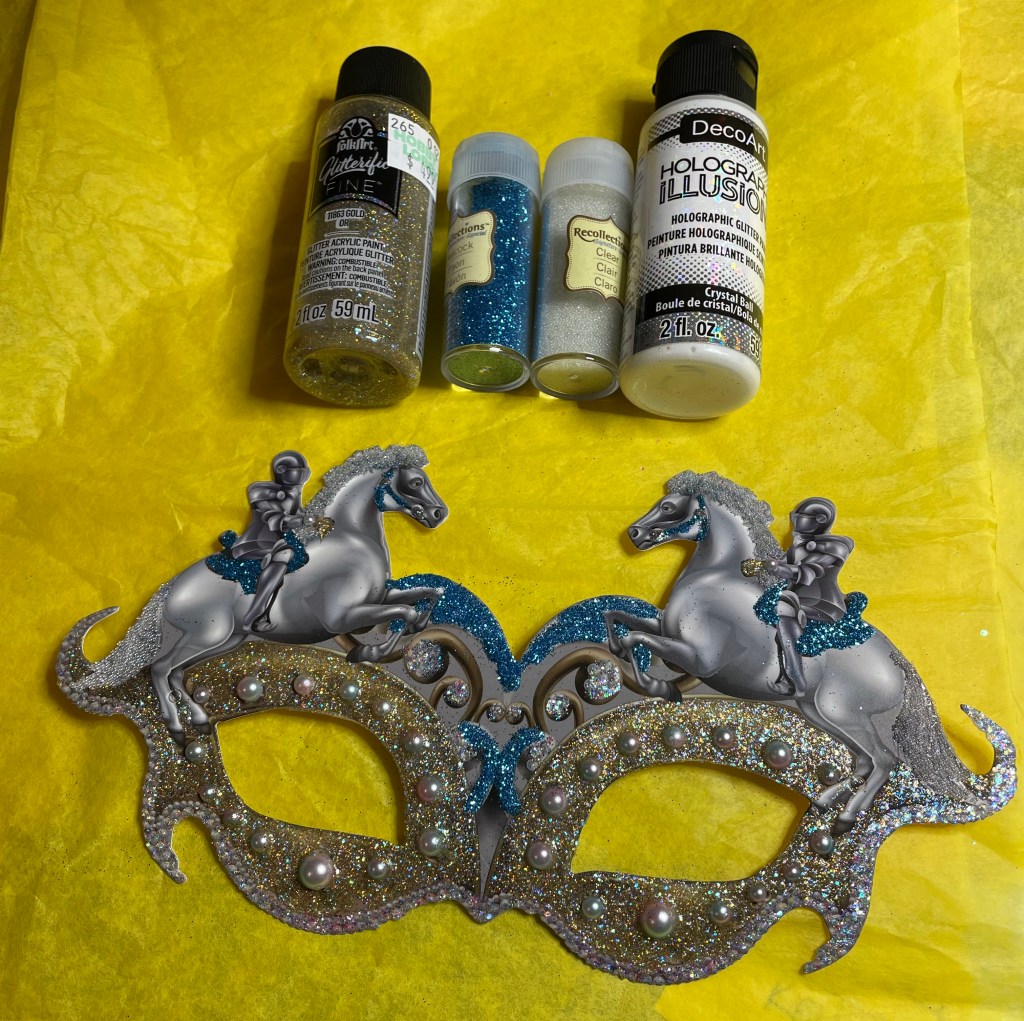
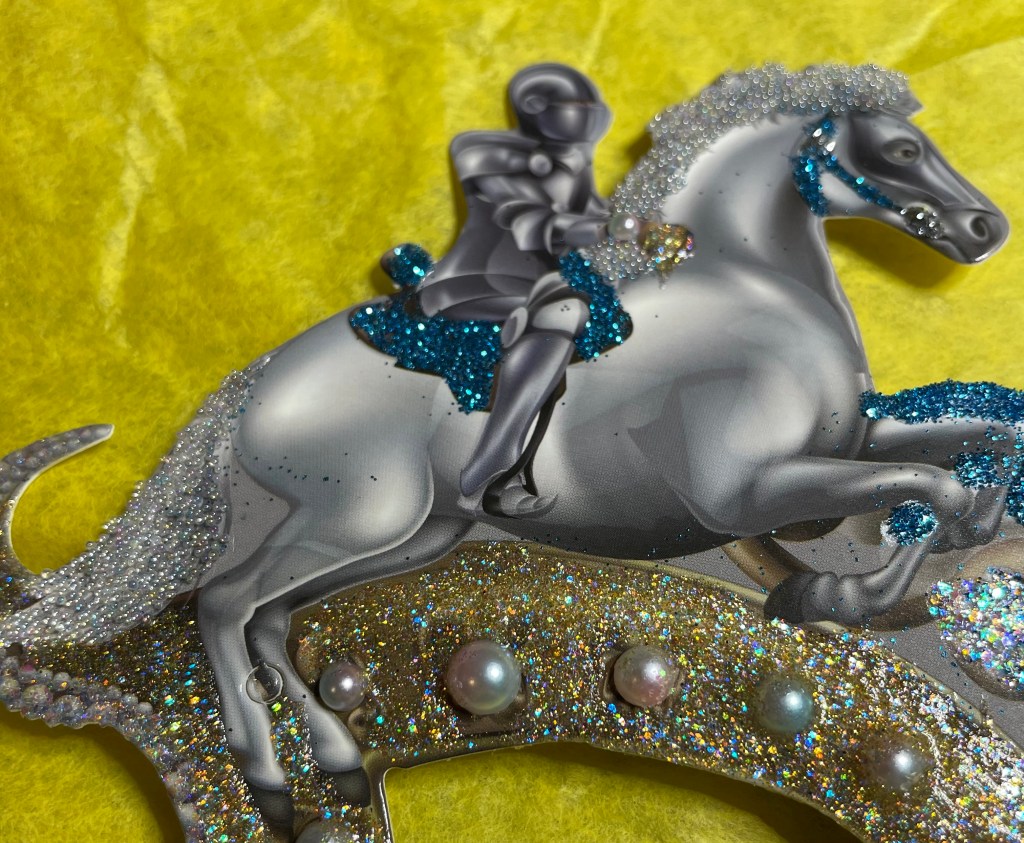
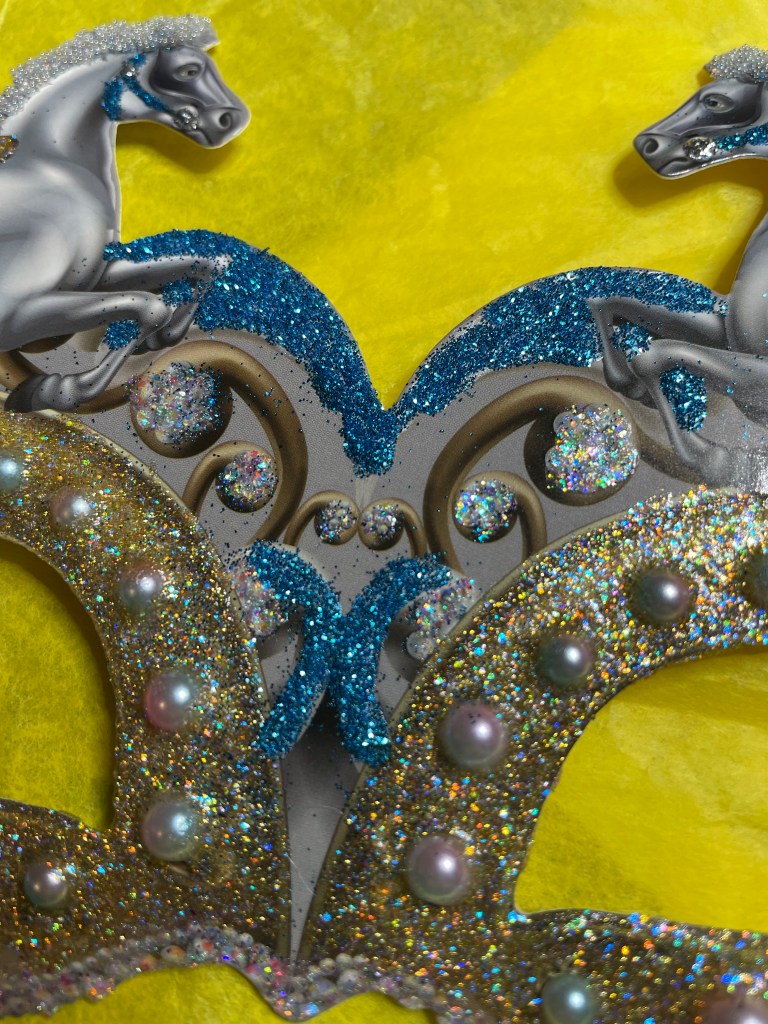
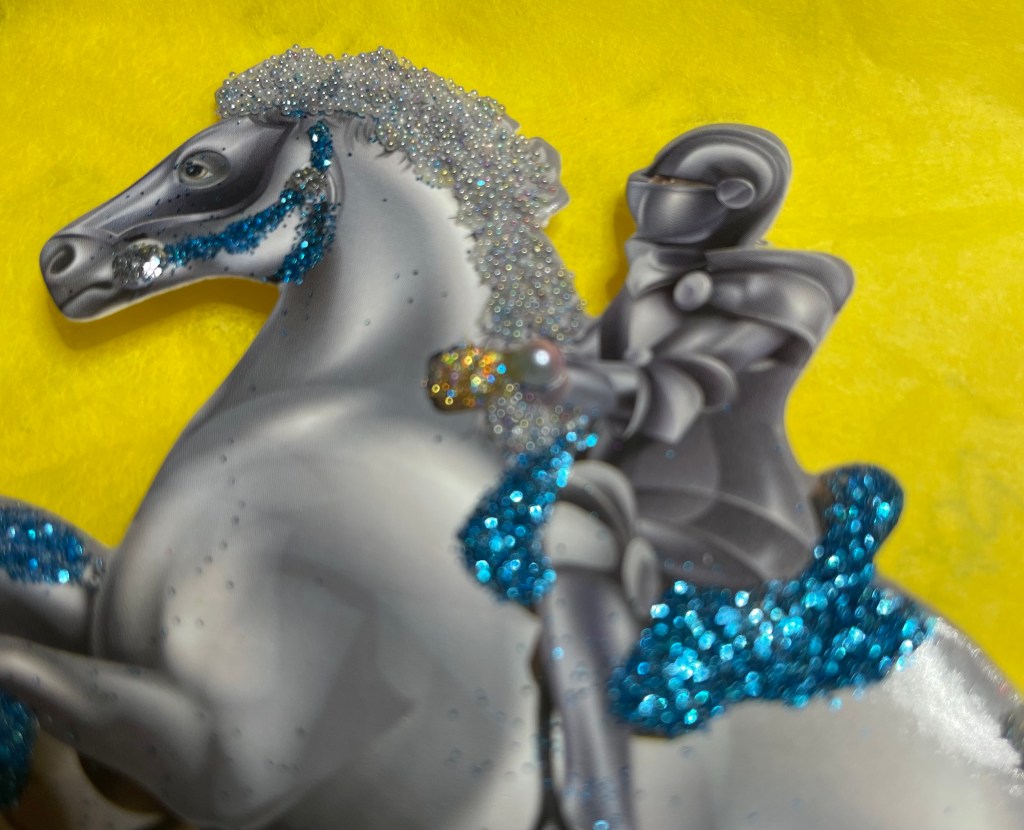
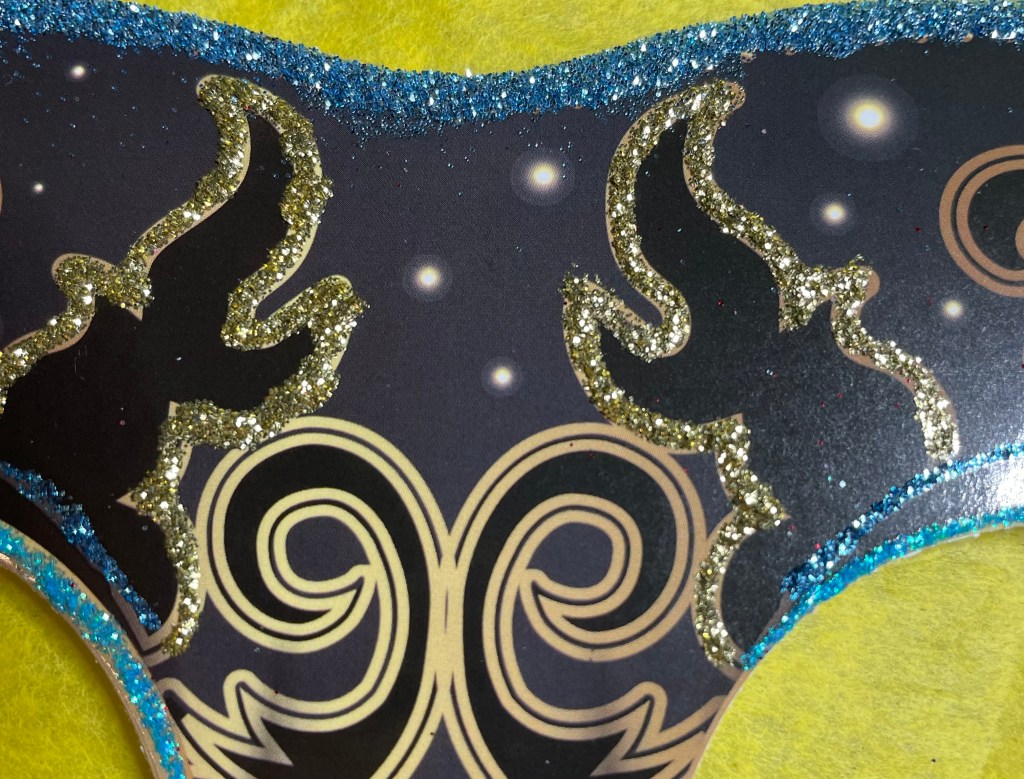
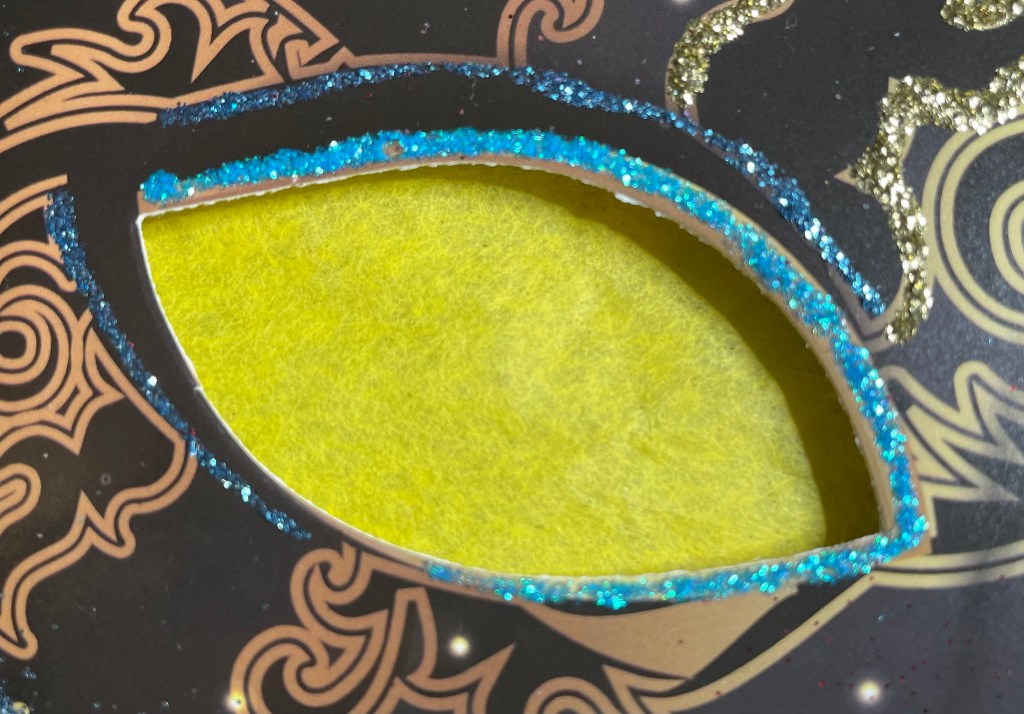
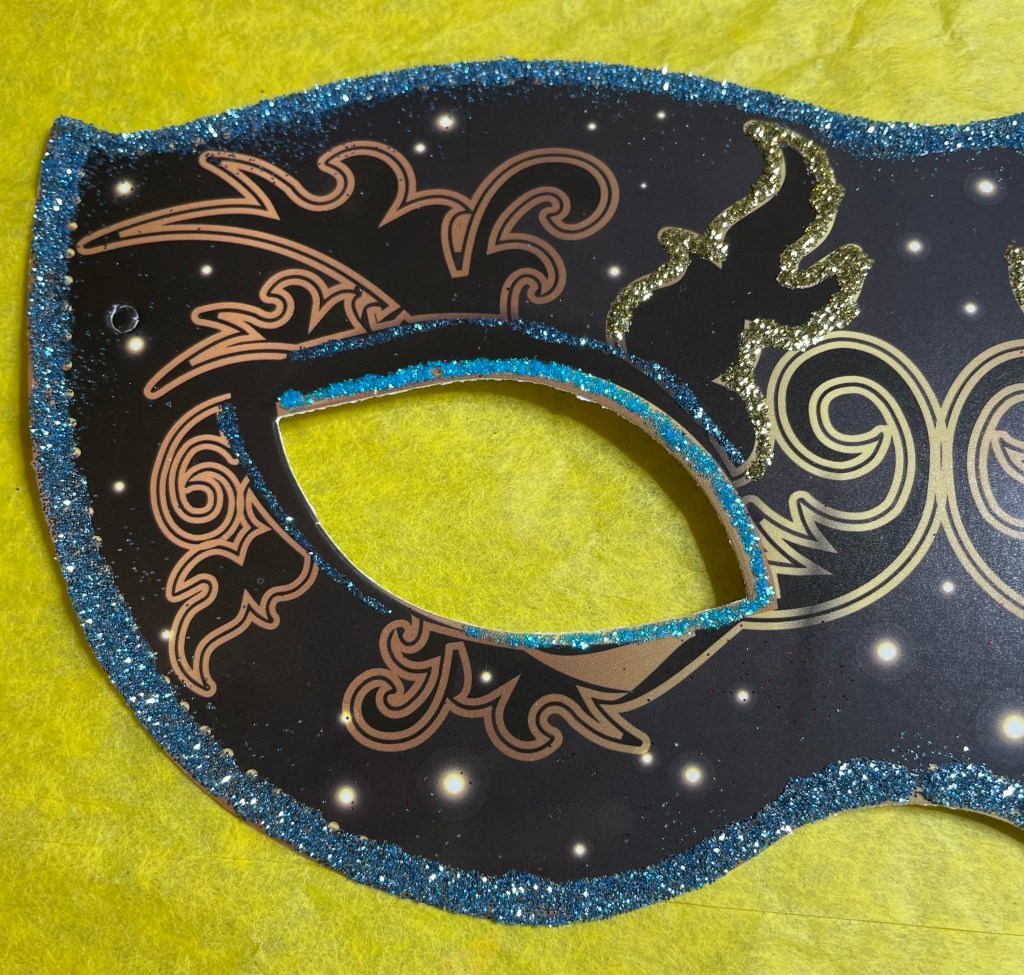
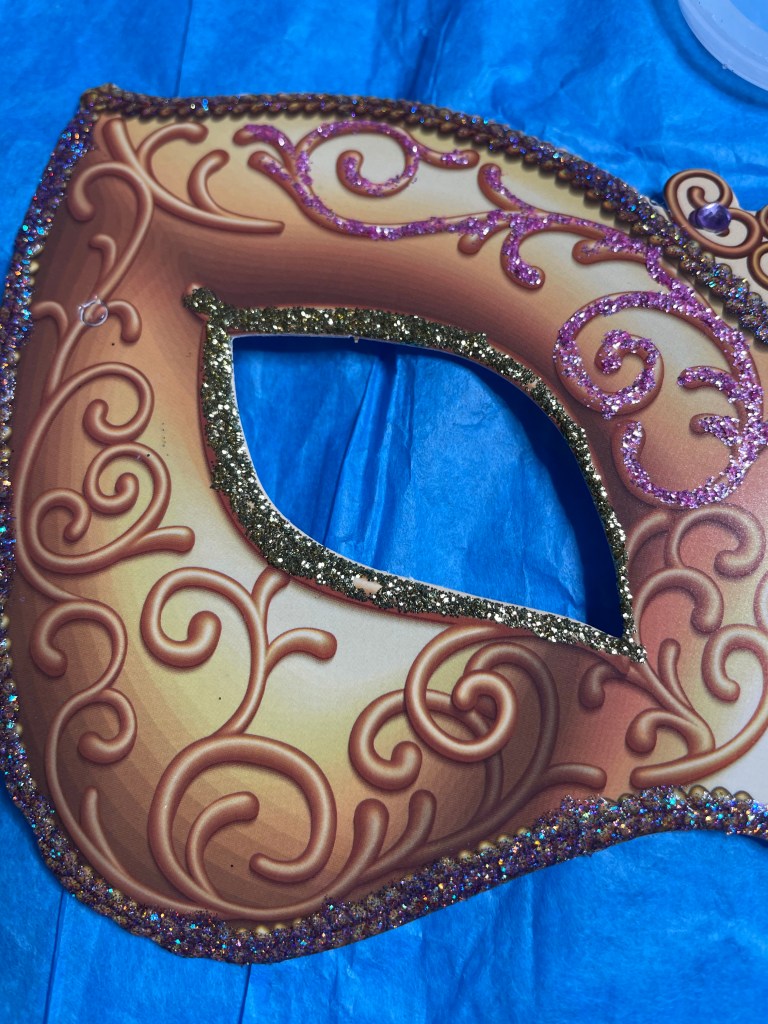
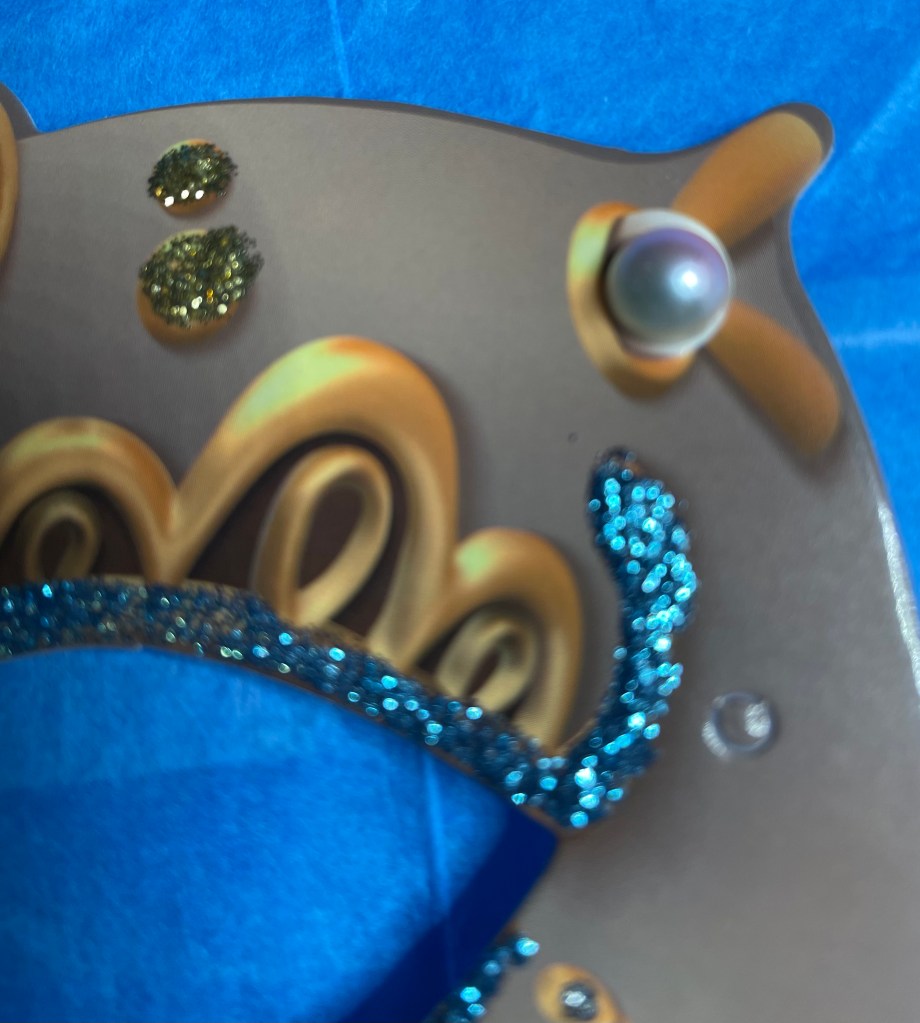
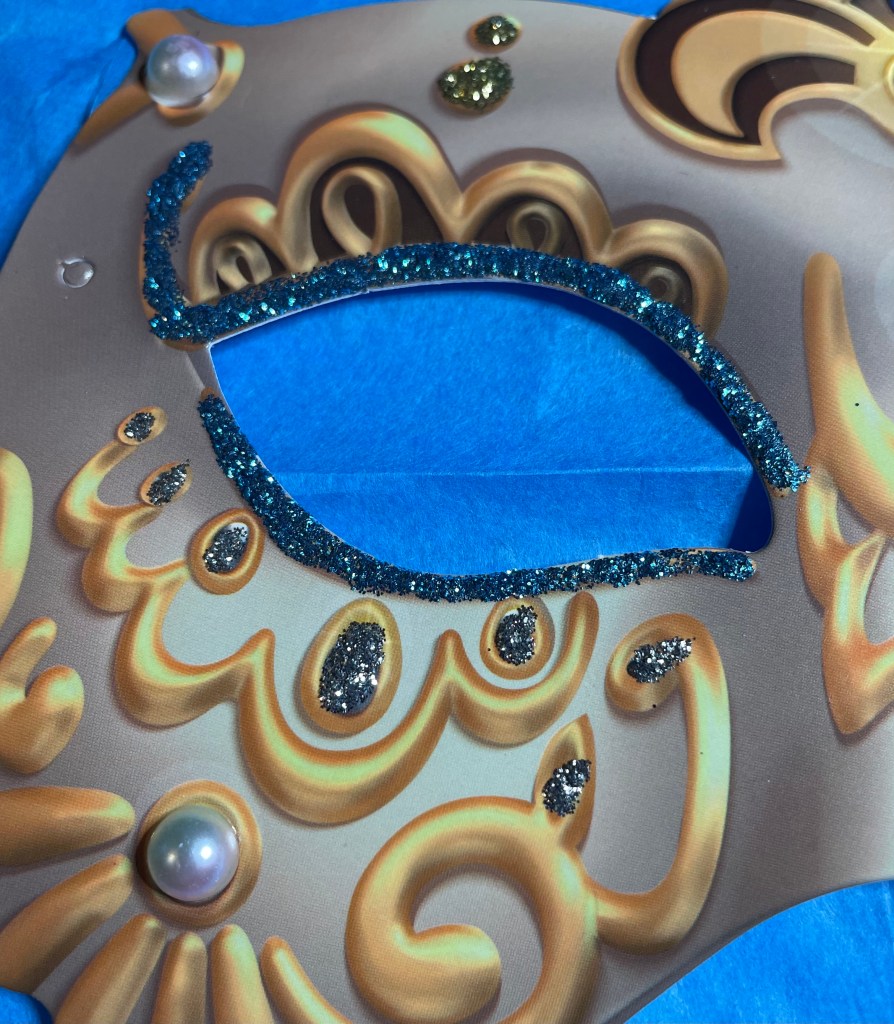
Mask #12 gave me nightmares and was always on my mind as to how I could possible make this mask really stick out above all the rest. In the beginning, I thought I would be able to use some faux pearls and some micro beads to make it pop. To test out my idea using the micro beads, I decided to try it on the mane and tail of each horse. They stuck thanks to Nuvo Deluxe Adhesive. But working with the beads was a real challenge. I decided that the hair would be the only area the beads would be used. Now I had to figure something else out. I decided the pearls would not give me the outcome I was wanting for the bottom edge of the mask so that mean I would have to go shopping. I quick stop at Michaels and Hobby Lobby in search of something but not sure what. I knew I wanted a paint product. I do not remember which store I purchased which product at but I came home with DecoArt Metallic paint in White Pearl from Michaels and DecoArt Holographic Illusions in the color Crystal Ball from Hobby Lobby. Once home, I quickly discovered the metallic pain would not work. So I have put it aside to use for another project down the line. The holographic illusions paid worked perfectly along the bottom edge of the mask. I decided to use the faux pearls in the eye area then use gold Glitterific for the remainder of the eye area. Holographic illusions was also used in the top area where there are what looks like pearl clusters. To really make things pop, I decided to use fine glitter in the color peacock for the saddle. I’m happy with how this mask turned out. It definitely took a long time to get this mask finished.
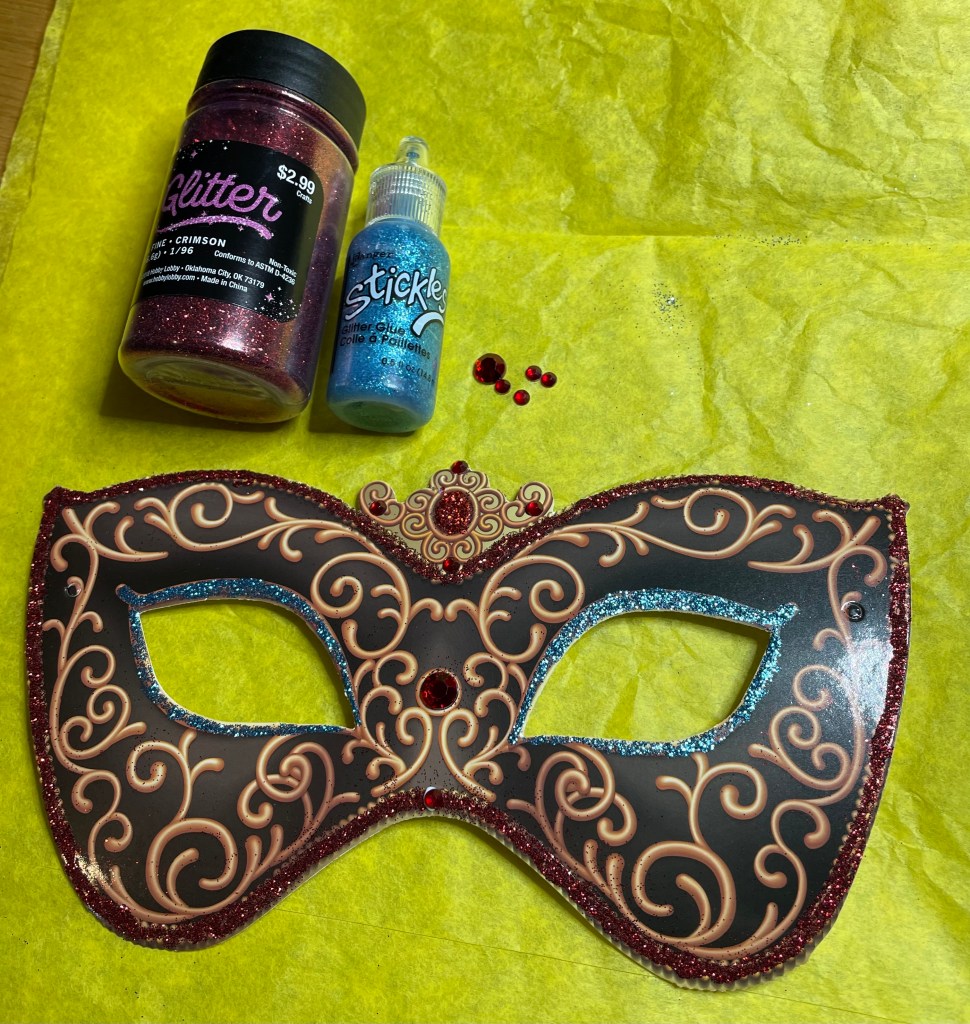
I just realized I did not include a list of the times used on the masks in part three. So, here is a complete list of all items used for this project.
From Amazon: all rhinestones and the Nuvo Deluxe Adhesive
From Dollar Tree: the flatback faux pearls.
From Hobby Lobby: Extra fine glitter in the colors Crimson and Light Blue, Tree House Studio glitter in soft pink, FolkArt Glitterific FINE glitter acrylic paint in the colors gold and purple and DecoArt Holographic Illusions glitter paint in the color Crystal Ball.
From Michaels: Czech seed beads in size 10/0 in the color white, DecoArt Dazzling Metallics metallic acrylic paint in the color White Pearl, Stickles in two different shades of blue and also in gold, mermaid tail, silver, and tangerine, and Recollections micro beads in the color clear, and Recollections find glitter in the colors Blush, Bubblegum, Grape, and Peacock.
Please keep in mind that a lot of these products may no longer be available. The only things I specifically purchased for this project were the Glitterific paints, the Holographic paint, and the Czech seed beads. Everything else I had on hand from other projects.
Well this has been a lot of fun and a challenge as well. I feel like this type of project is something I would like to do again in the future.
4 more masks completed. To make this easy, I have decided that the will show what I originally had planned for the mask. Any changes will be noted on the first photo along with where each product is used. On with the masks!!!
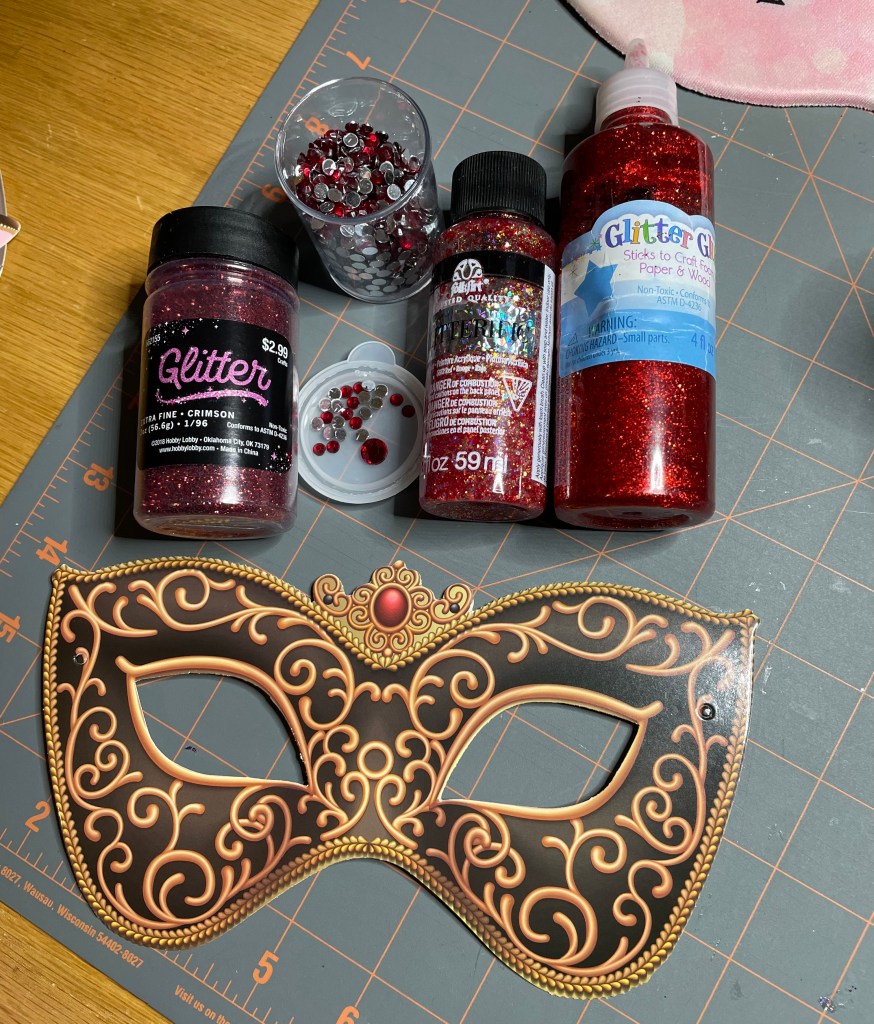
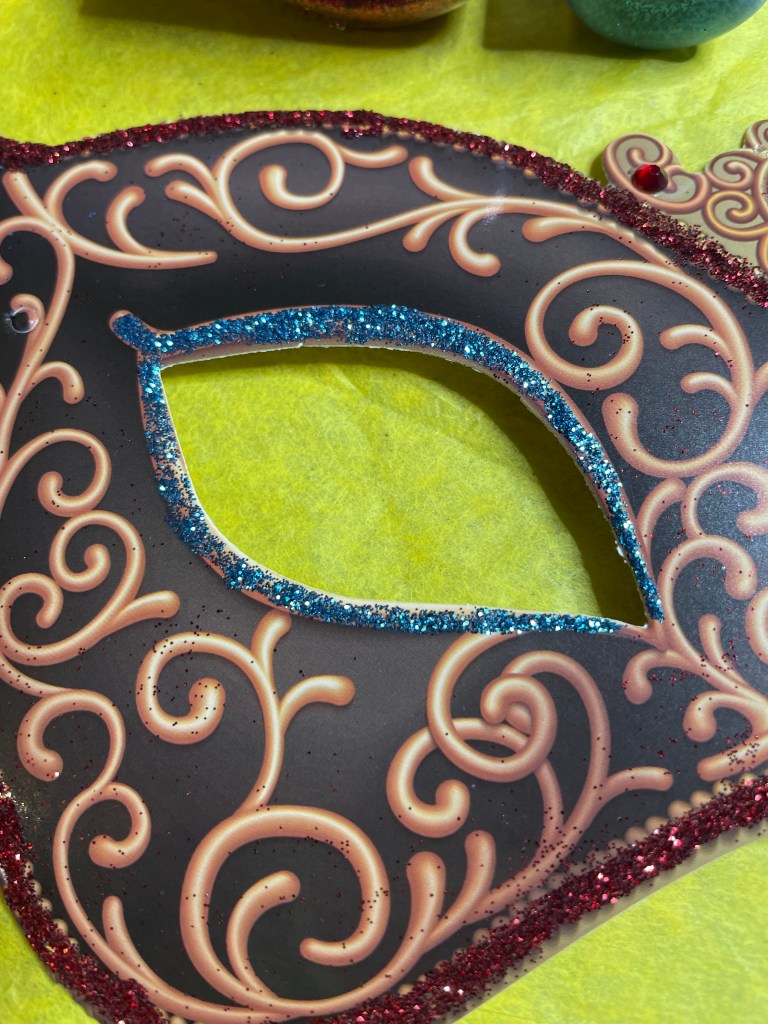
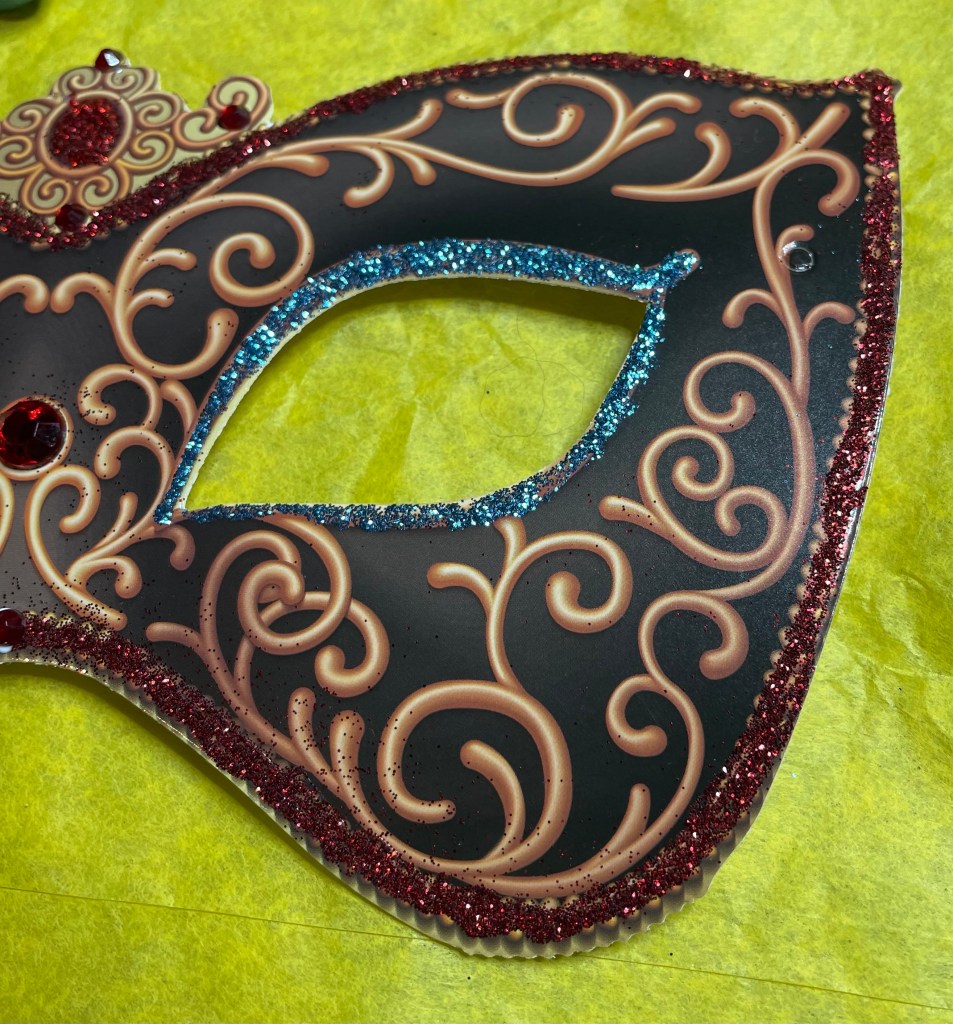
Mask #5. Continuing with the less is more theory, the following masks definitely fall under this category. One think I learned on this mask is that the Glitter Glue and the thicker Glitterific glitter paint were NOT a good idea for this project. I need to make a not to myself to remember to dispose of those products. One large(ish) red rhinestone and 4 small red rhinestones were used to accent the center top of the mask. Blue Stickles around the eyes. This is becoming one of my favorite parts of the mask to accent. and ultra fine glitter in the color Crimson was used on the outer edge of the mask.
Mask #6 had me scratching my head as to what to do with it. I decided to use Gold Stickles to accent the upper middle design, blue Stickles for the eyes, and extra fine glitter in light blue was used on the outer edge of the mask. I must say, Nuvo Deluxe Adhesive is amazing! I wonder if it can be purchased by the gallon or maybe a quart!!!!
Mask #7 is one that really did not need a lot to be done to it. I used ultra fine glitter in the color Crimson for the red oval and silver rhinestones to accent the eyes and center of the mask, ans silver Stickles for the small dots around the eyes.
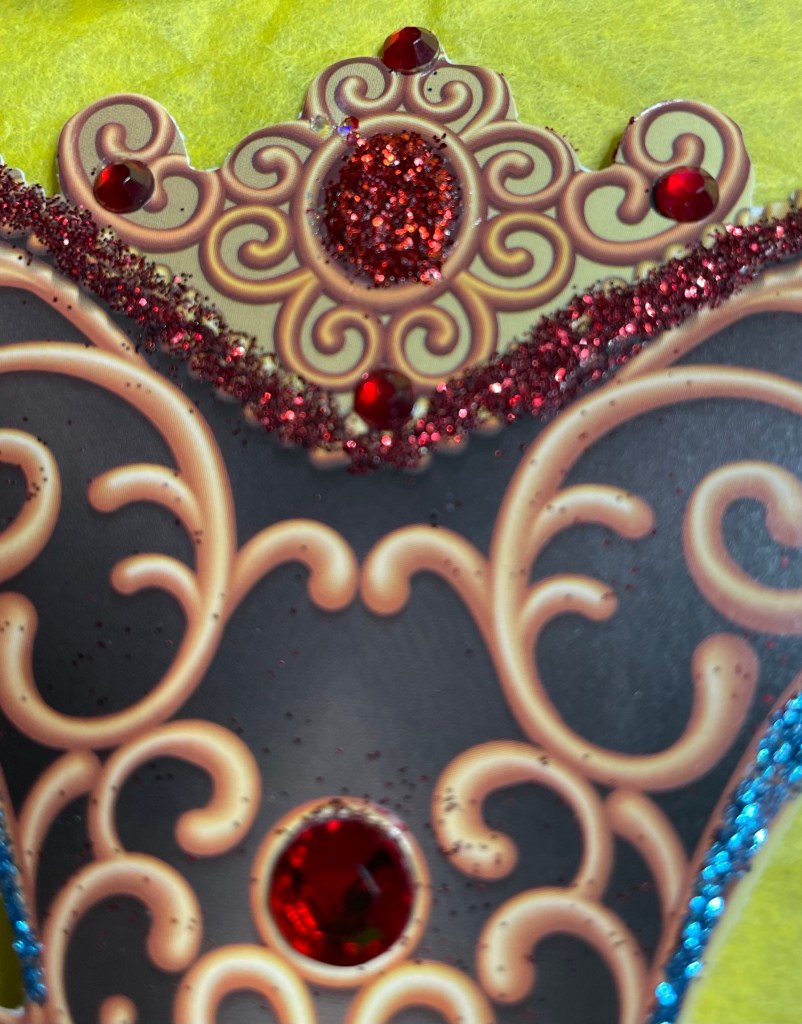
Mask #8 did not have a before picture, but the outcome is fantastic, at least in my opinion. One large(ish) and one small rhinestone in a deep pink color was used as accents in middle area of the mask. Silver rhinestones were placed around the eyes. Gold and silver stickles were used to accent a few areas, gold in the center top area and silver below the eyes. Gold Glitterific was used around most of the outer edge of the mask.
I realize there is glitter dust on the masks and I will work to get them off the masks before I decorate my mom’s door. Does anyone have any ideas on how to remove it???
The first 4 completed masks. To make this easy, I have decided that the first photo will be what I intended to use on the mask. If I decide on something different, the second photo will show the products I actually use. Each mask will have4 a list of items I used and where they were purchased from.
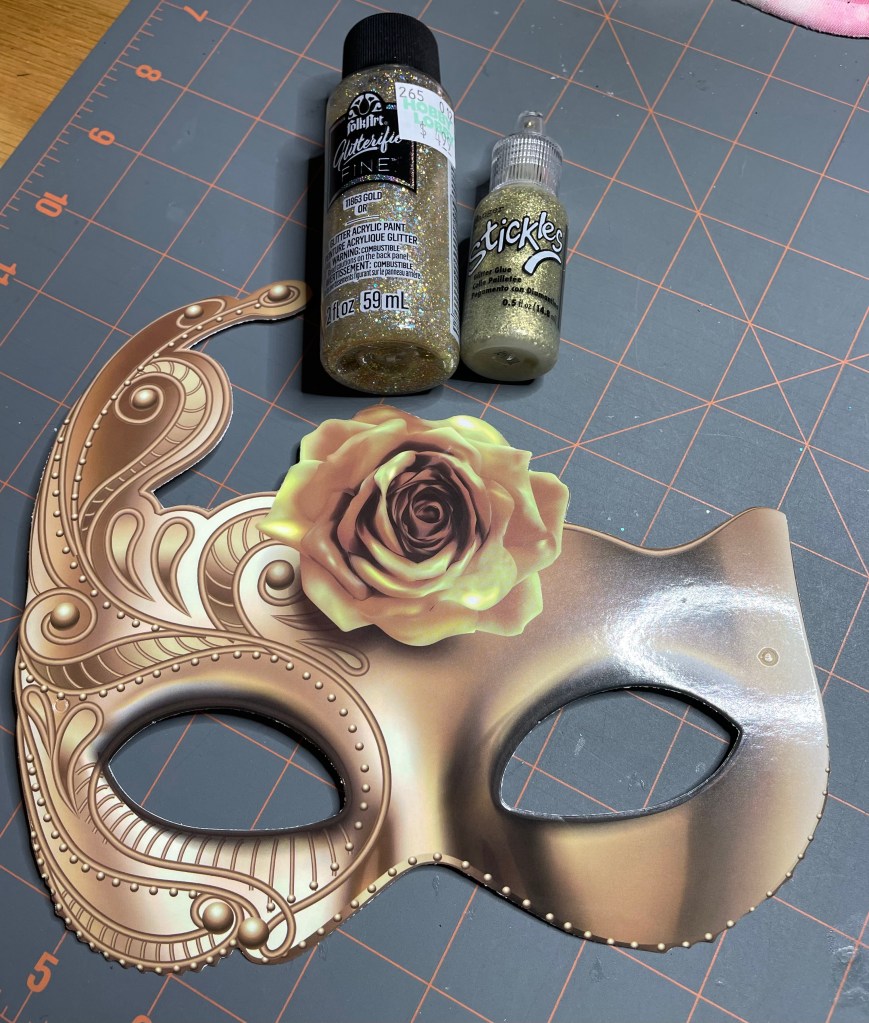
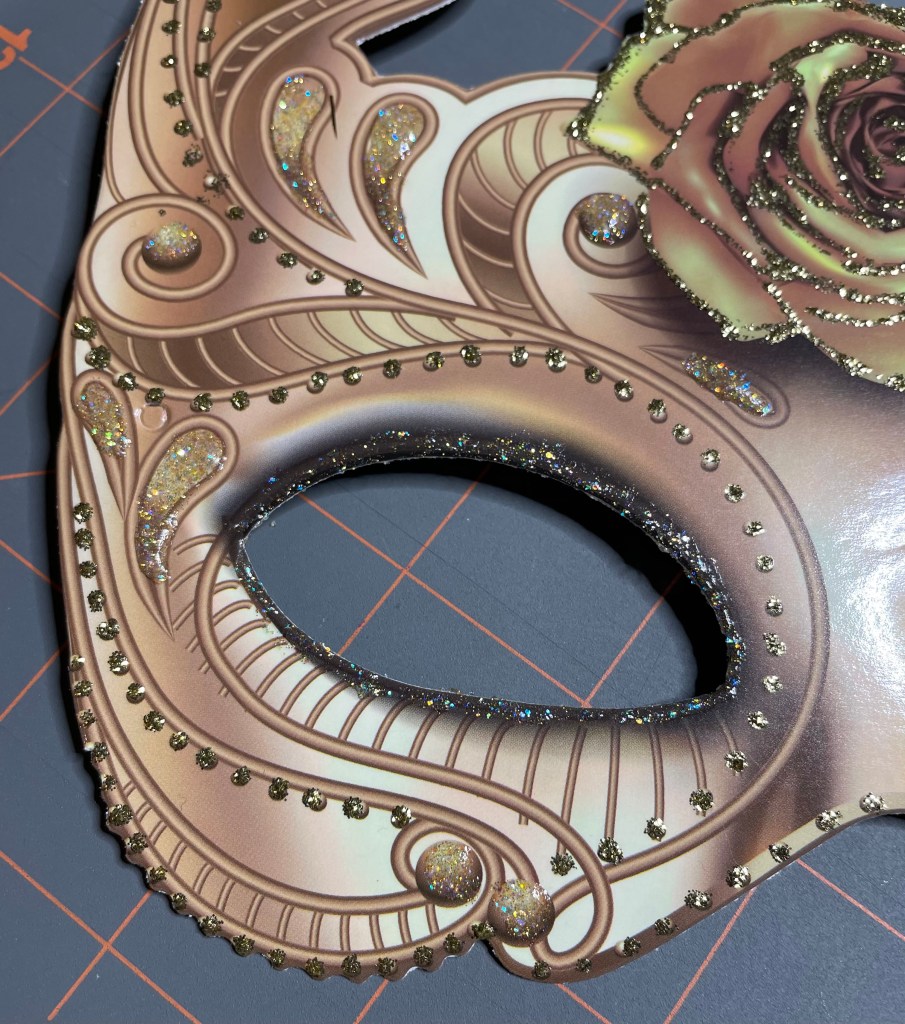
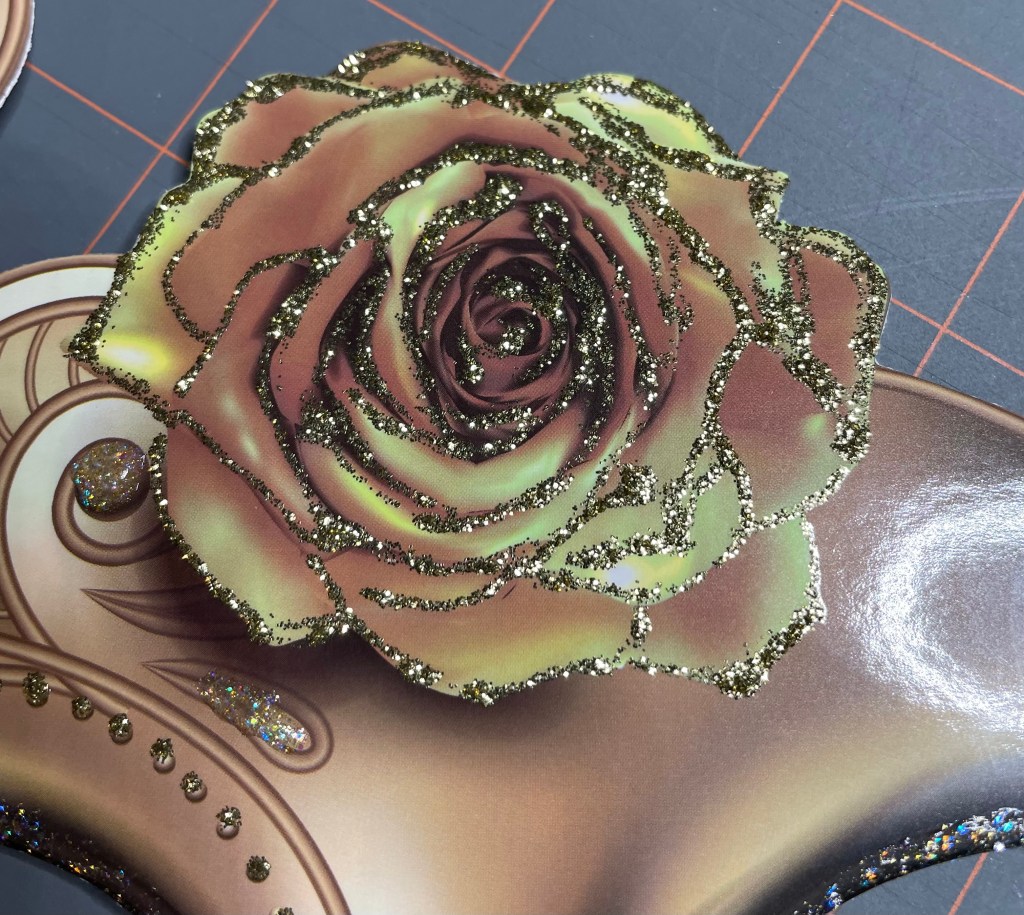
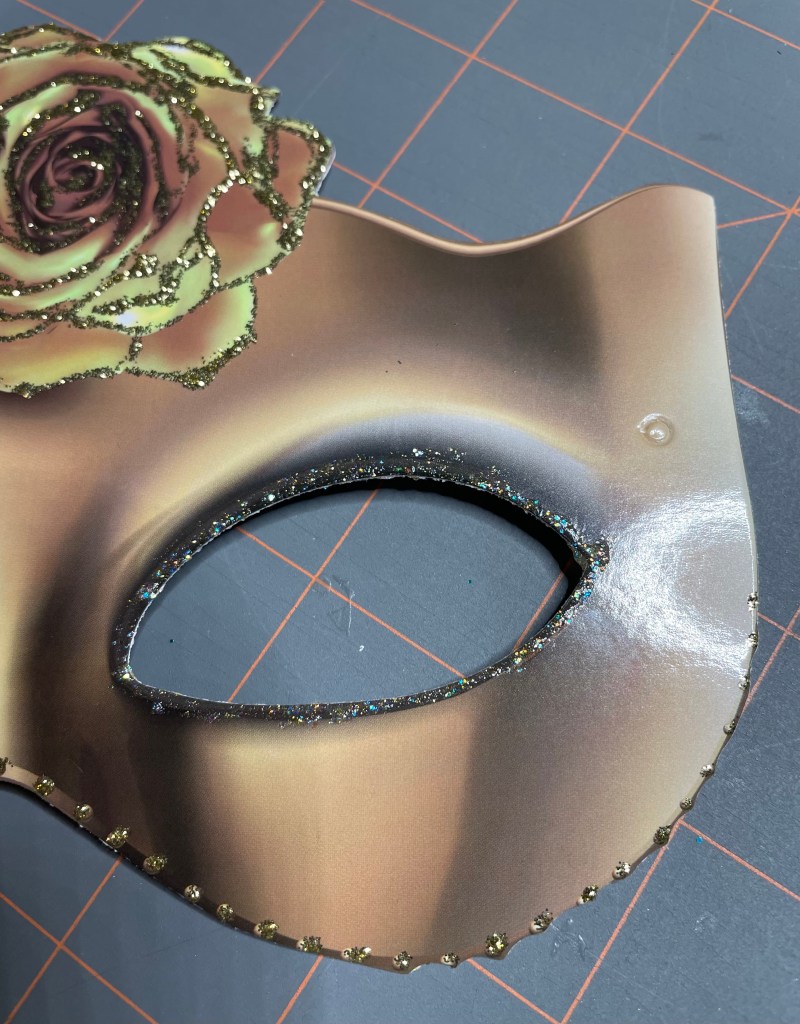
The first mask I worked on is the one with a yellow rose. My mom loves yellow roses so it just seem appropriate to use it. I used Folkart Glitterific in the color gold, purchased at Hobby Lobby and gold Stickles purchased at Michaels a long time ago.
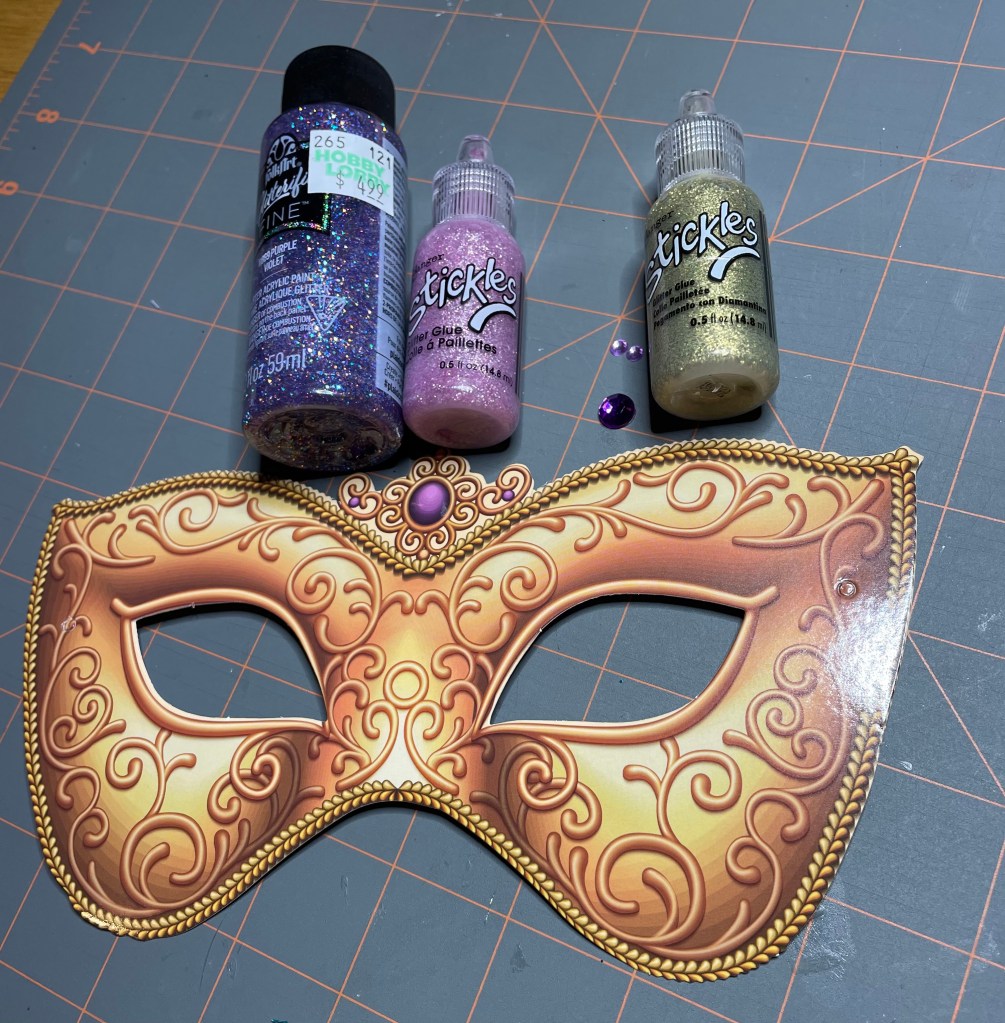
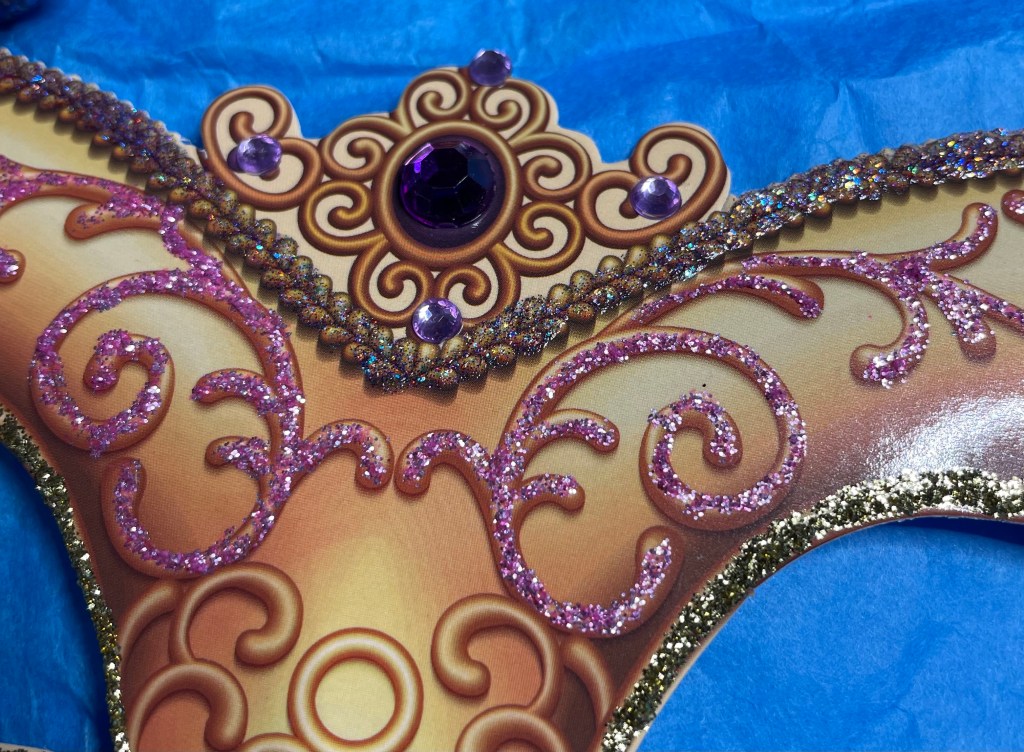
Mask #2. Not changes to the selections of item I pulled for this mask. Purple Glitterific was used along the outer edge of the mask, the gold Stickles was used around the eyes, and the other Stickles was used to accent the filigree above the eyes only. Rhinestones were glued in place at the top of the mask using Nuvo Deluxe Adhesive.
Mask #3. The only change I made on this mask was switching the purple Glitterific with the gold Glitterific and I did not use the silver Stickles at all. The gold Glitterific was used on the outer edge of the mask, gold Stickles for the eyebrows, Stickles in the color Mermaid Tail and small light purple rhinestones were used around the eyes. Larger purple rhinestones were used with gold Stickles surrounding the rhinestones.
By the time I got to mask #4, I decided it was time to do something more simple. Along the lines of less is more. Blue rhinestones and faux pearls made great accents as did the gold and silver Stickles. But I think my favorite part is the blue Stickles around the eyes. Yes, that is definitely my favorite part of this mask.
Here is a list of the items used on these masks and where I purchased them from.
Folkart Glitterific FINE gold paint and Folkart Glitterific FINE purple paint purchased at Hobby Lobby
Stickles in Gold, Mermaid Tail, Blue, and Silver purchased at Michaels.
Rhinestones in all colors and sizes along with the Nuvo Deluxe Adhesive were purchased on Amazon.
Faux pearls were purchased at Dollar Tree.
Part 3 coming up with 4 more masks completed. Who knew this could put such a strain on my old eyes!!!!
We have reached the final installment of this series! Let’s get started!!!
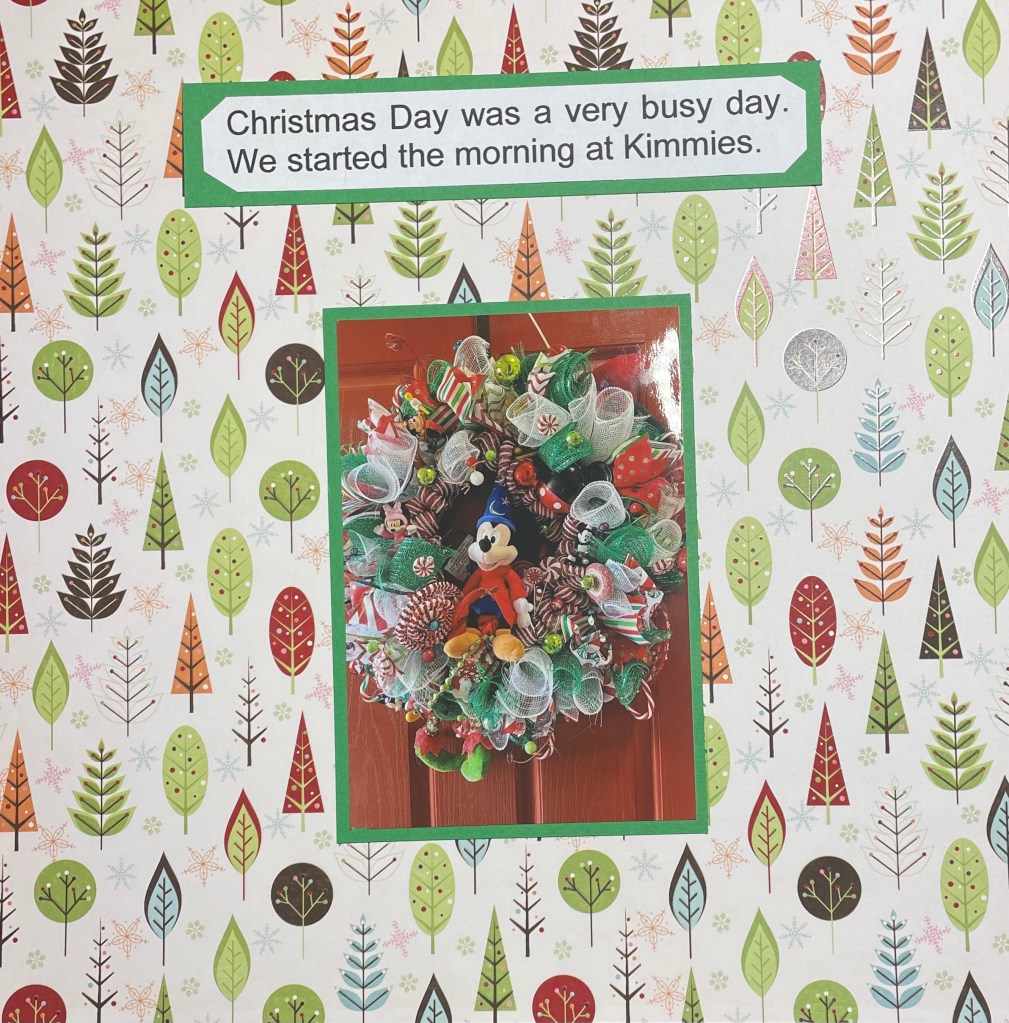
On Christmas morning, we took my mom to Kimmie’s house to be with her family for breakfast and to exchange gifts. This 3-page layout was made on Imaginisce Christmas Cottage Winter Wood collection.
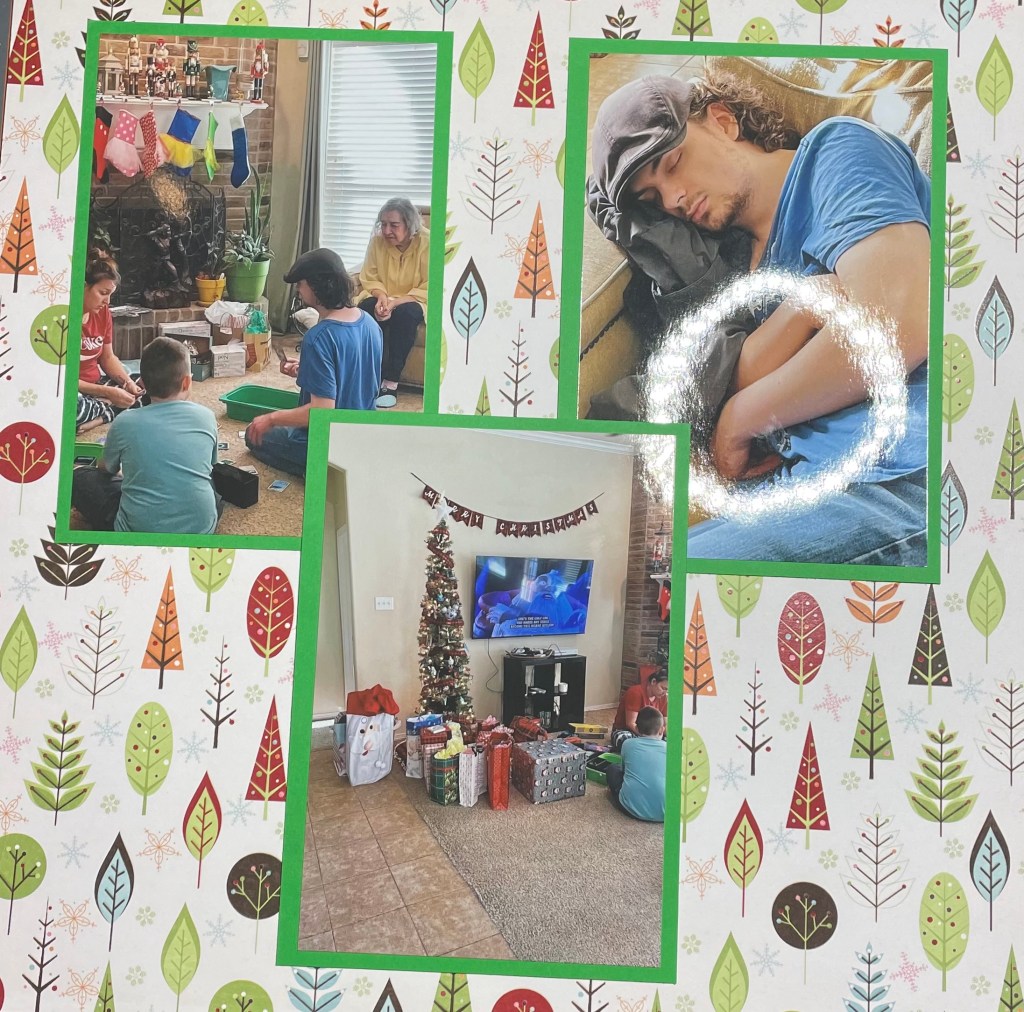
Then we made our way to Wesley’s home for lunch and to exchange gifts with his family. Since he lives a farther distance away from us, she was starting to get tired before we got there. After she ate her lunch, she was ready to go home so she could take a nap. I wish we could have spent more time there. Maybe this year will be different. This layout was made on Imaginisce Cottage Christmas Peppermint Stick collection.
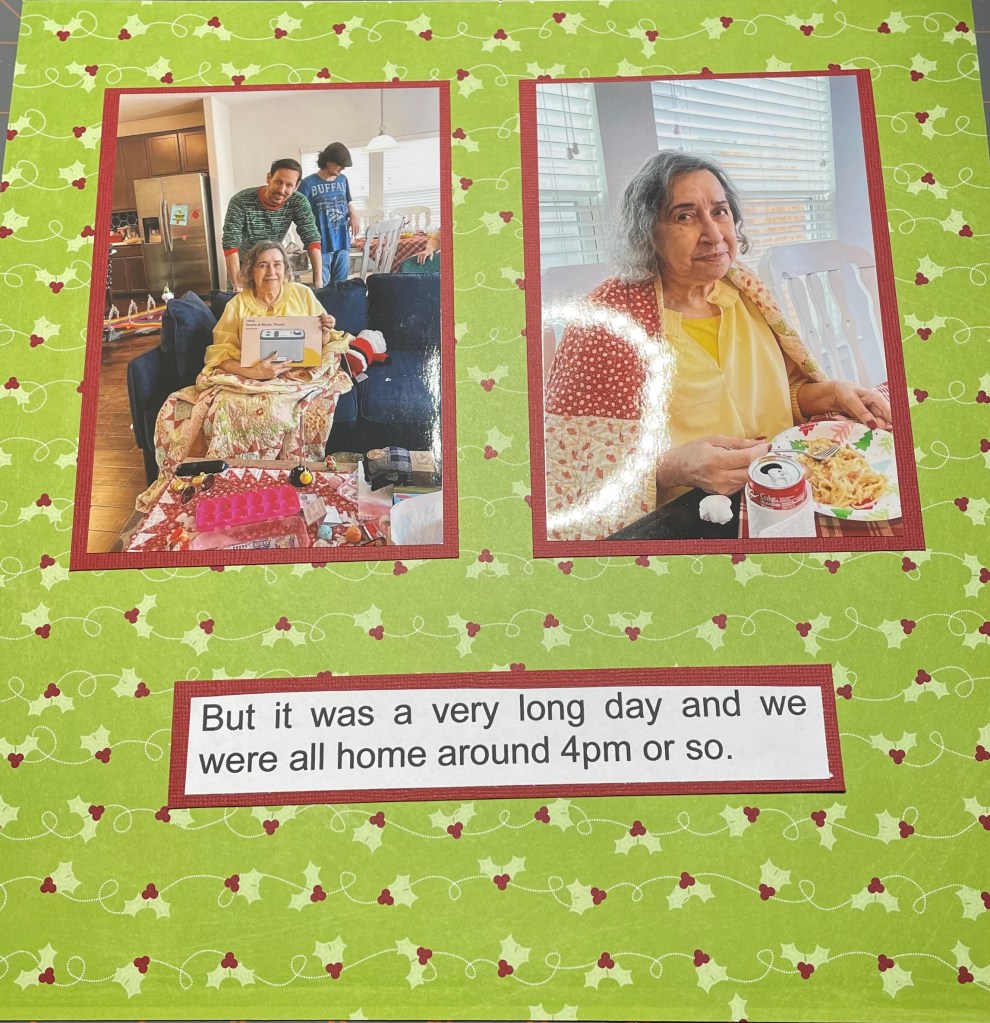
One final lunch out for the year. This time, lunch with mom also included Kimmie. The Eaton clan had given my mom a gift card for Cracker Barrel so that is where we went. We had a short wait, but definitely not like the hour long wait we had on Thanksgiving. This layout was made on Craft Smith Palm Spring collection.
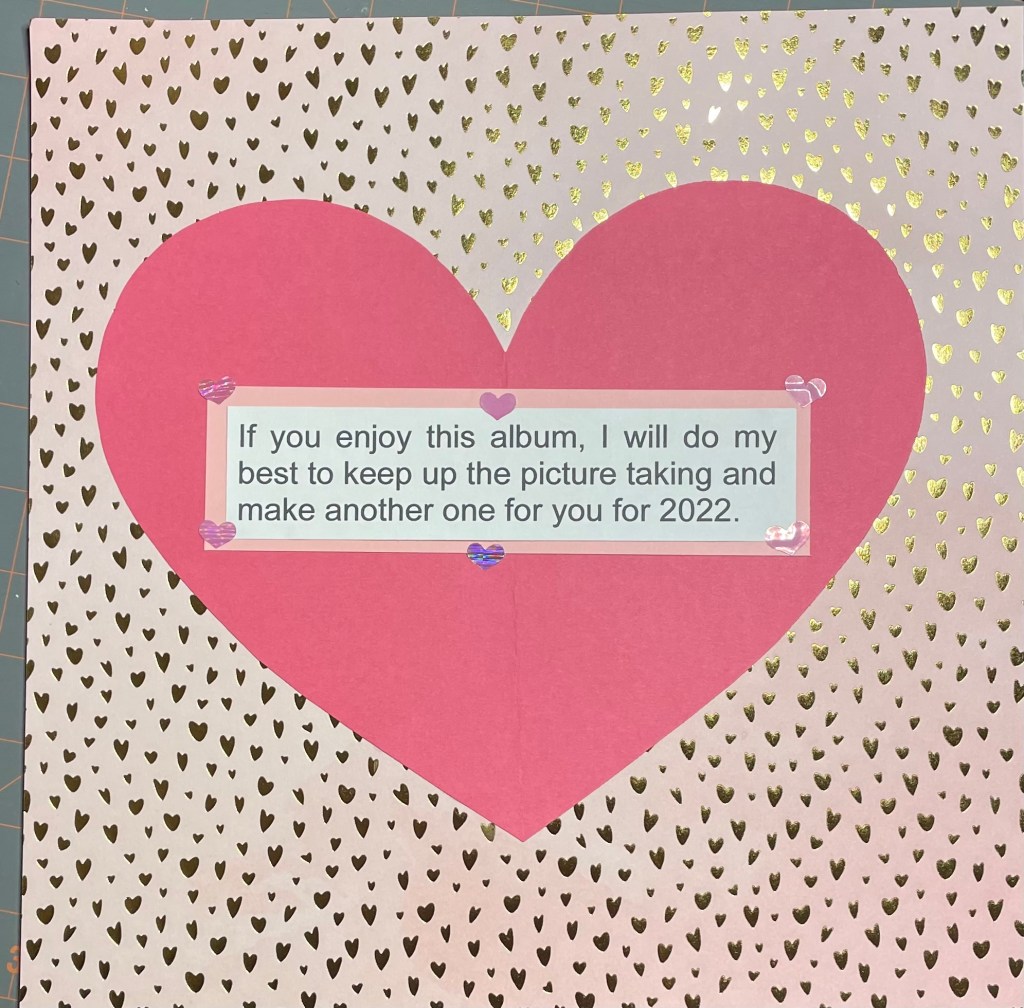
For the last page of the album, I made a special layout for her. The paper used for this layout is from the Craft Smith Write Your Heart Out collection.
Now it time to start another project. I wonder what it will be!!! I hope you will return to see what’s next.