I love planning cruises, planning trips to Cozumel, but mostly I love spending time with my family! And making scrapbook pages of everything! You can also find me on Instagram and Facebook
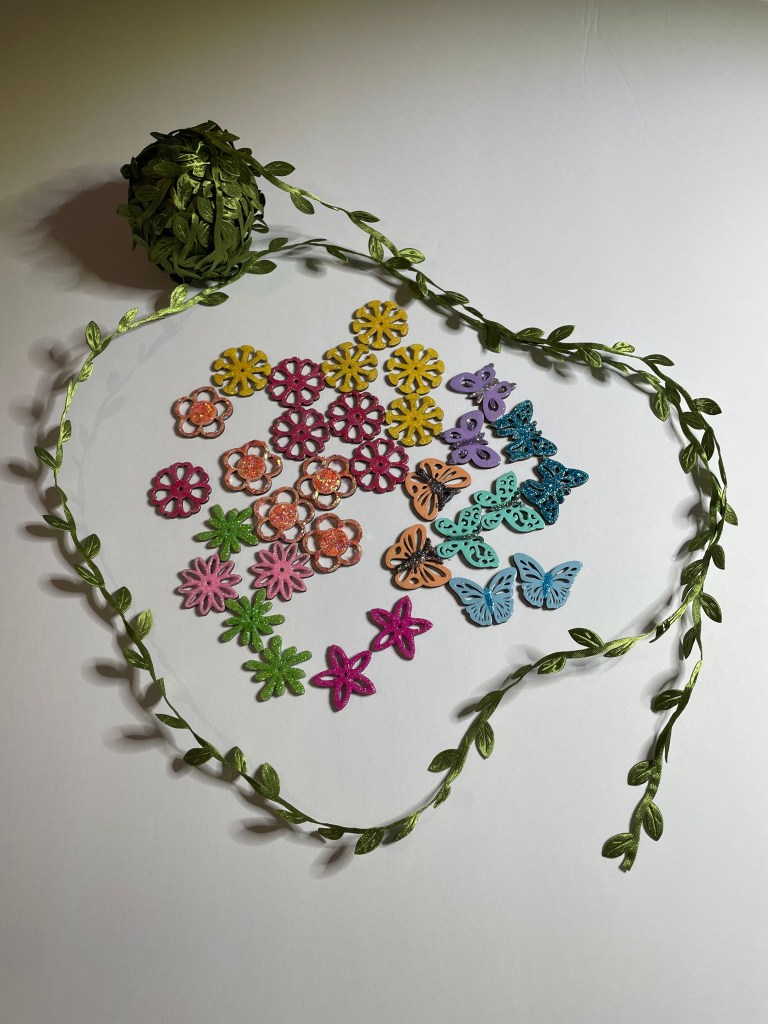
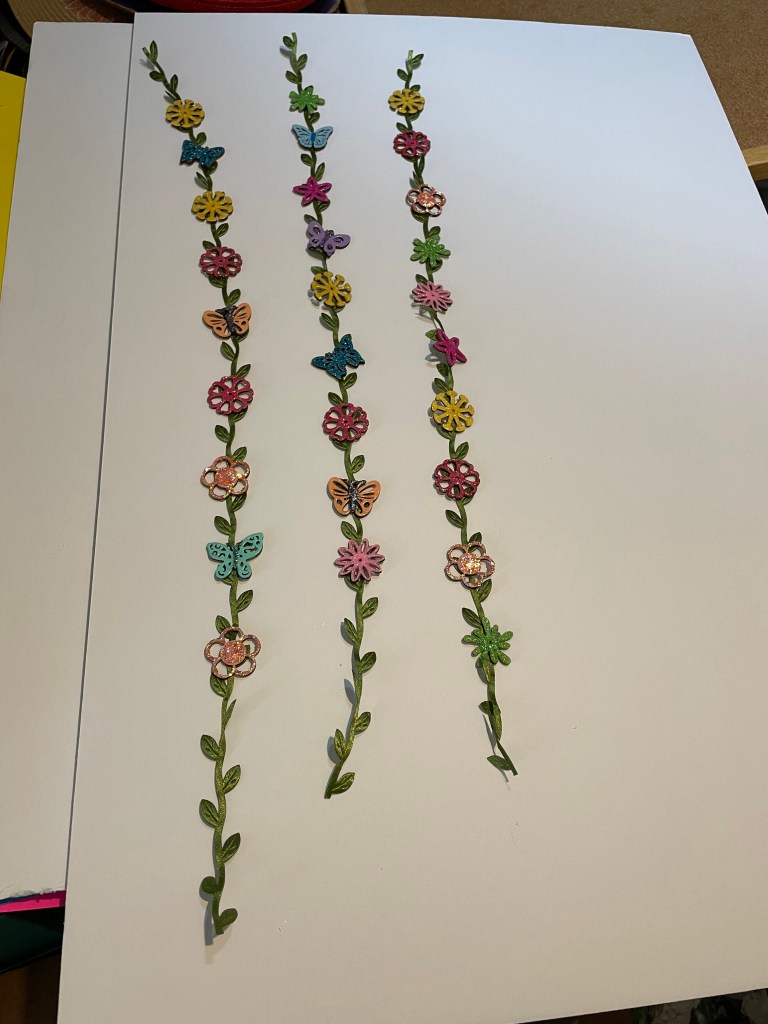
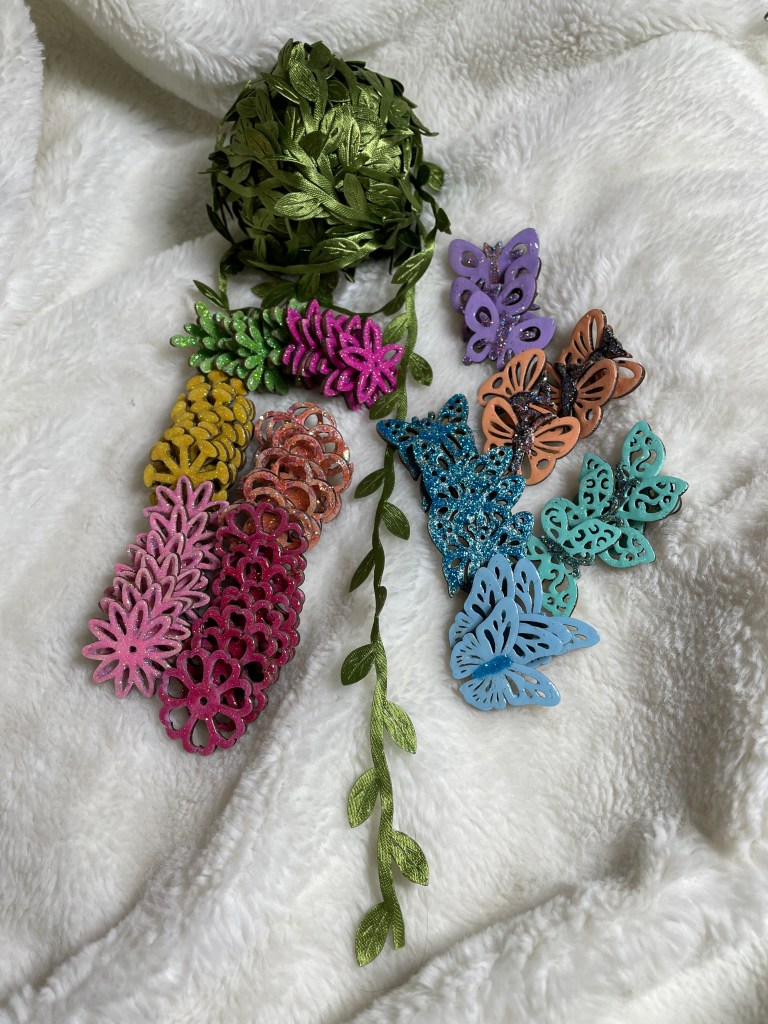
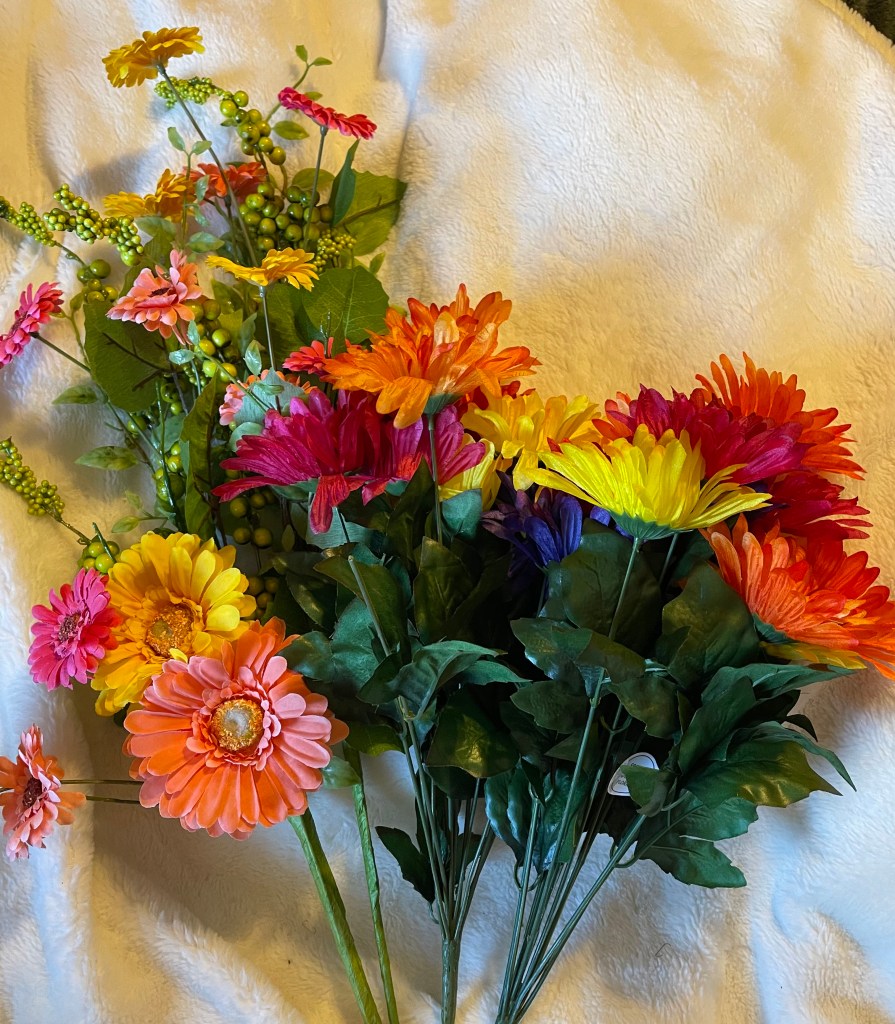
I had some butterflies and flowers left over from the spring sign project. I decided they would be perfect to attach to the green leaf ribbon and make a garland. So I gathered everything up and got to work.
I used Nuvo Deluxe Adhesive to attach the flowers and butterflies to the ribbon.
I cut the ribbon in approximately 24 inch pieces. The first garland I did has 6 flowers and 3 butterflies.
The second garland has 5 flowers and 4 butterflies.
And the final garland 10 flowers only. No butterflies.
There are 3 butterflies left that I decided I would use as part of the tree topper. Stay tuned for that!
All items used for this project were purchased from Amazon!
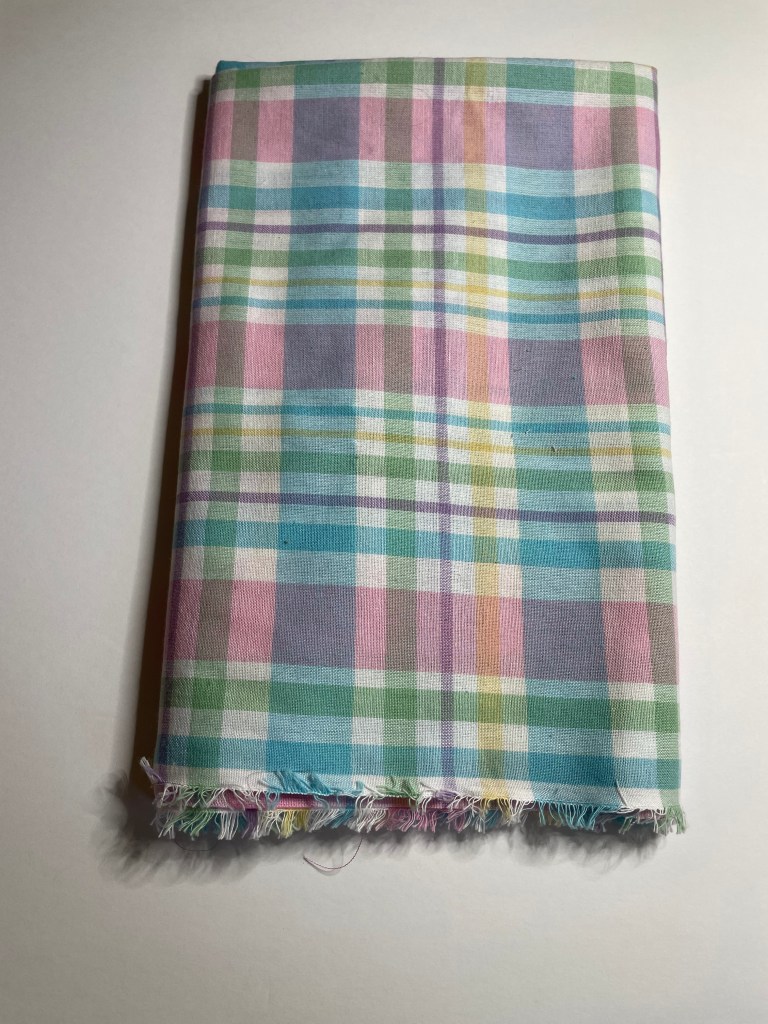
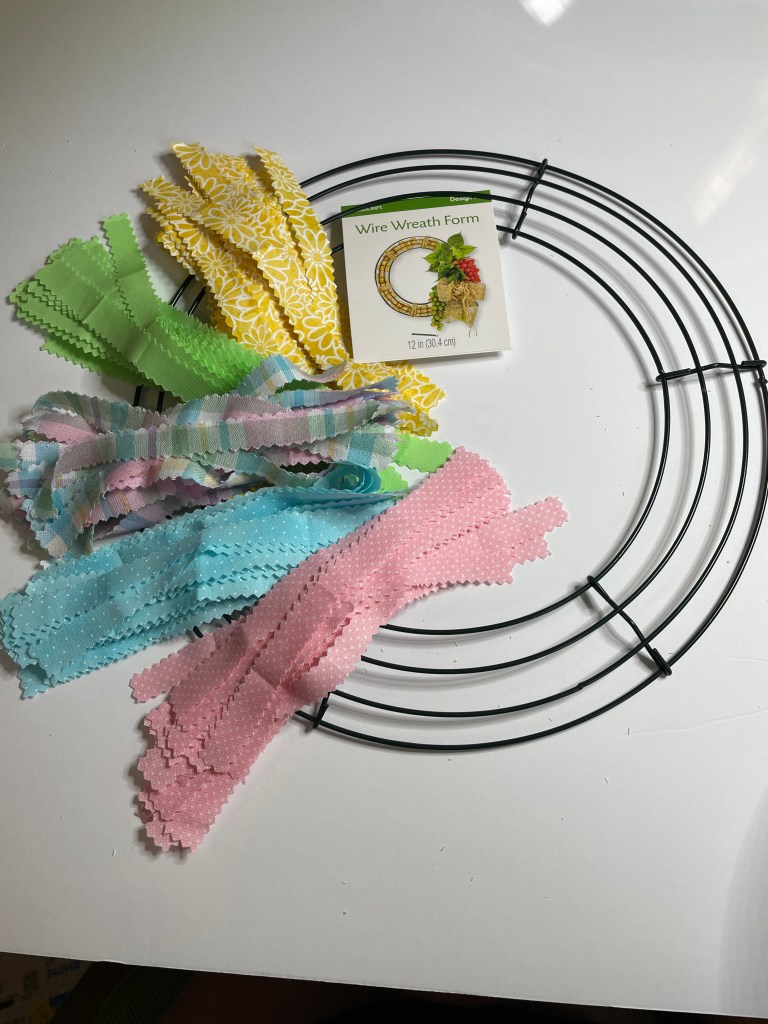
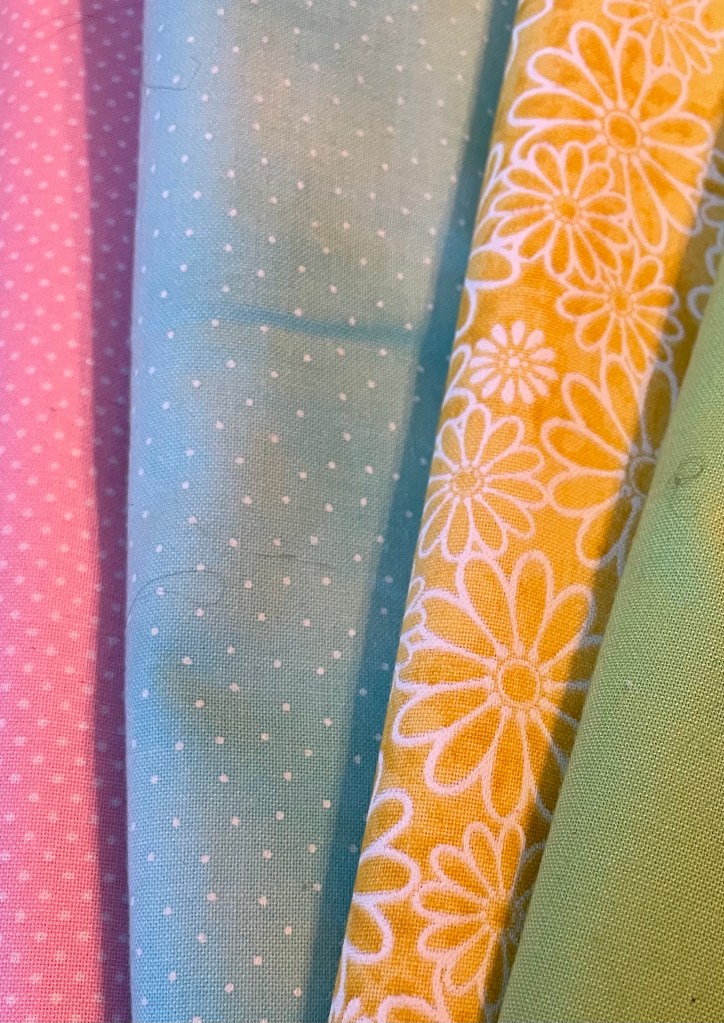
All of the craft projects for Spring and Easter are based on one single fabric selection. The pastel plaid fabric. I just love this so much.
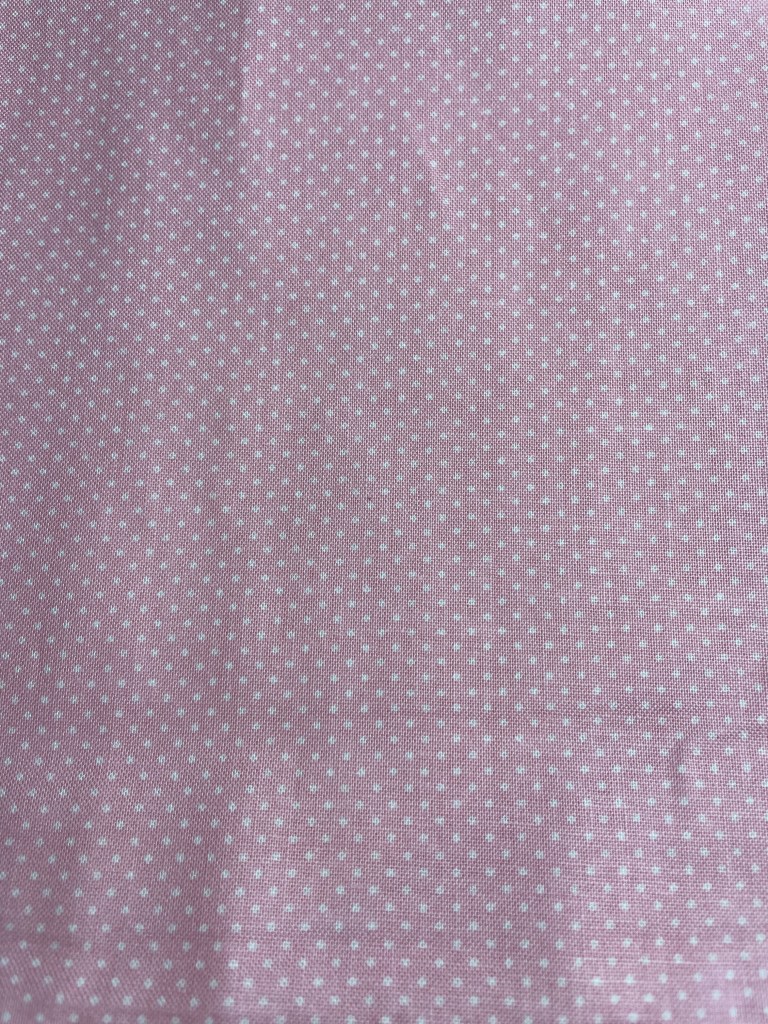
I decided that this rag wreath will have a total of five separate fabrics with the first one being the plaid. I am also adding fabrics in the colors pink, blue, yellow, and green making sure they compliment the plaid fabric. All fabrics were purchased at Hobby Lobby. I found that they have a better selection of pastel selections.
The pink and blue fabrics have white dots on them.
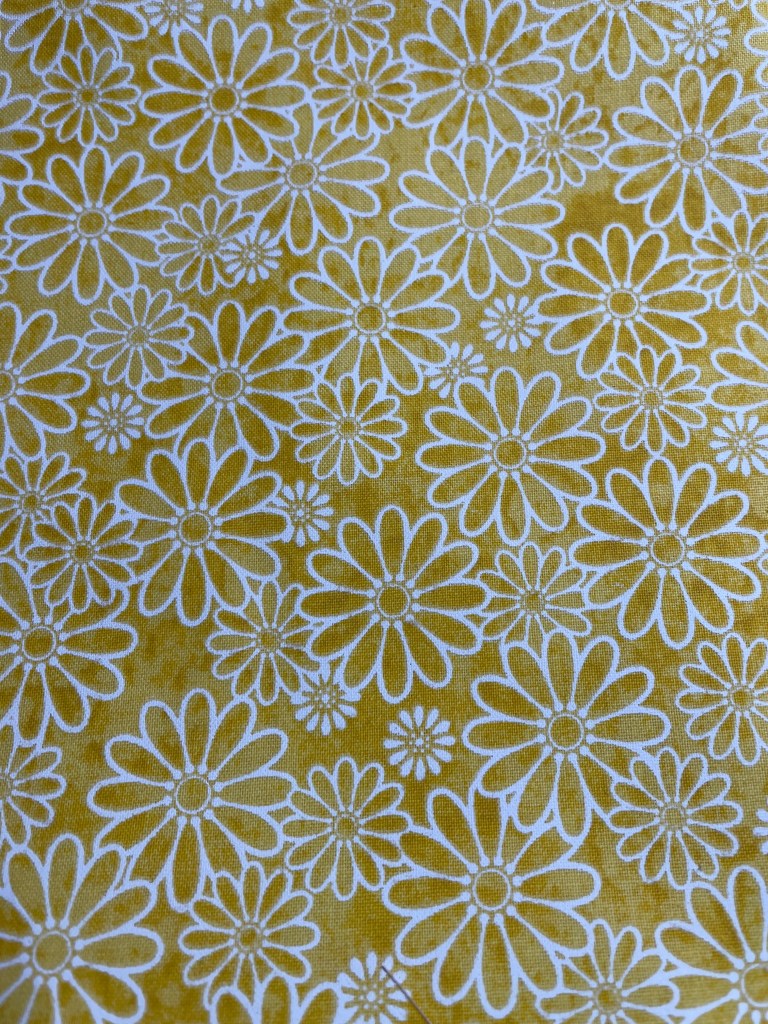
They yellow fabric has white flowers all over it.
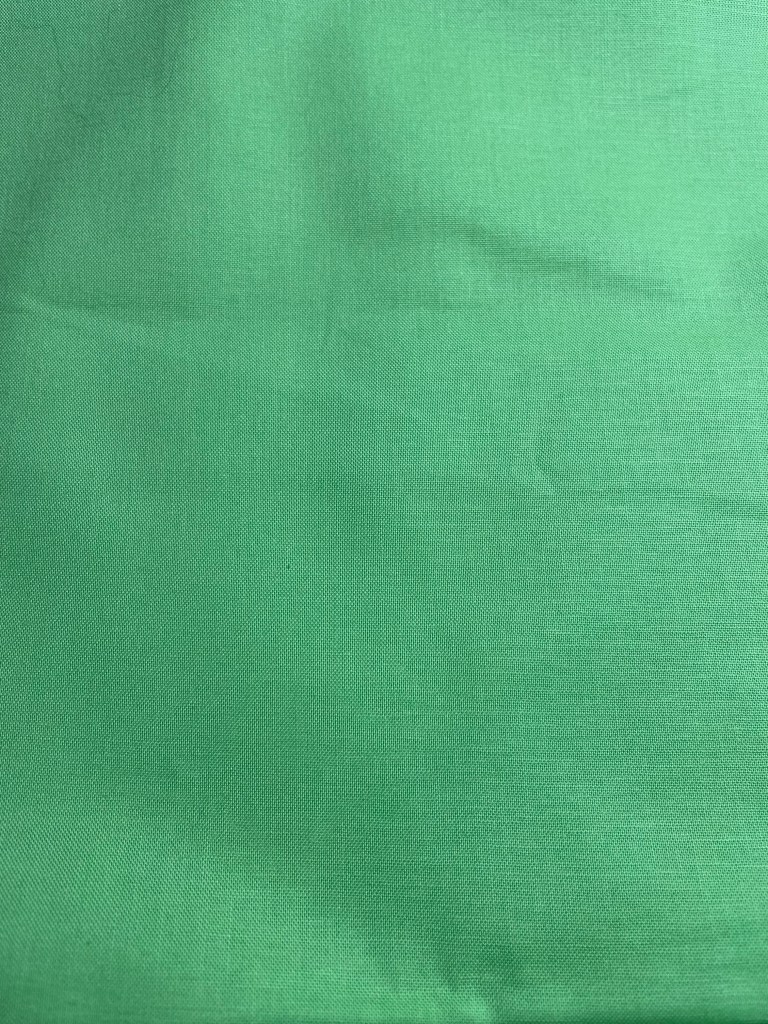
The green is just a plain solid green. I chose this color as I did not want a darker shade of green.
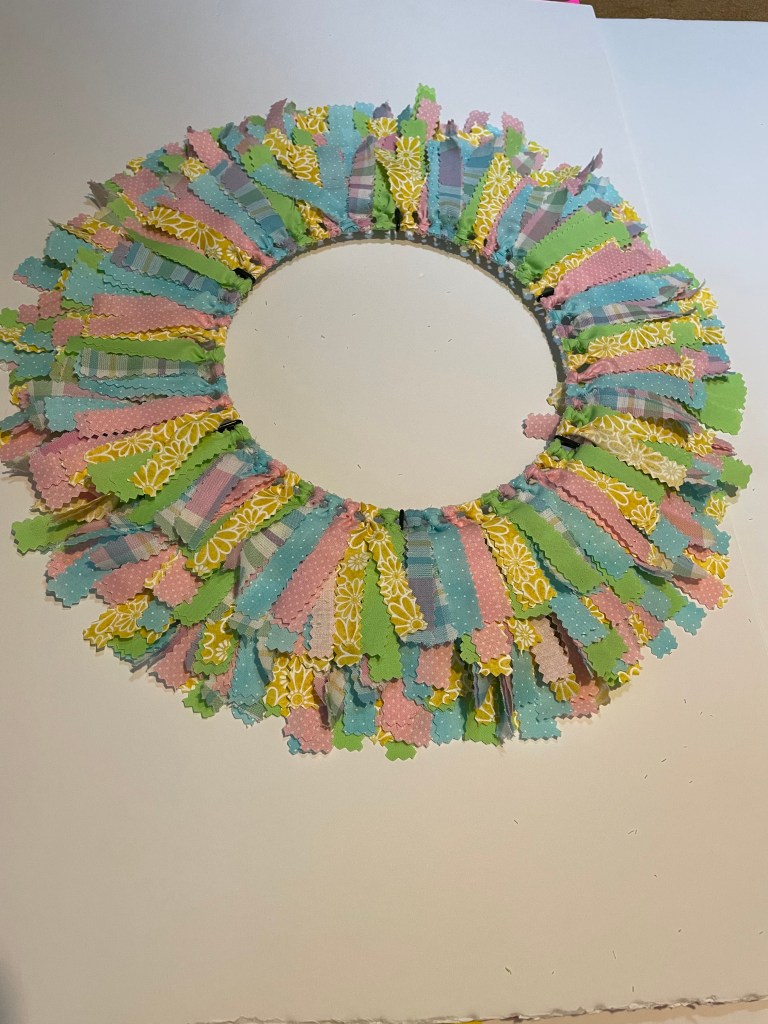
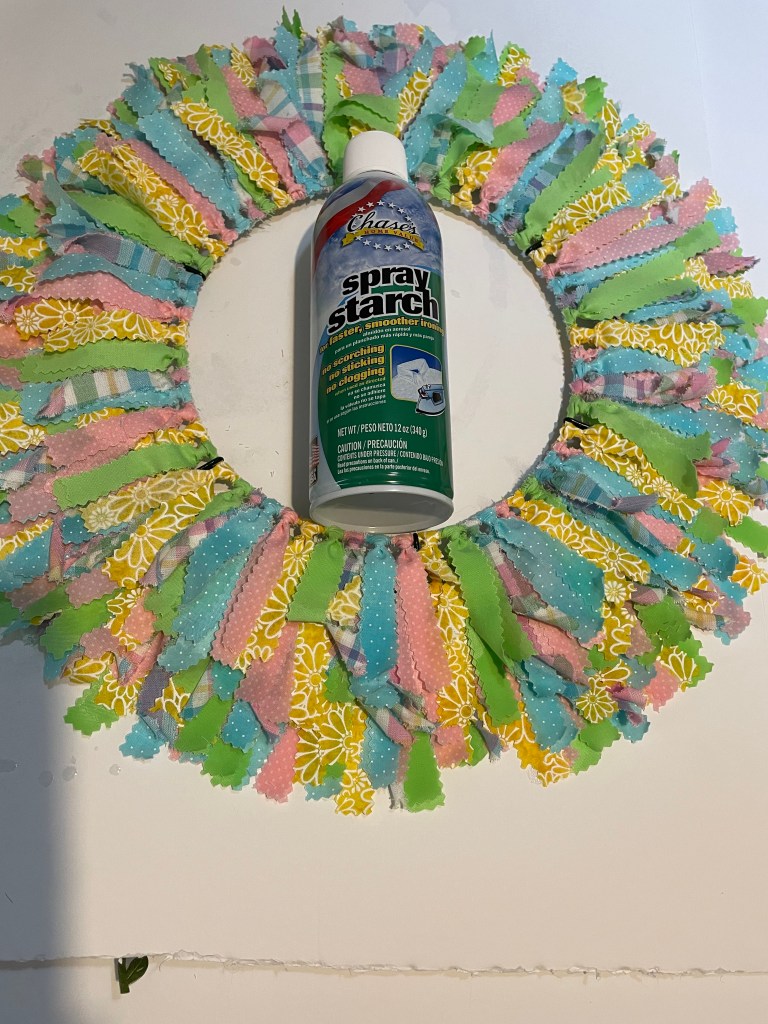
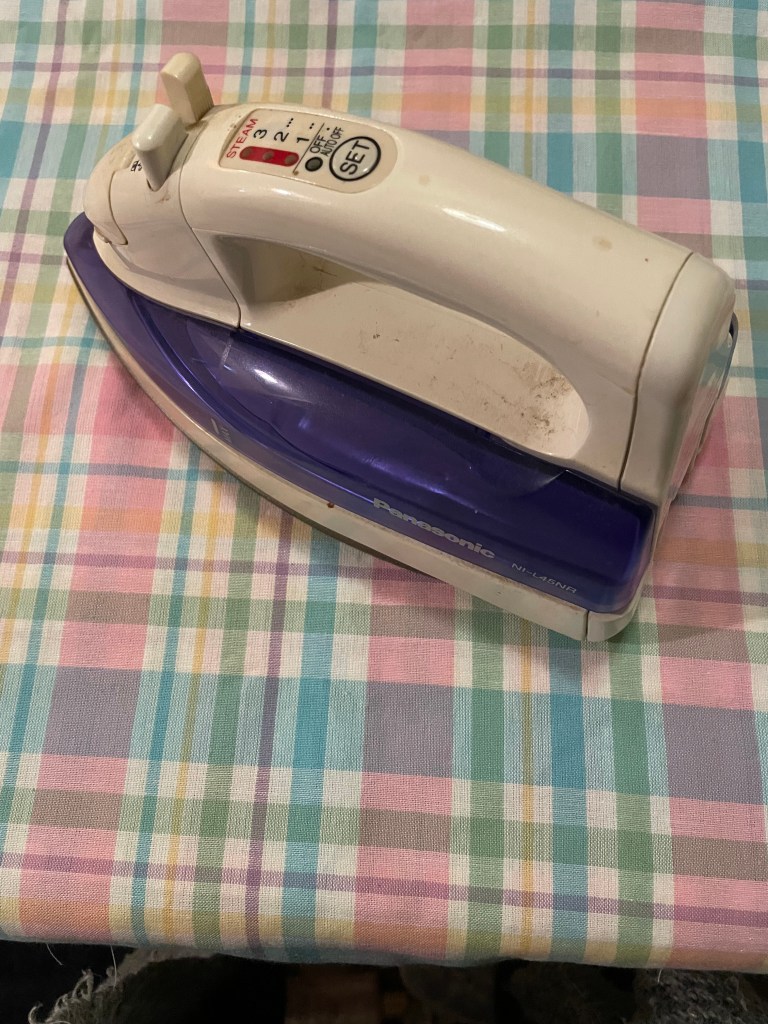
I started the wreath by ironing the fabric before I started cutting them down to size.
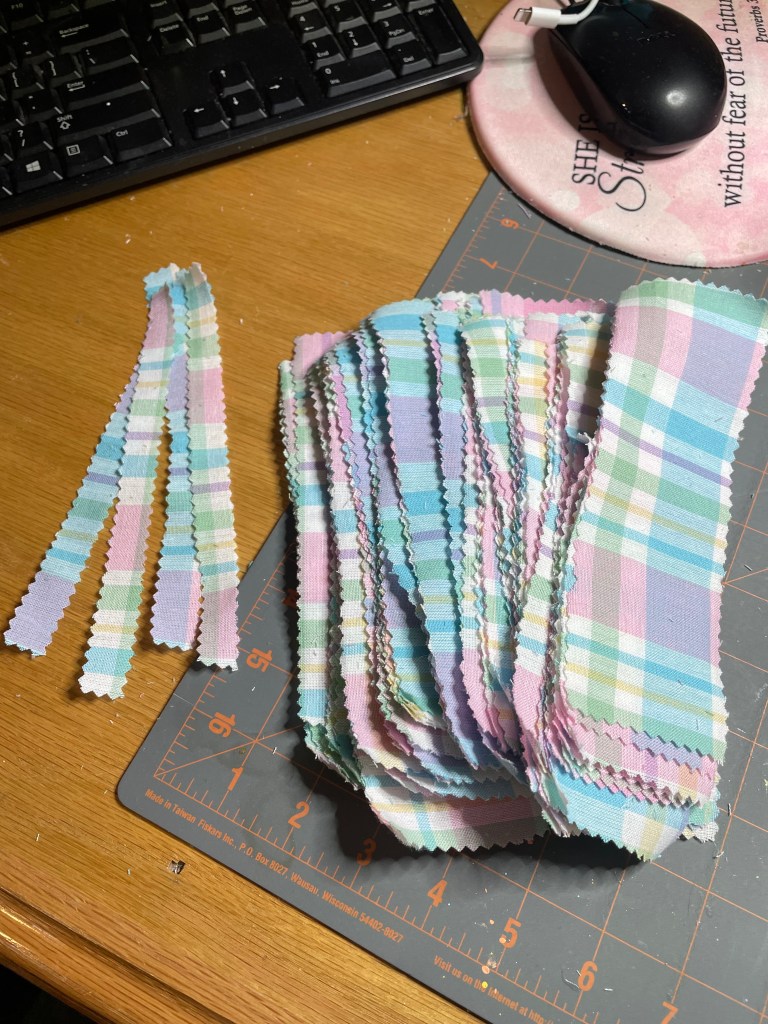
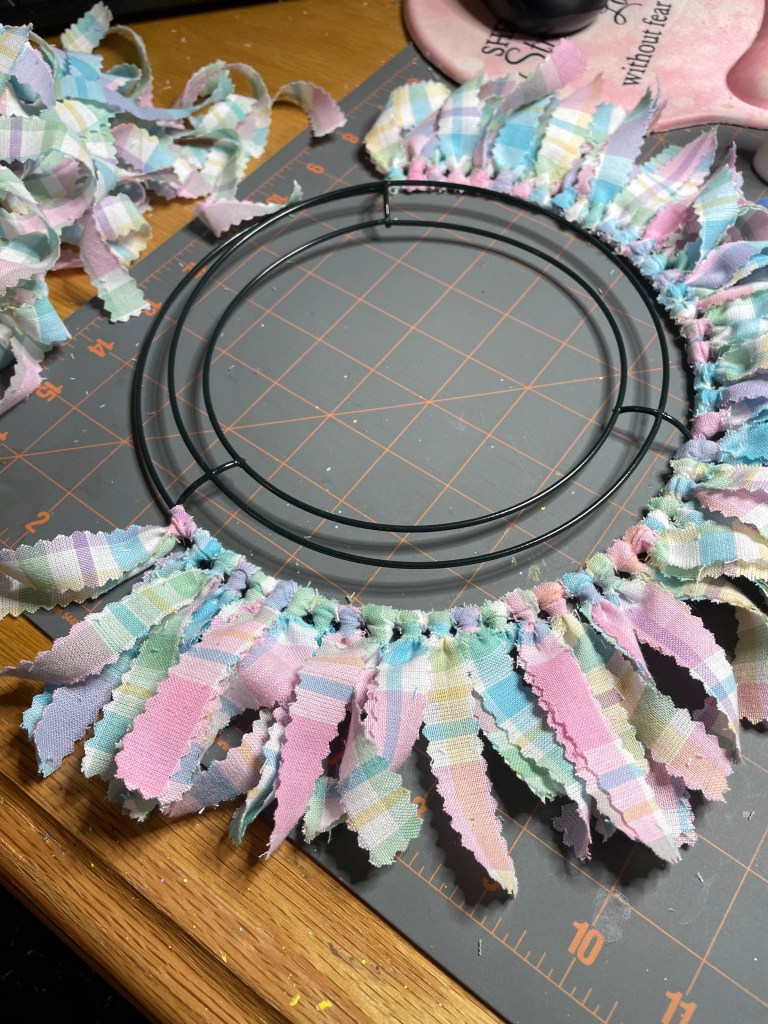
The final size of the fabric strips is 1/2 to 3/4 inch wide by 7 inches long. Fabric strips will be attached to a 12 inch round wire wreath form that I purchased from Walmart.
I started with the outer ring and made my way in.
Now that the wreath is complete, I will spray some spray starch of each section to make the fabric stiff. By doing this, my hope is that the fabric strips will stay in place better. I’m using some spray starch I found at Dollar Tree.
The only thing left to do with this wreath is to put it on my mom’s door. Spring decorations will be going up soon.
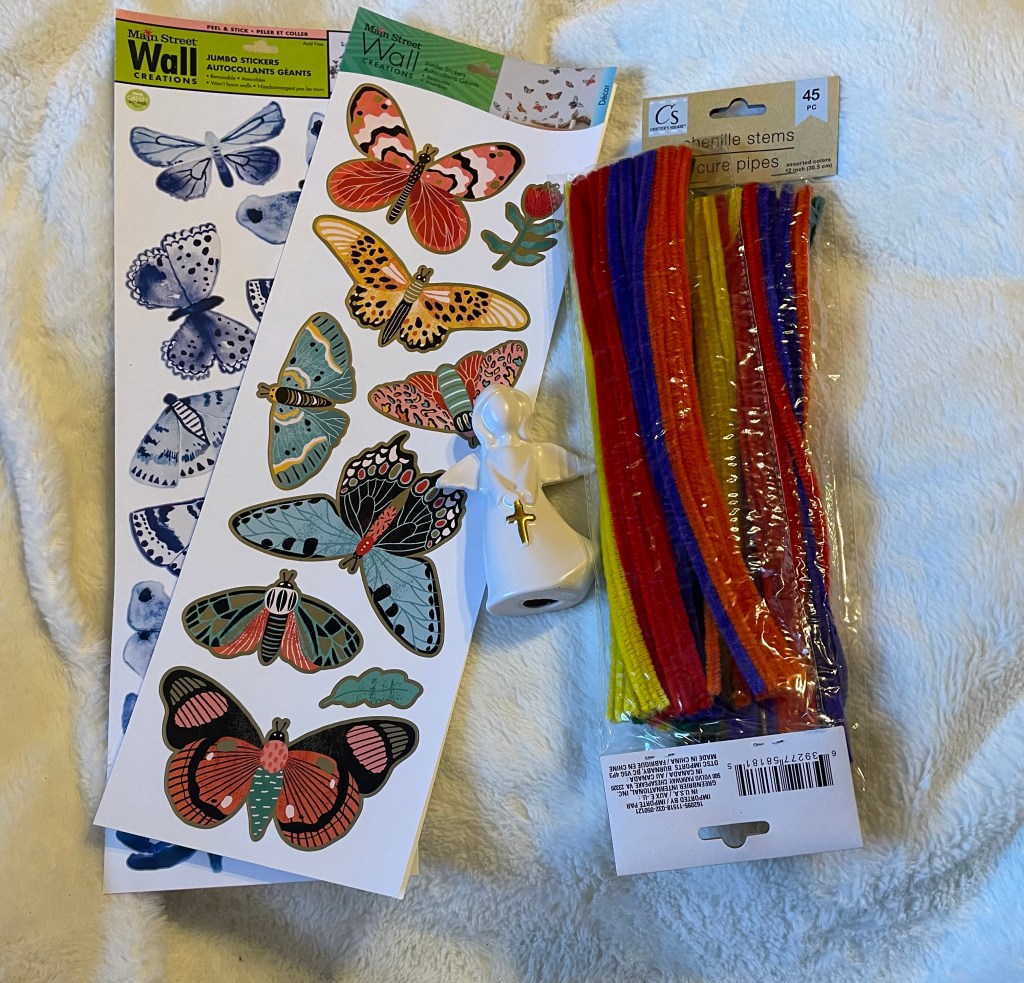
This is a quick and easy project that took very little time to make. I decided that I want to add some butterflies to the garland that I will be putting around my mom’s door as part of her Spring decorations. It is also a very inexpensive project.
The supplies needed for this craft project are:
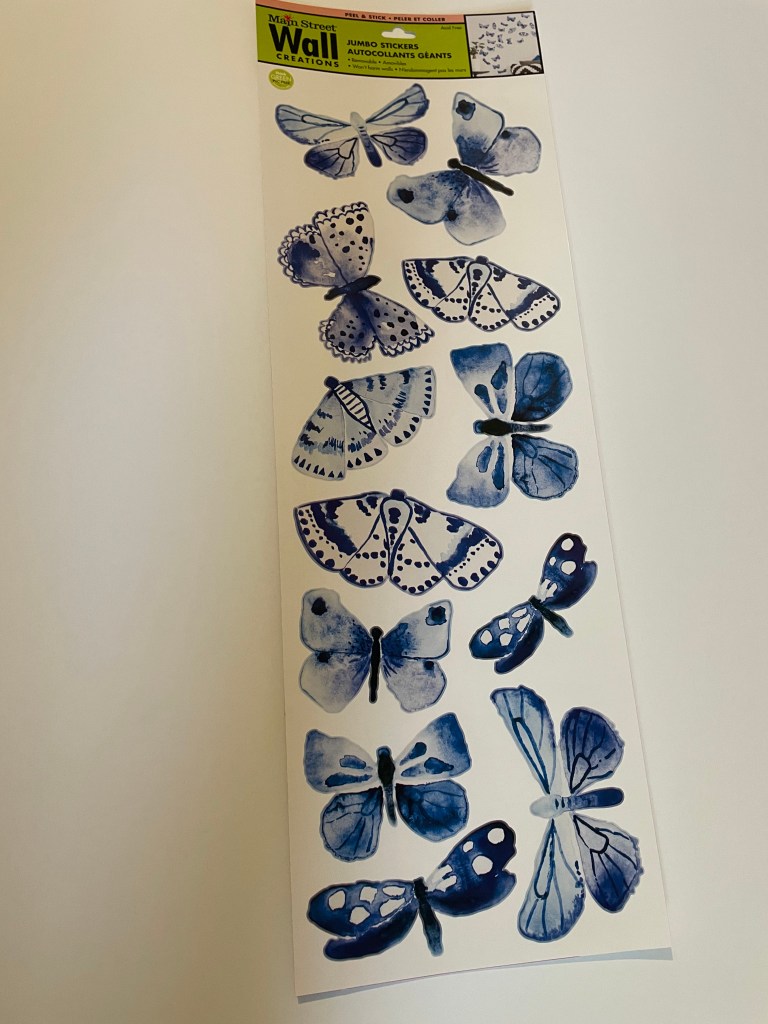
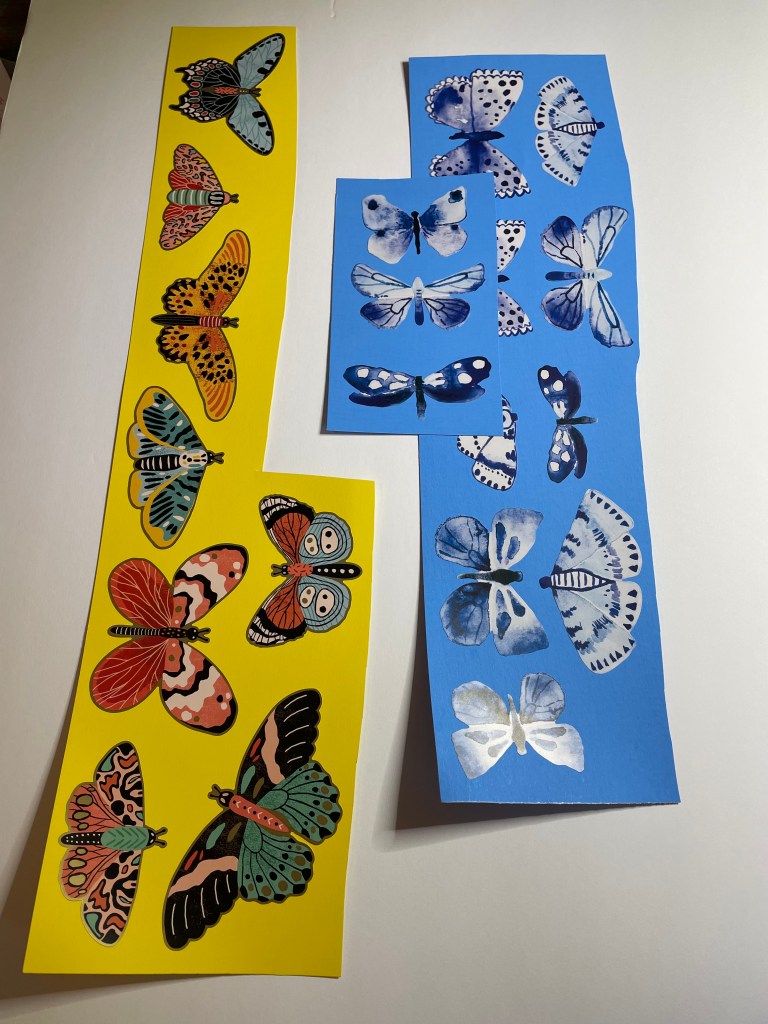
Main Street Wall Creations Jumbo Stickers and poster board that were purchased at Dollar Tree. You will also need E6000 adhesive and chenille stems/pipe cleaners which I had on hand.
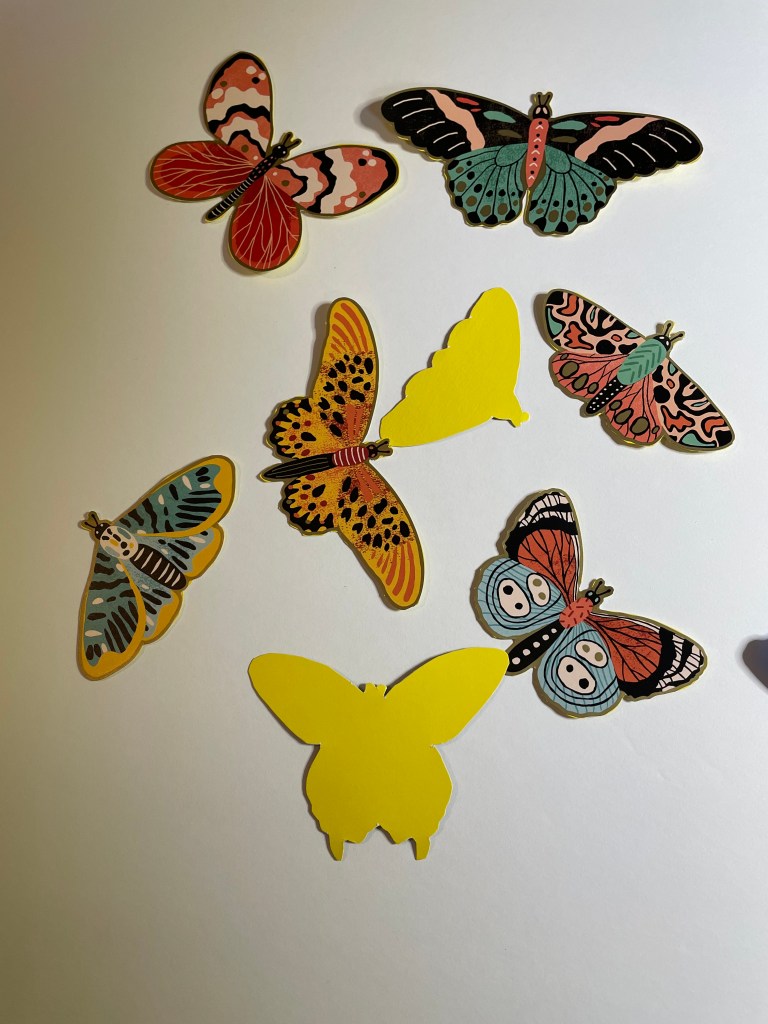
Step one in this project is to attach the butterflies to poster board. This will give them a strong backing.
Step two: cut out the butterflies. Luckily, this does not have to be perfect.
Step three: gather the supplies needed to attach the chenille stems/pipe cleaners to the back of the butterflies. This is something you probably have already done.
Step four: fold the chenille stems/pipe cleaners in half. Add a generous amount of E6000 to the back of the butterfly. Place the chenille stem/pipe cleaner in the E6000 and press down. It is important to press down on the center of the chenille stem/pipe cleaner to make sure the E6000 covers the center of the stem as completely as possible.
Step five: put the butterflies in an area that the will not be disturbed/moved/touched and allow to dry. I allowed mine to dry overnight.
And now they are ready to attach to the garland when it is time to decorate my mom’s door for Spring.
Now it is time to start working on the next craft project for mom’s spring decorations. I wonder what it will be!
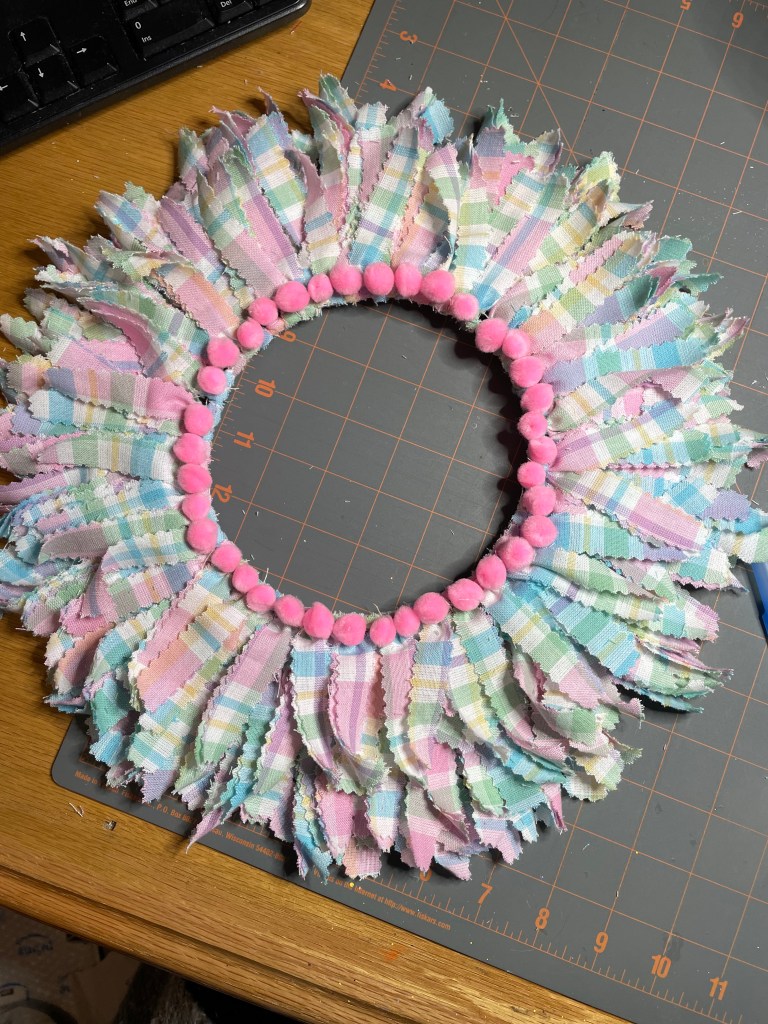
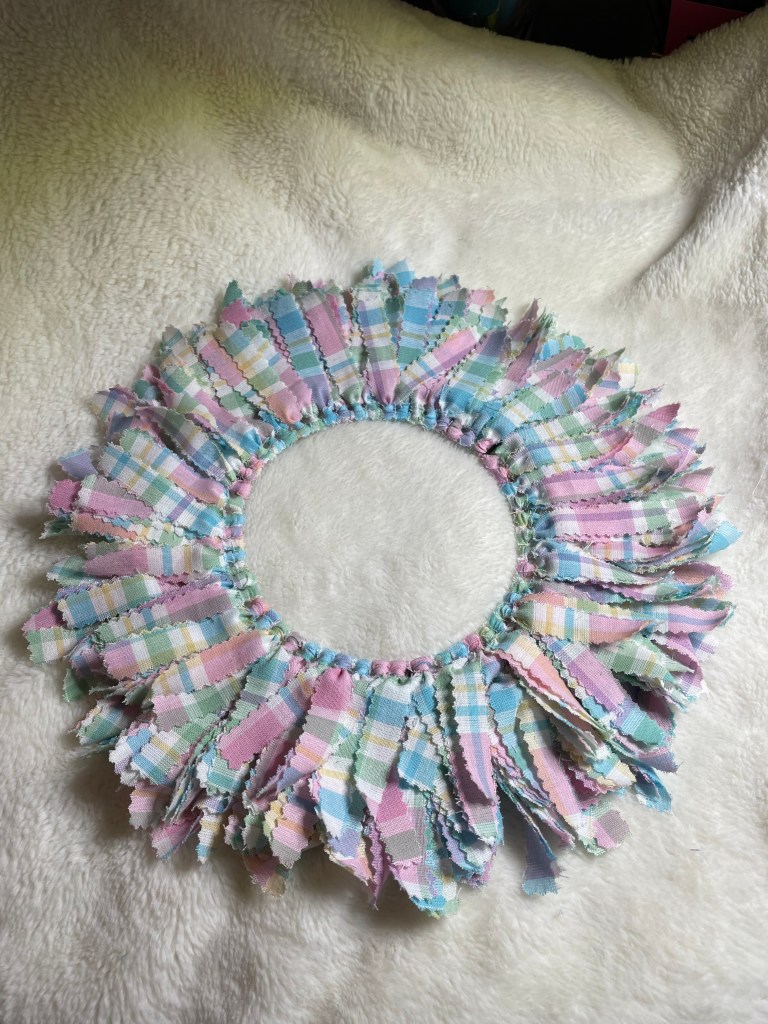
I really enjoy making rag wreaths. While thinking about the decorations I would be using for mom’s door, I decided I would do so pre-decorating decorations to put around the door area. Since I have made the small spring sign, I decided that she would need a small wreath as well.
I decided on one fabric that reminds me of spring and Easter that I found at Hobby Lobby. I will be using an eight inch round wire wreath form that I purchased at Dollar Tree.
I started by ironing the fabric.
Once this was done, I cut the fabric into 1/2 to 3/4 inch by 7 inch strips. I find this is the perfect size that works best for me. Each fabric was attached using the larks head knot starting with the outer ring and moving inward.
I actually kept track of the number of strips used for this project. The outer ring has 76 fabric strips, the middle ring has 64 fabric strips, and the inner ring has 55 fabric strips. So, it too a total of 195 fabric strips to make this wreath.
After all of the strips were put on the wreath form, I was beginning to wonder if it needed a litte something extra. First I thought I could use some pink pom poms, but my granddaughter voted that down. Then I thought maybe I could use the left over letters I had from the sign and spell out the word spring, but she voted that one down as well. So, it was decided to just leave it as is.
I will using spray starch on the wreath before I put it up so help keep the strips in place.
Coming up next is another craft project to add to mom’s Spring decorations.
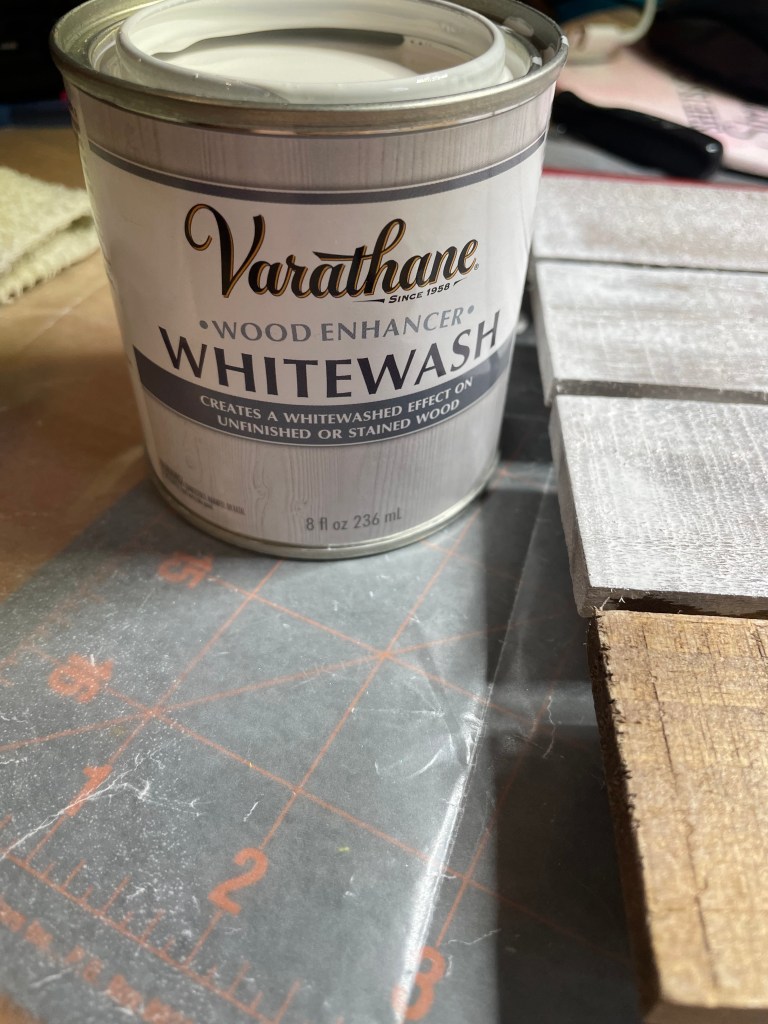
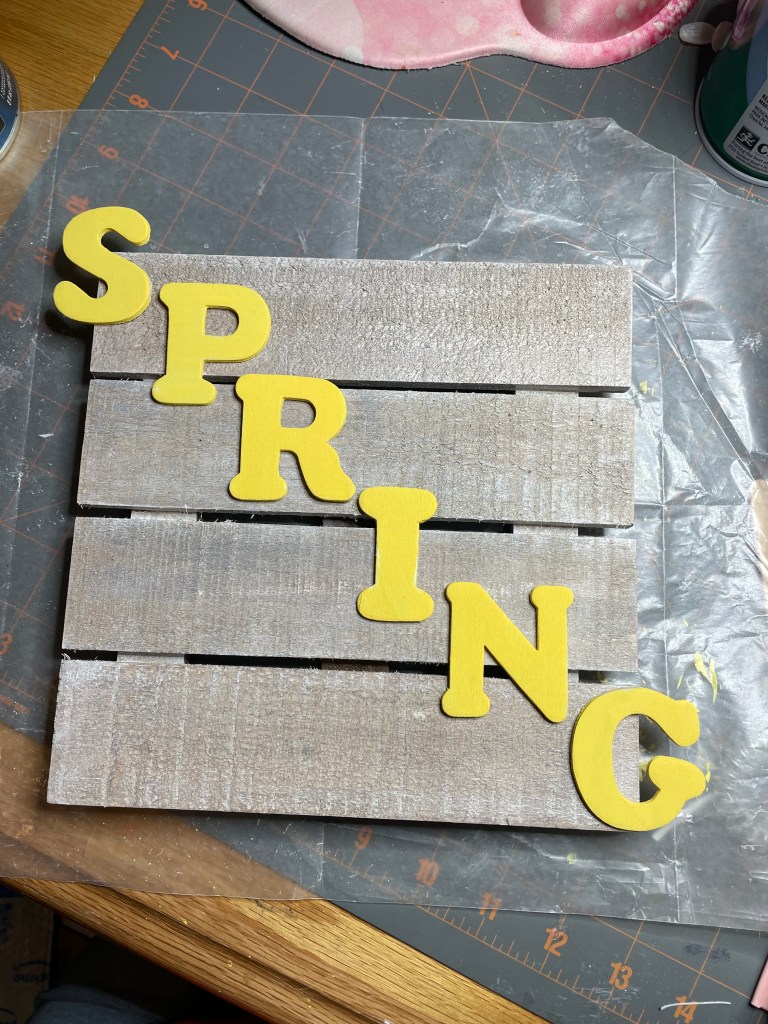
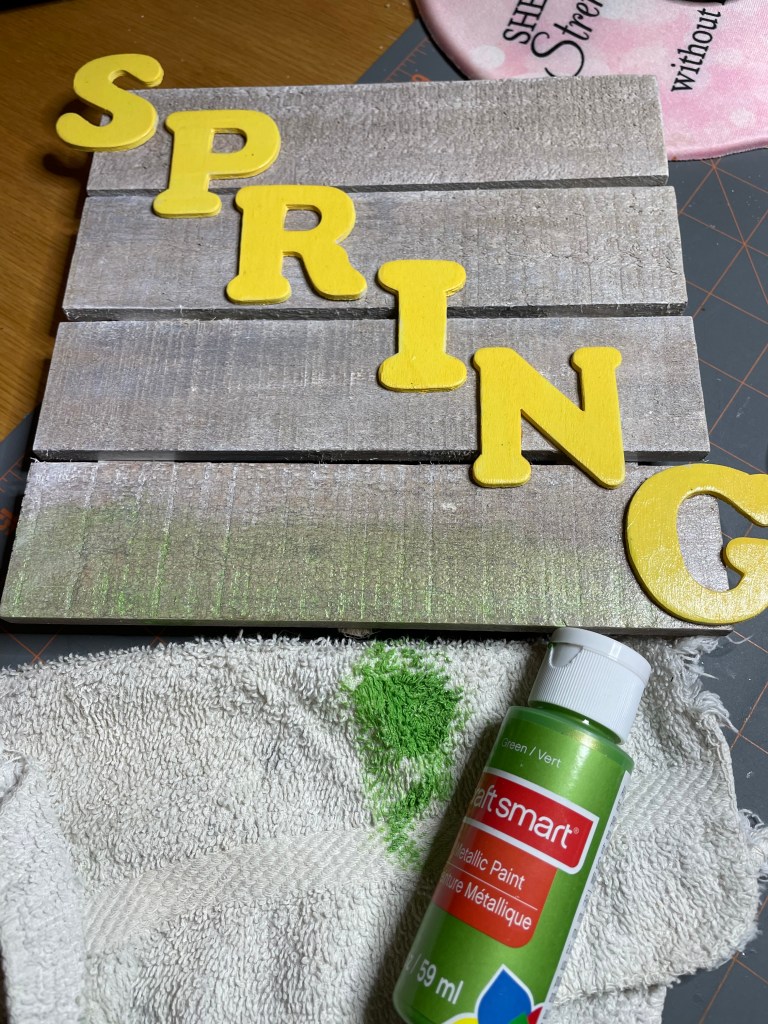
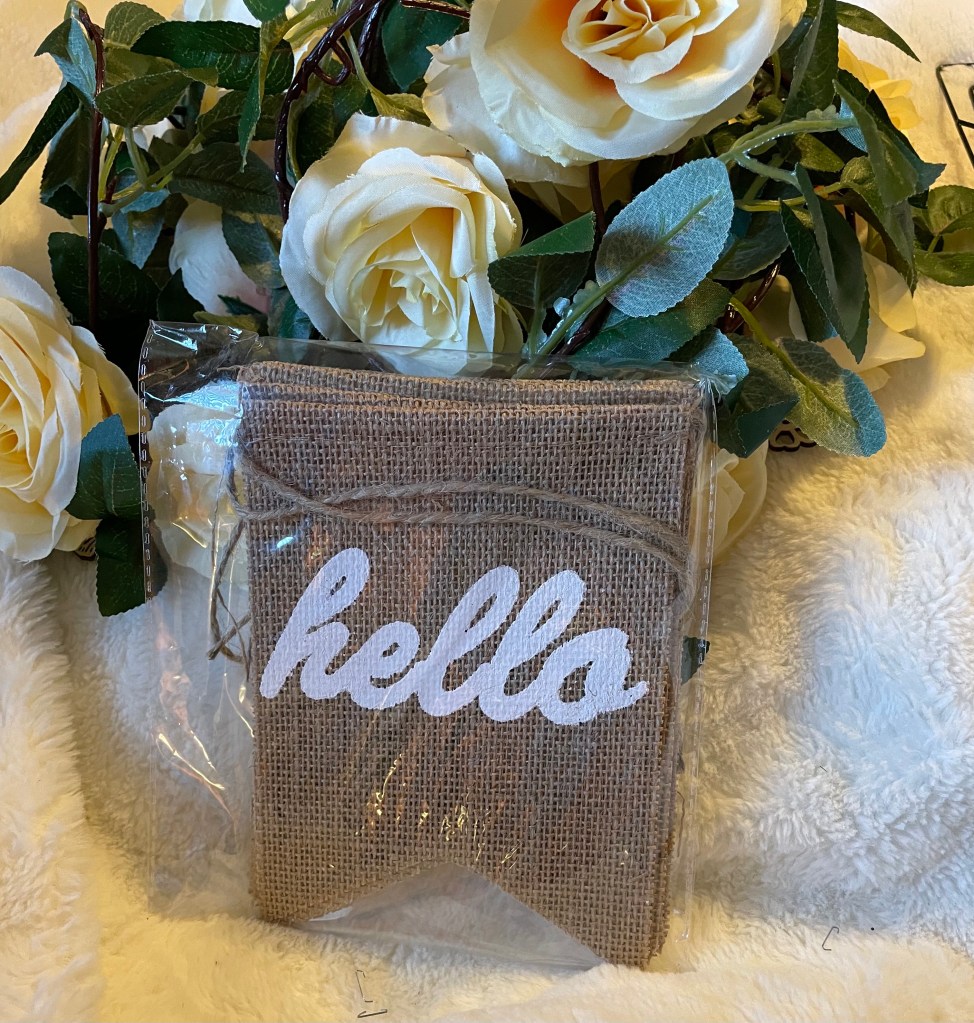
Time to make a pre-decorating sign for my moms door area! I find that it keeps her door area somewhat decorated before we put up the next seasonal/holiday decorations up. This time, I decided on a wood frame that has slats. I found it at Hobby Lobby and it is the perfect size!!!!
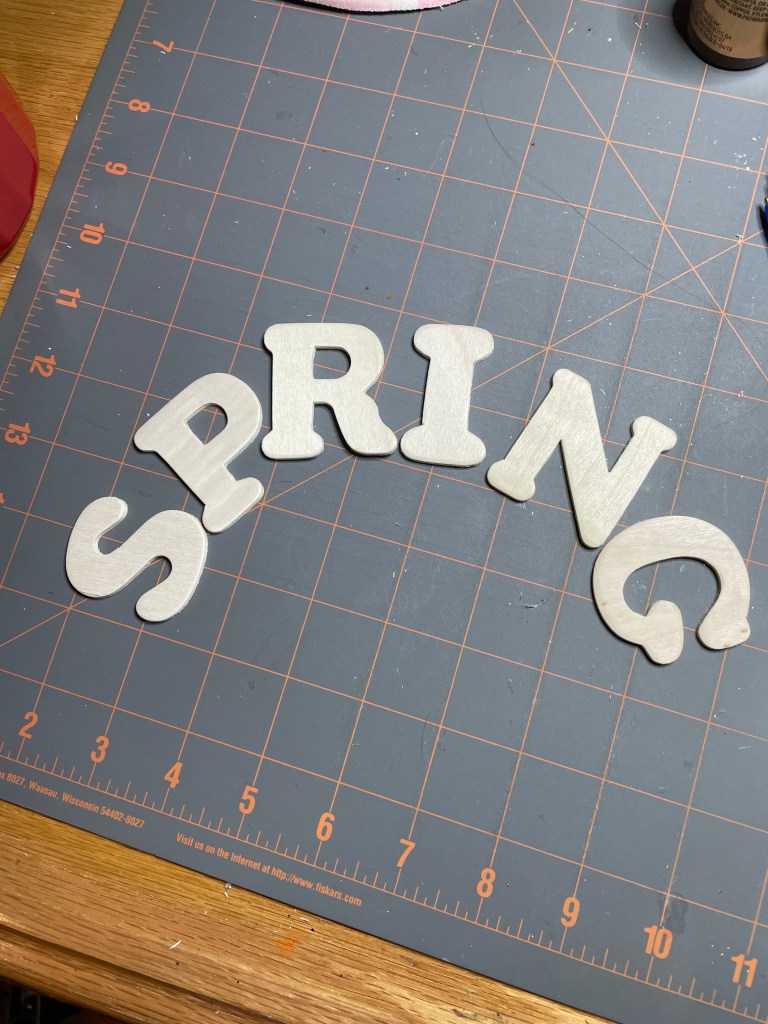
I decided to use Varathane wood enhancer in the color Whitewash to tone down the appearance of the frame and to make sure the embellishments would not get lost in the natural wood tone.
I purchased unfinished wood letters that are 2 inches in height at Hobby Lobby. I initially thought I would spell out SPRINGTIME but once I got everything at home, I realized that would not work and decided I would just spell out SPRING.
I was not sure what color I wanted to paint the letters since there are so many pastel colors that I thought I might use. I even thought about using a different color for each letter.
In the end, I decided to use the color yellow after painting the back of the letters to see how the color would actually look.
Once everything was dry, I attached the letters to the frame using E6000 adhesive. These letters are not going anywhere!
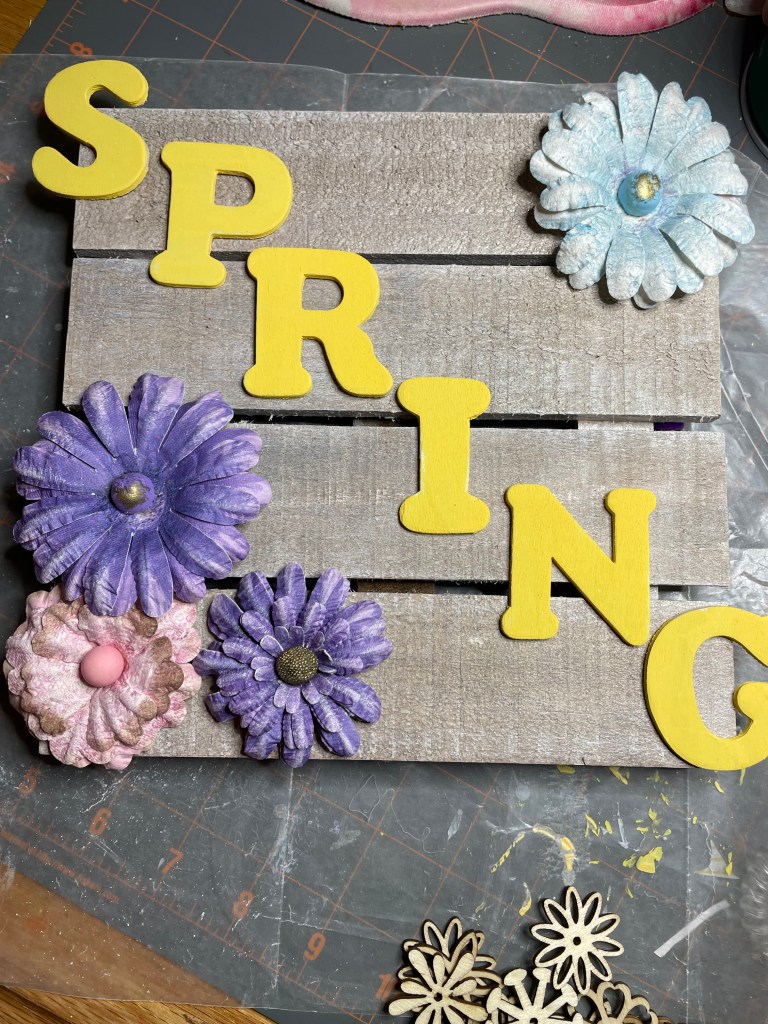
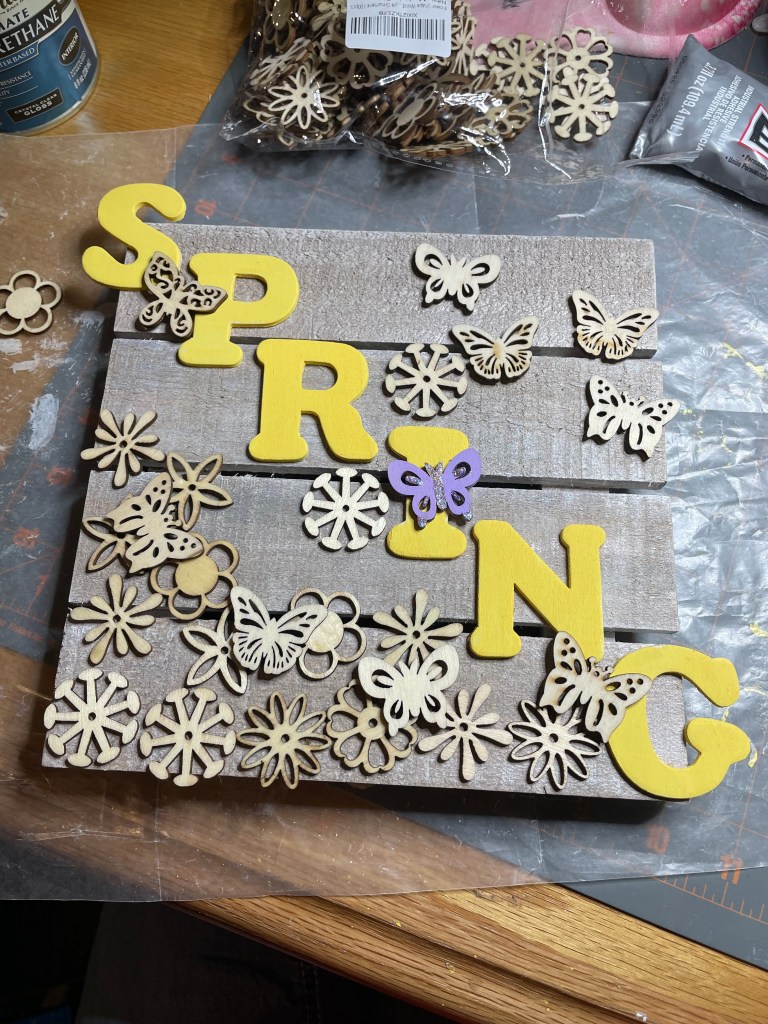
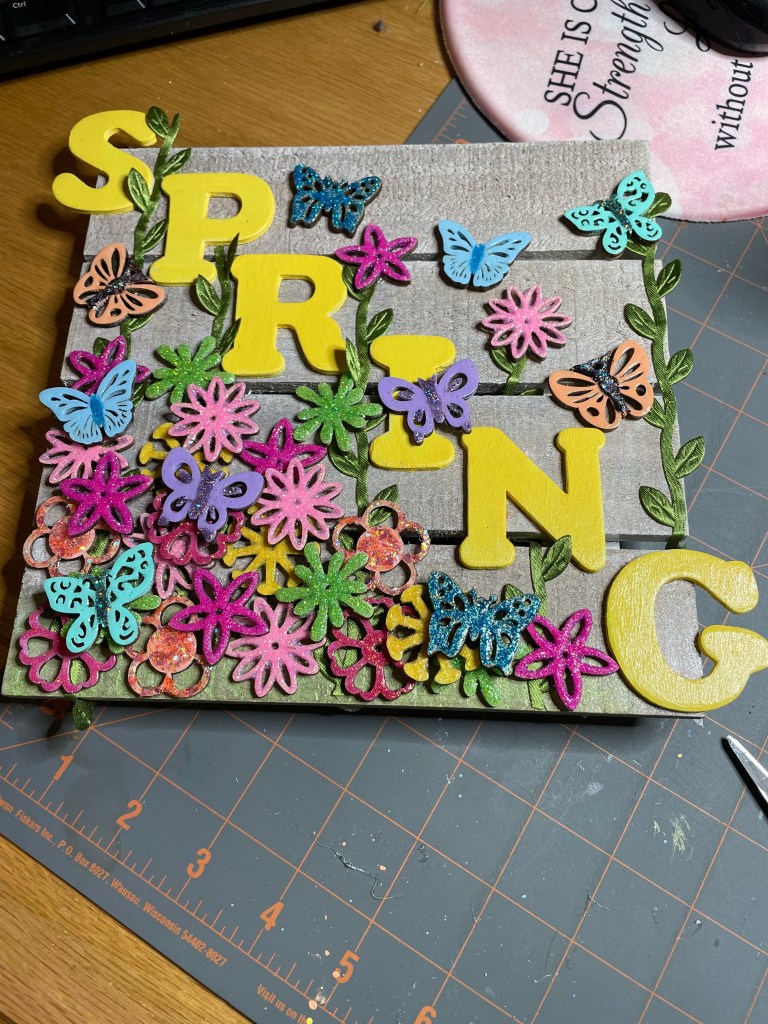
I started second guessing myself about how I wanted to decorate the frame and decided to see what other embellishments I have on hand or recently purchased that I could use.
After some internal debate and discussion with my granddaughter, Victoria, it decided to continue with the wood flowers and butterflies. Figuring out a potential placement was then figured out.
I then got all of the wood flowers and butterflies I had painted together. As a very last minute purchased, I found some green leaf ribbon on Amazon that I thought would work perfect to add vines and a little more character to the frame.
Before I attached the ribbon, flowers, and butterflies, I decided to rub some green metallic paint to the bottom slat of the frame.
It did not take long for the small amount of paint I rubbed onto the frame to dry and in no time at all, the frame was completed.
Now it is time to make another small wreath for the Spring pre-decorations to go with the frame.
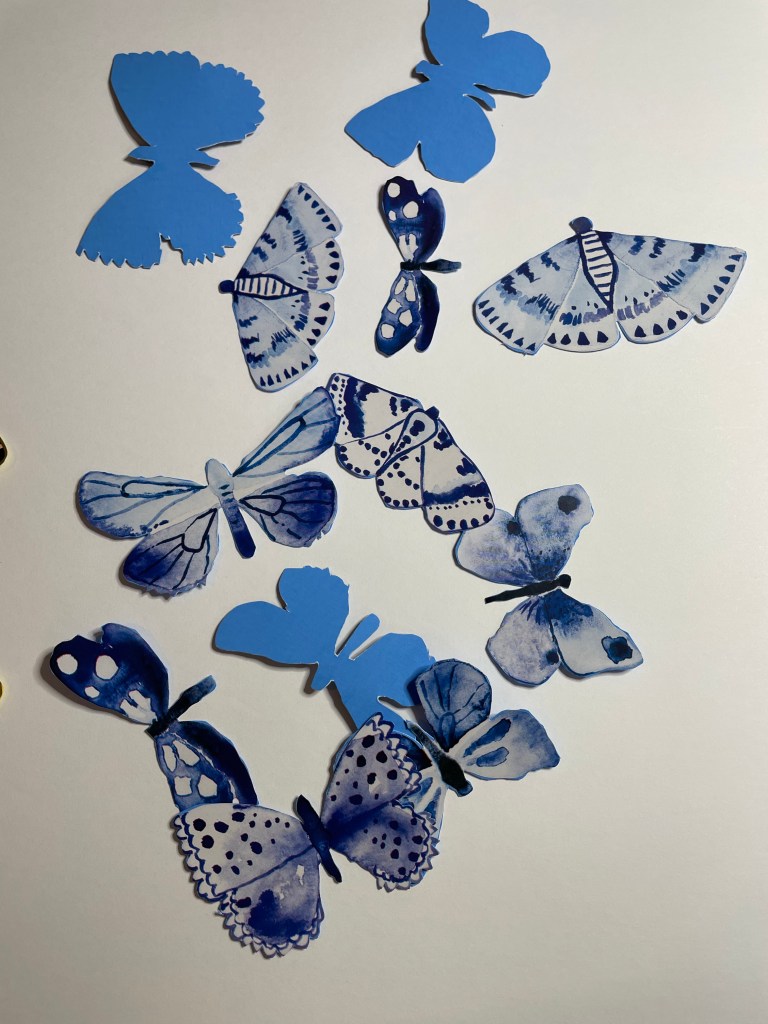
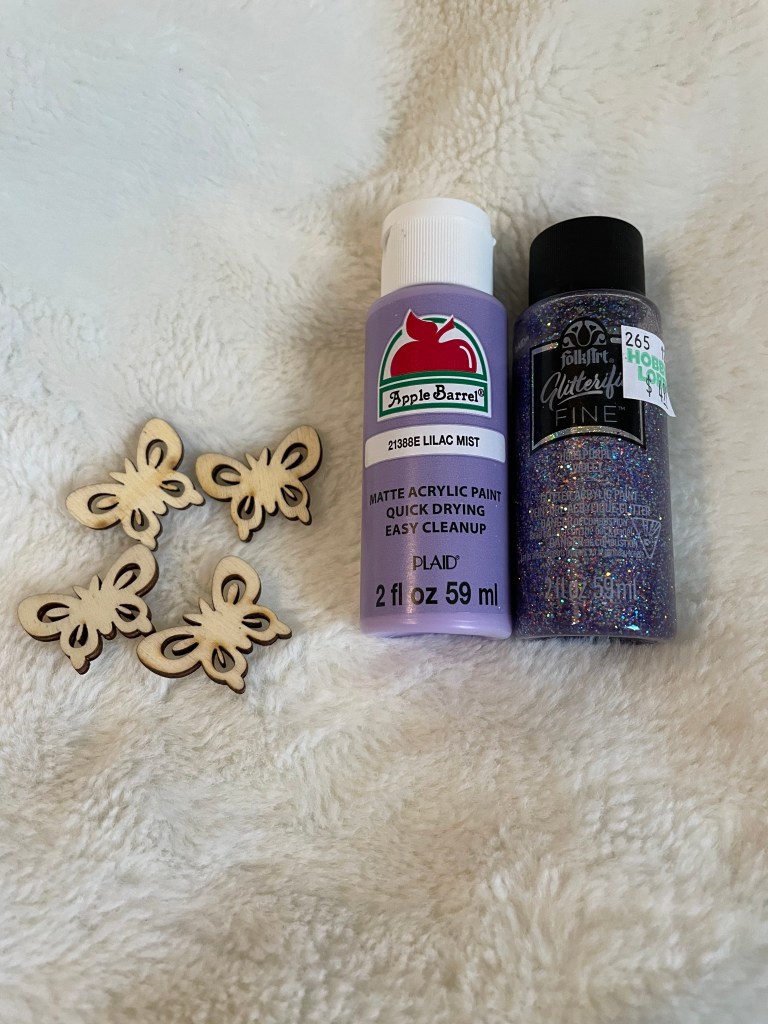
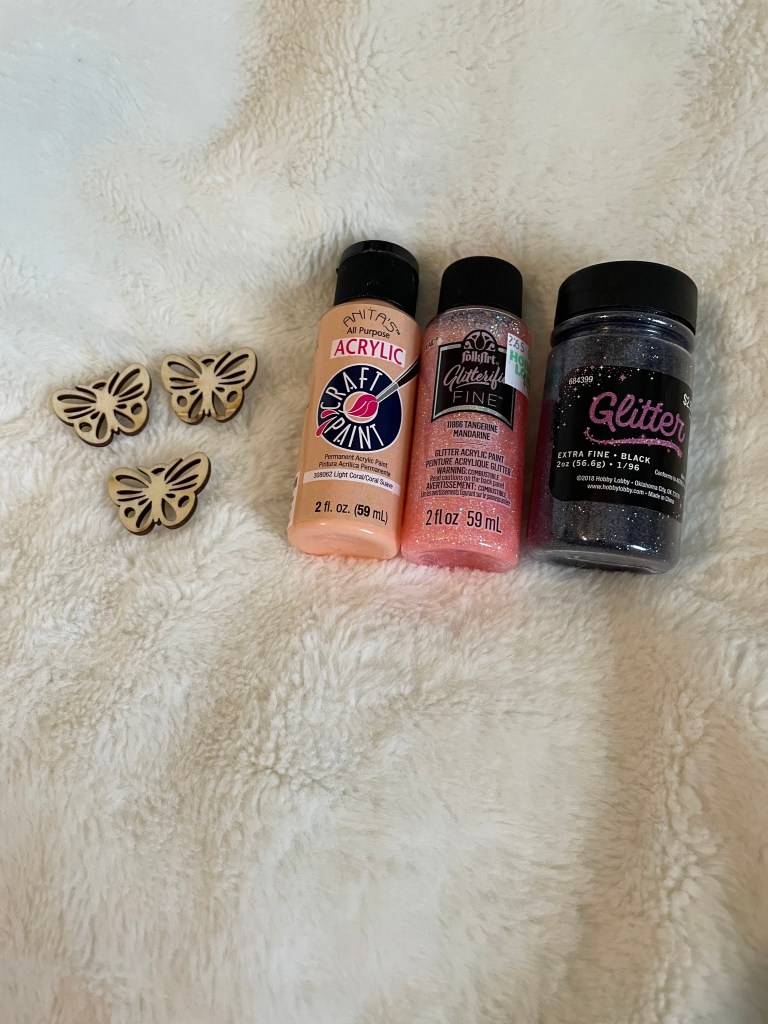
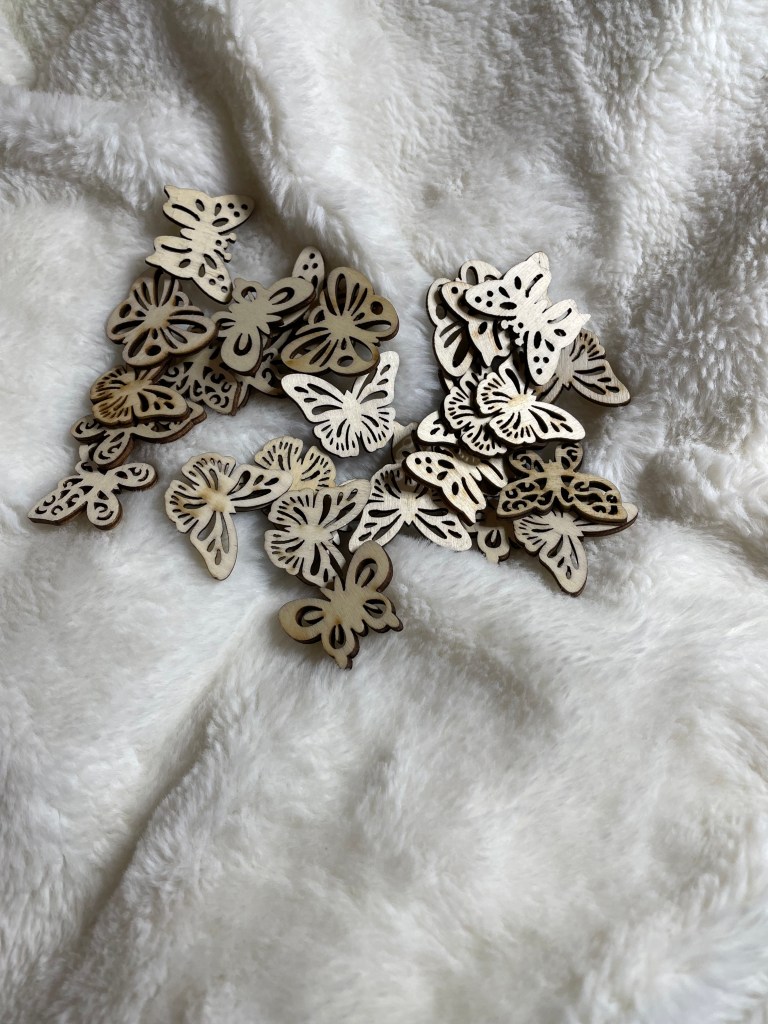
Time to start working on the wood butterflies for the special spring sign I will be making. While working on the wooden flowers, I decided that wooden butterflies would make a nice addition to the sign. I found a package of 50 butterflies on Amazon that I am using for this project. The package contains 5 different butterflies so I will be using 4 of each. I think that I will not be using as many butterflies as I will the flowers.
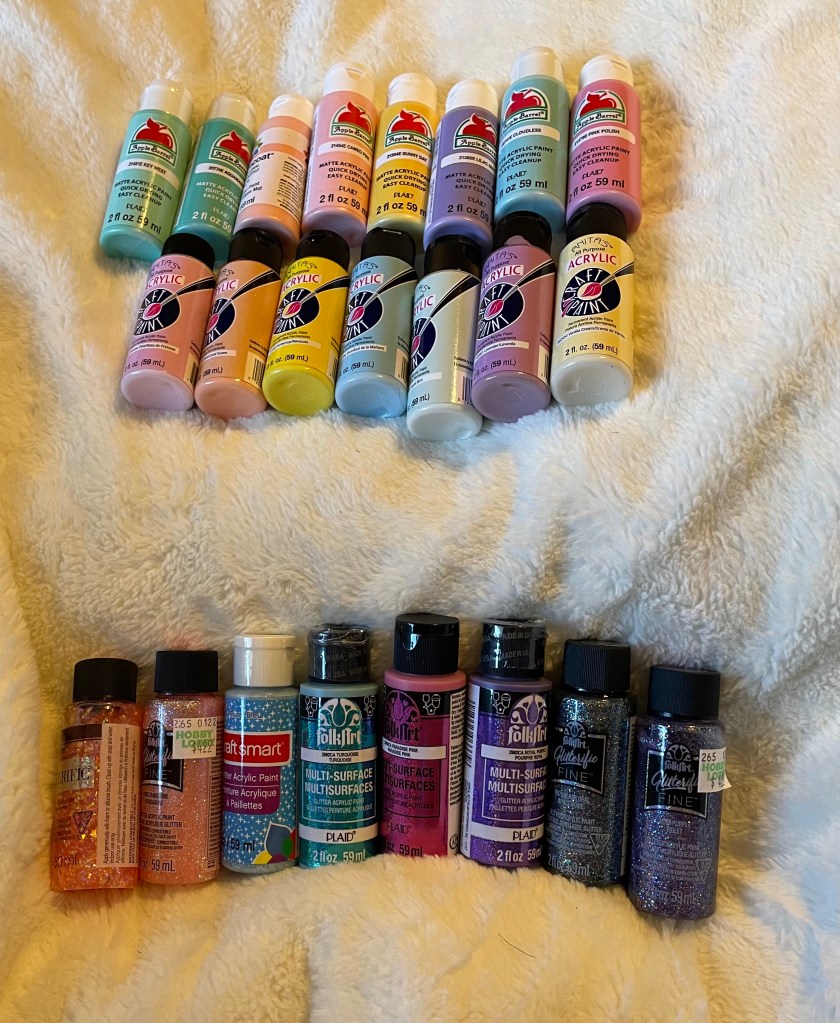
Butterfly number one was created using Apple Barrell matte acrylic paint in Lilac Mist. For the center of the butterfly, I used FolkArt Glitterific FINE in the color Purple.
Butterfly number two was created using Anita’s all purpose acrylic craft paint in the color Light Coral. The center of the butterfly is a combination of Glitterific FINE acrylic paint in the color Tangerine and extra fine glitter in the color black that is from Hobby Lobby.
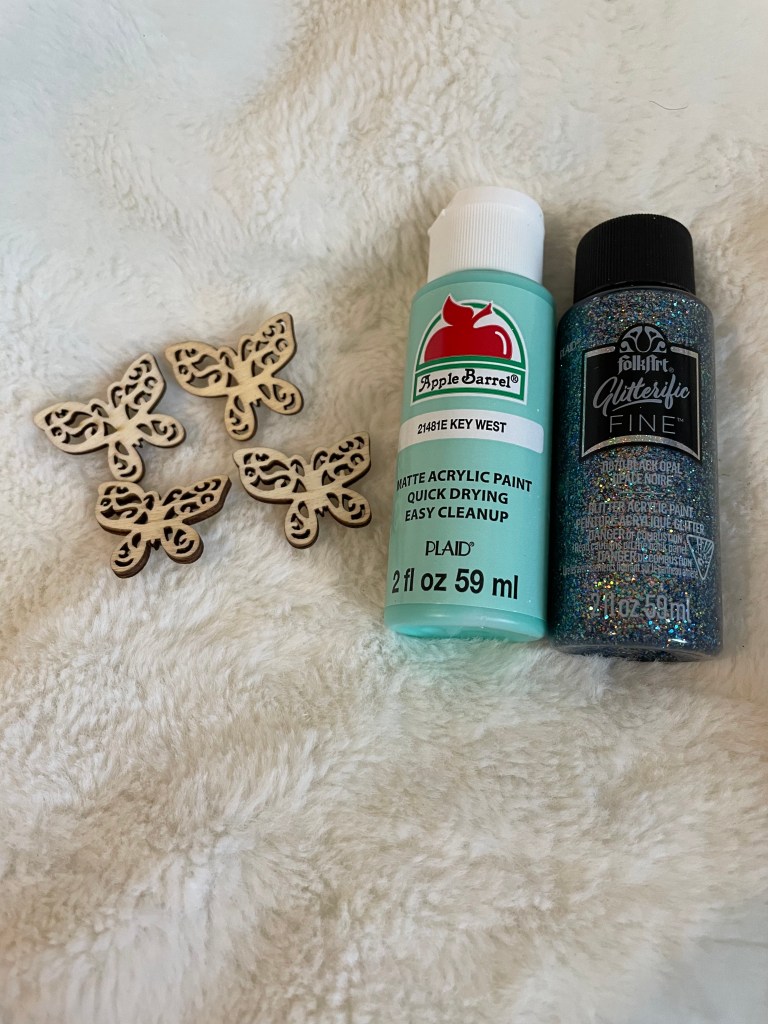
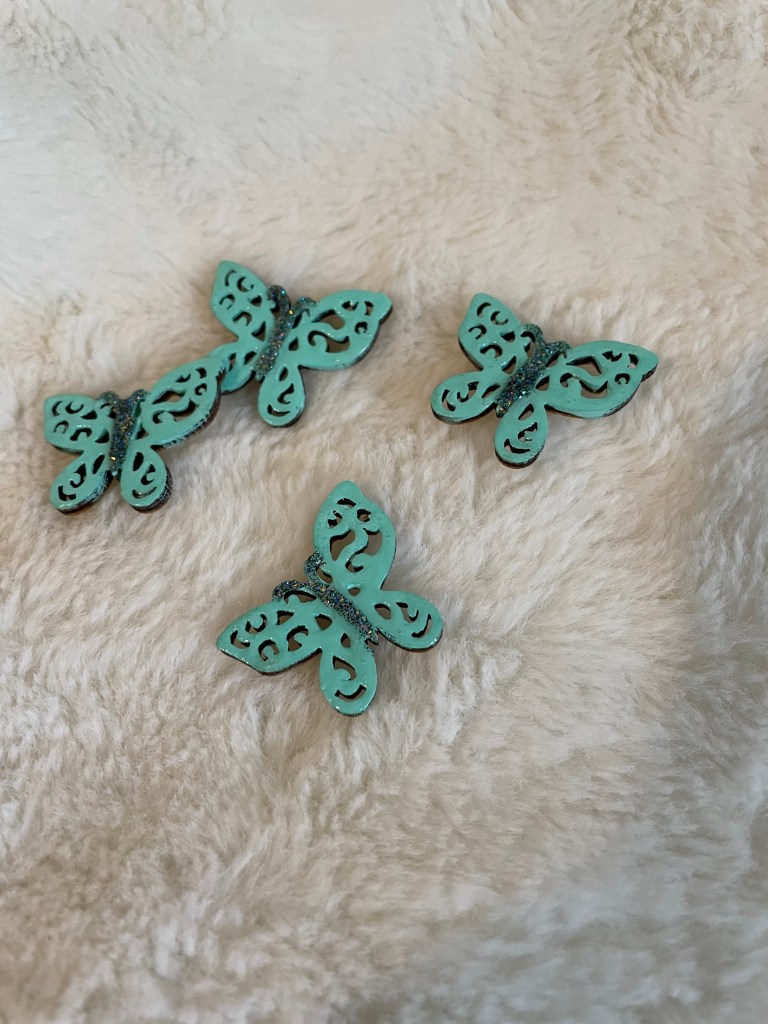
Butterfly number three was created using Apple Barrell matte acrylic paint in the color Key West. For the center of the butterfly I used FolkArt Glitterific FINE acrylic paint in the color Black Opal.
Butterfly number four was created using FolkArt multi-surface glitter acrylic paint in the color Turquoise. I did not do anything with the center of this butterfly as I felt it did not need it.
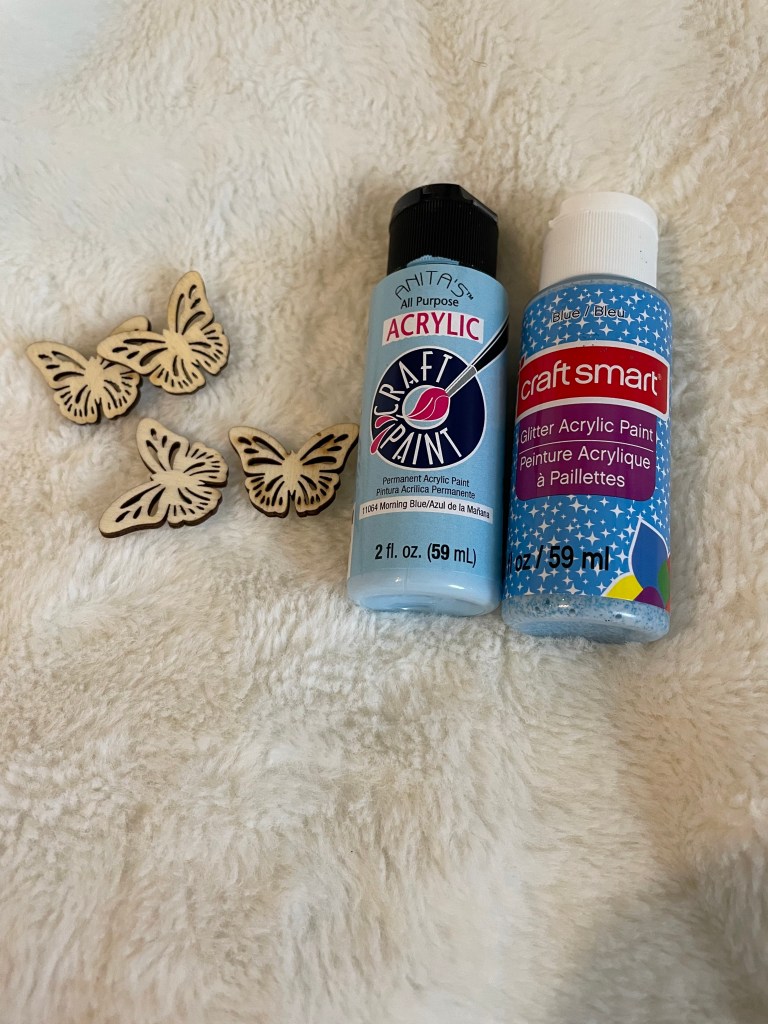
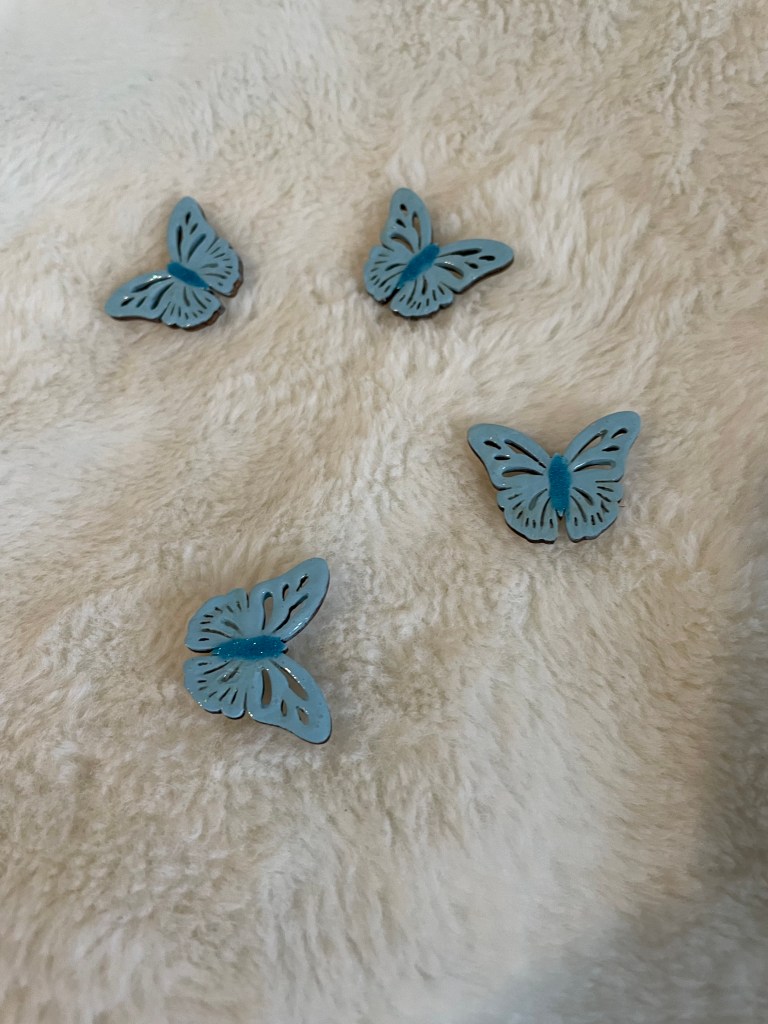
Butterfly number five was created using Anita’s all purpose acrylic craft paint in the color Morning Blue. For the center of this butterfly, I used craft smart glitter acrylic paint in the color Blue.
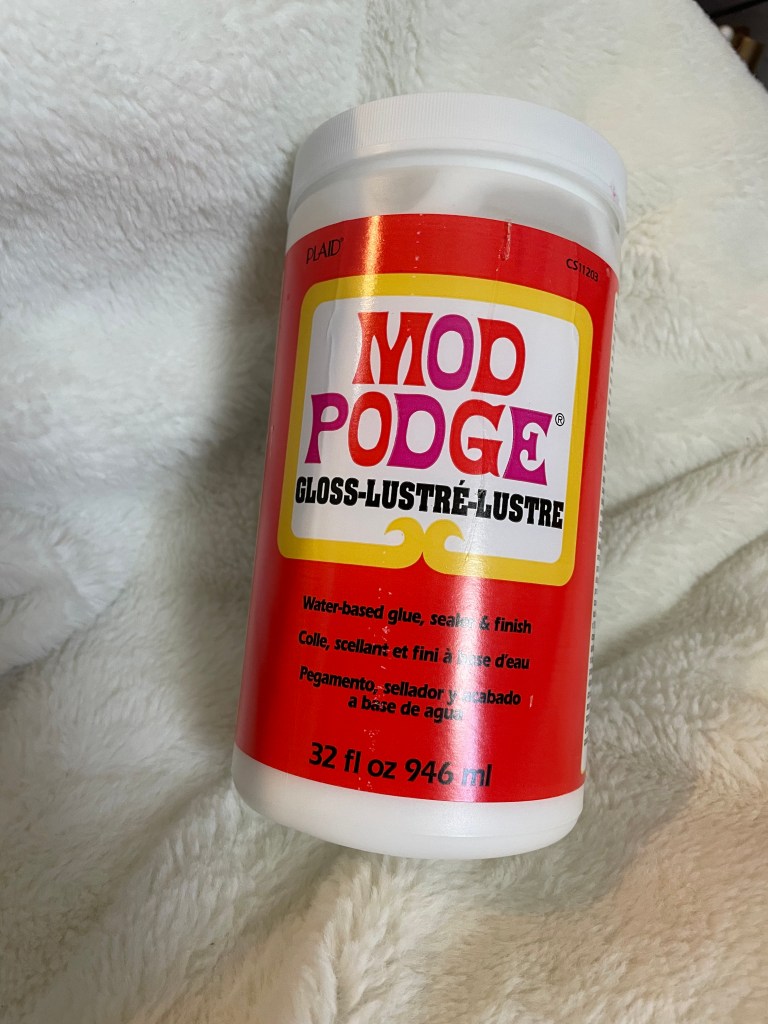
All butterflies were finished off with a generous amount of Mod Podge to make them shine!
Now it is time to add the flowers, butterflies, and some other stuff to the sign!
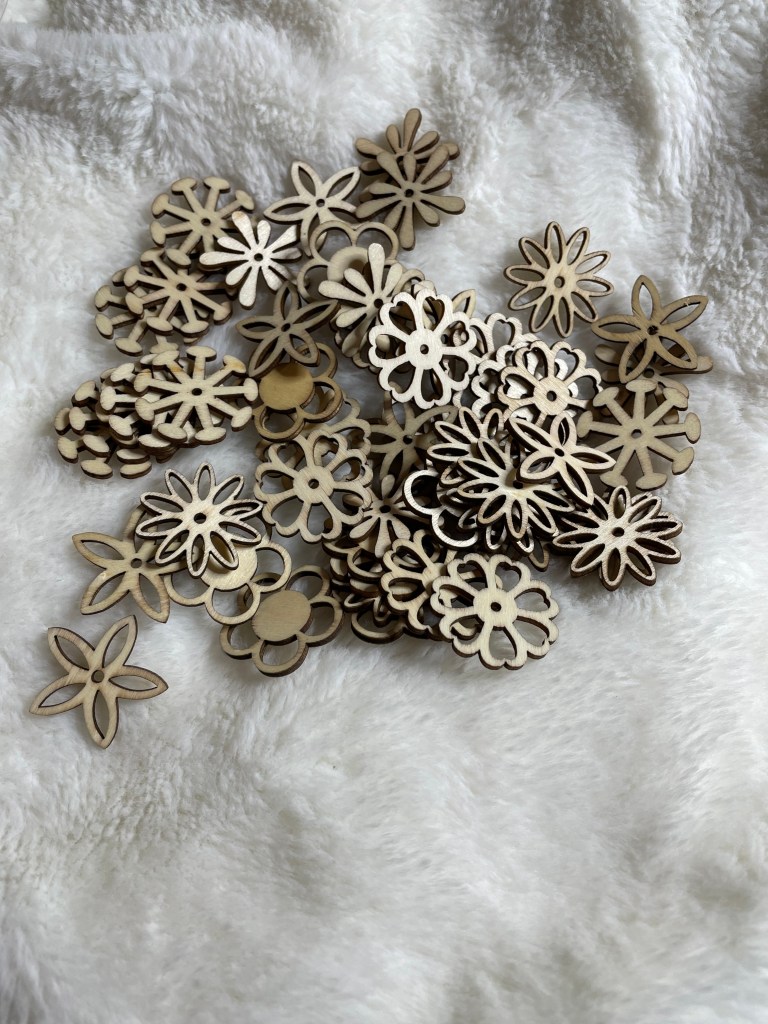
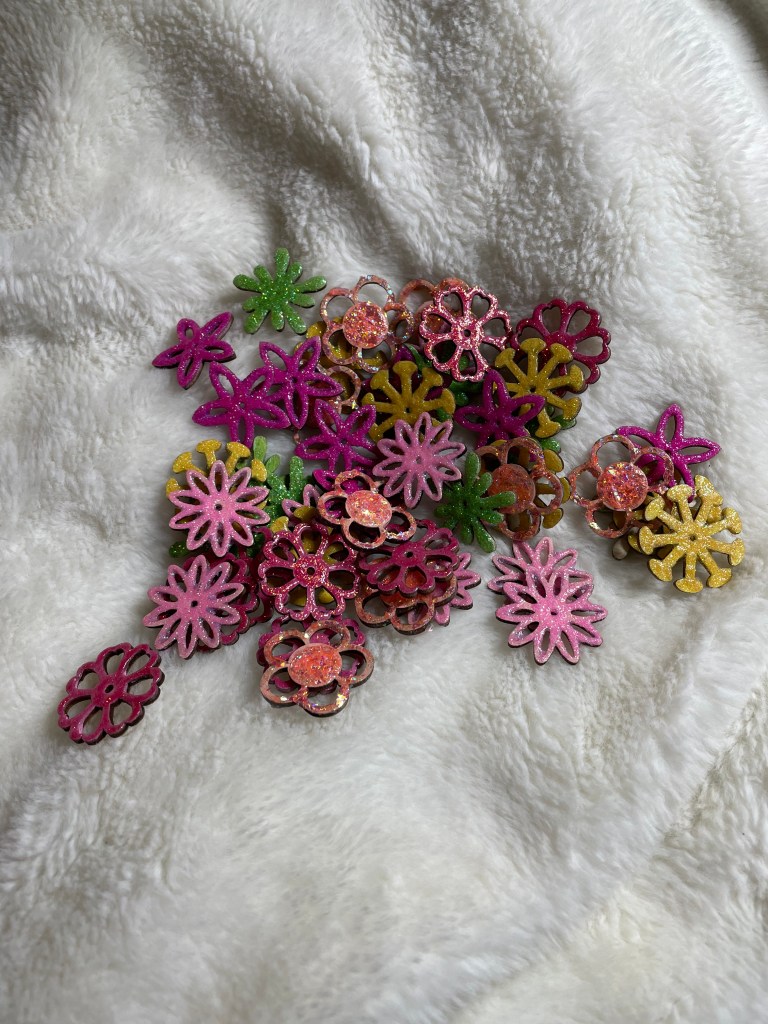
I decided to continue making what I call pre-decoration signs before the actual decorations are put up. So, I’m working on the spring sign but there is some pieces that are made separately. The first part are the flowers that will adorn the sign. I found these flowers on Amazon and the they came in a package of 100. I will be using 6 separate wood flower designs each in their own individual color. At least for this project.
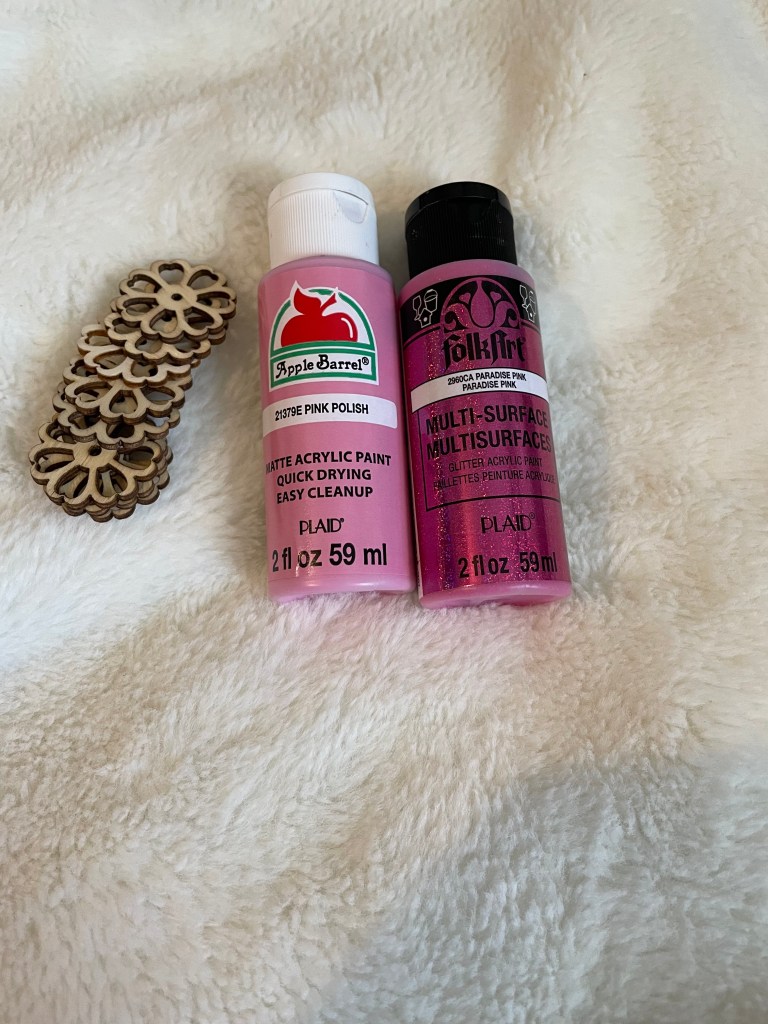
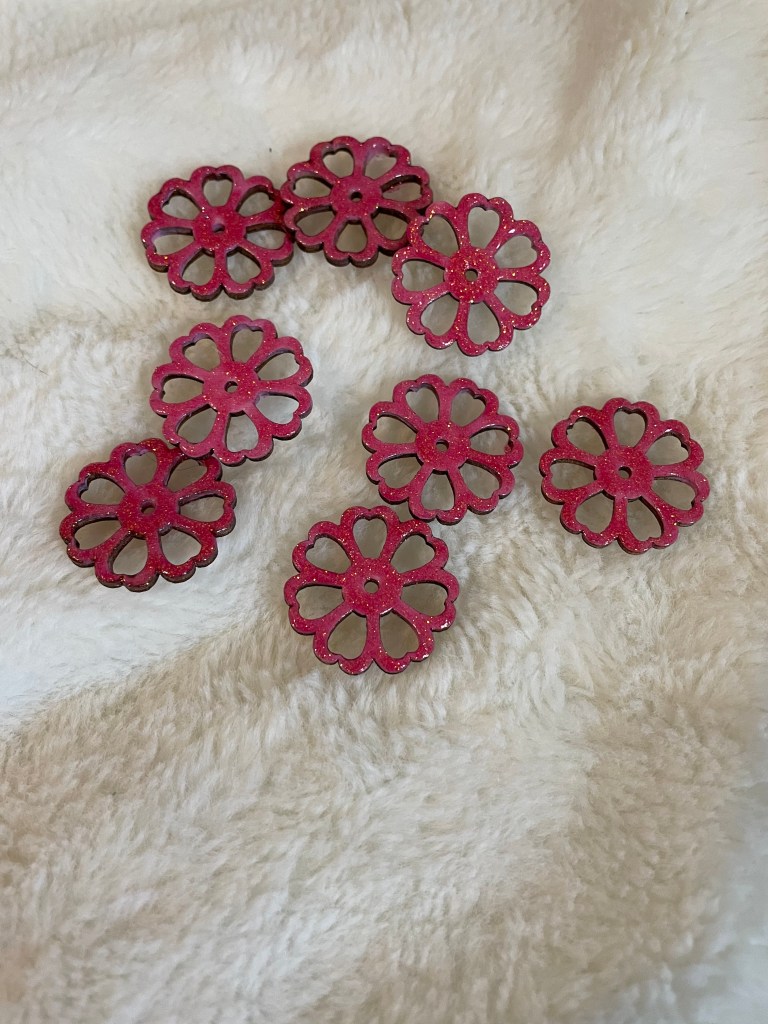
Flower number one was created using Apple Barrel matte acrylic paint in pink polish as a base coat. I then topped the base coat with 2 coats of FolkArt multi-surface glitter acrylic paint. I love how the flower has turned out. I have high hopes for the remainder flowers.
Flower number two was created using delta Ceramcoat matte acrylic paint in the color Calypso Coral. I topped the base coat with 1 coat of FolkArt Glitterific acrylic paint in the color Neon Tangerine. This paint is thick so it really only took one coat with a few touch ups here and there.
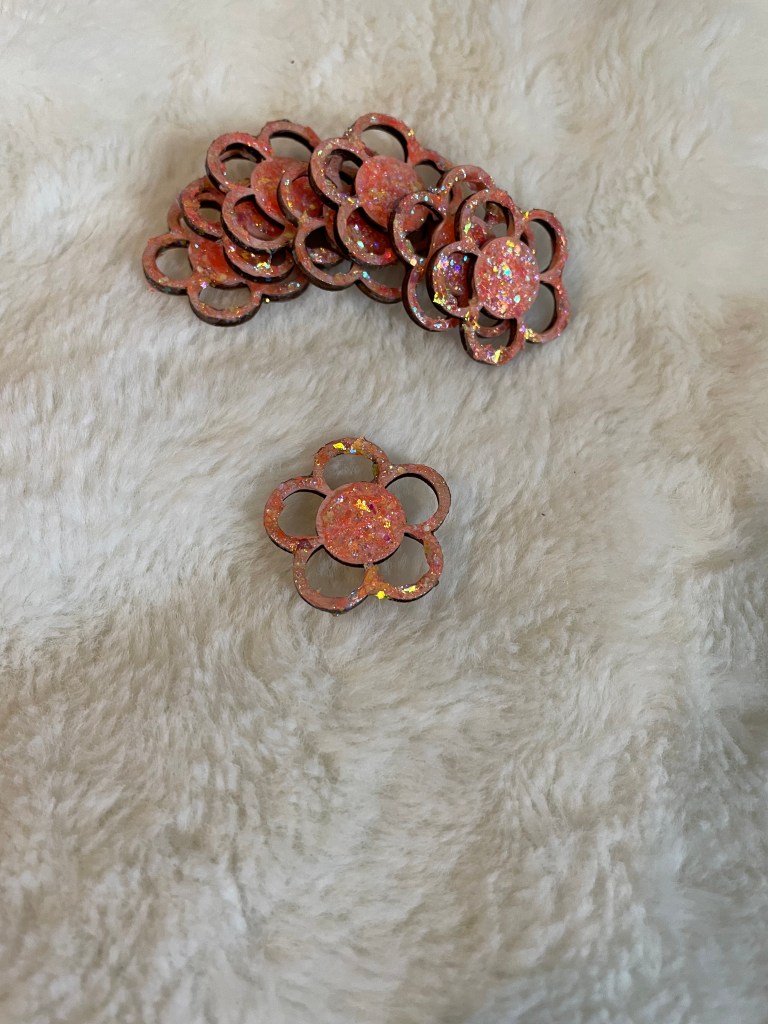
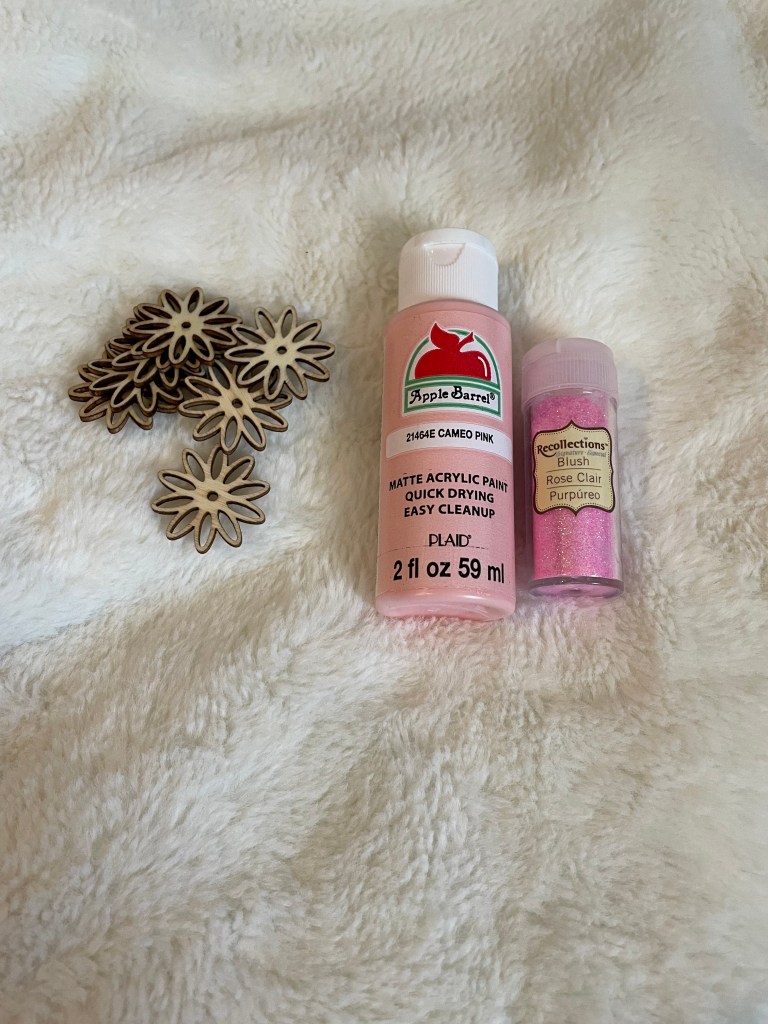
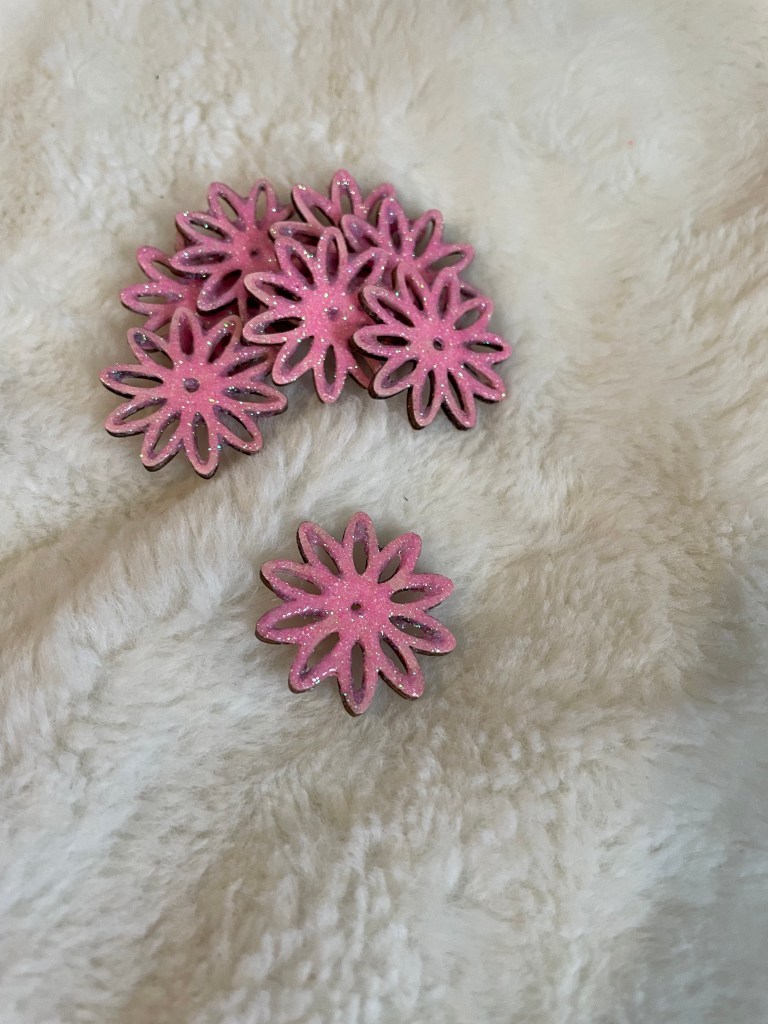
Flower number three was created using Apple Barrel matte acrylic paint in the color Cameo Pink as the base coat and topping it with Recollections fine glitter in the color blush. I love how subtle the color turned out.
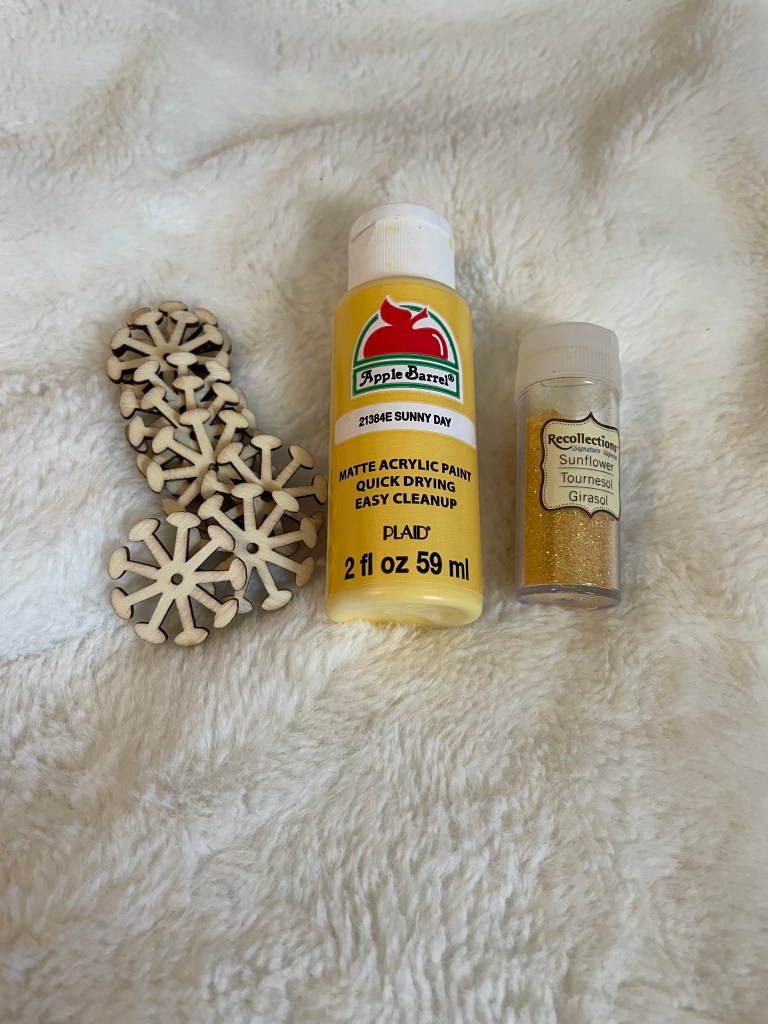
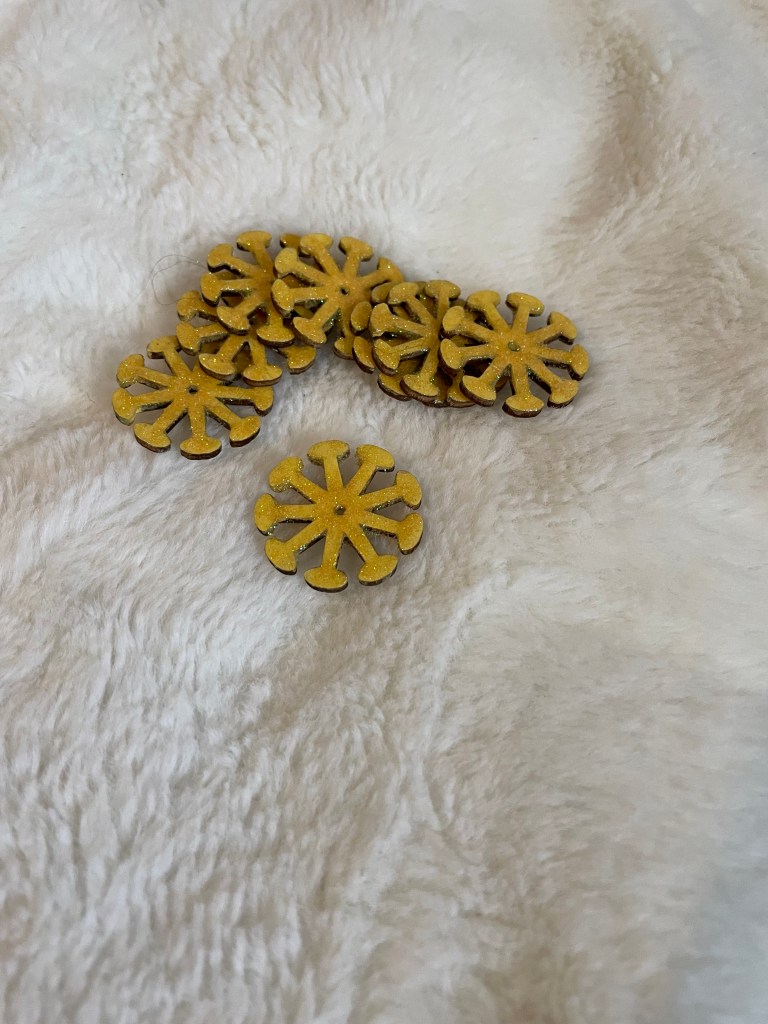
Flower number four was created using Apple Barrel matte acrylic paint in the color Sunny Day as the base coat and topping it with Recollections fine glitter in the color Sunflower.
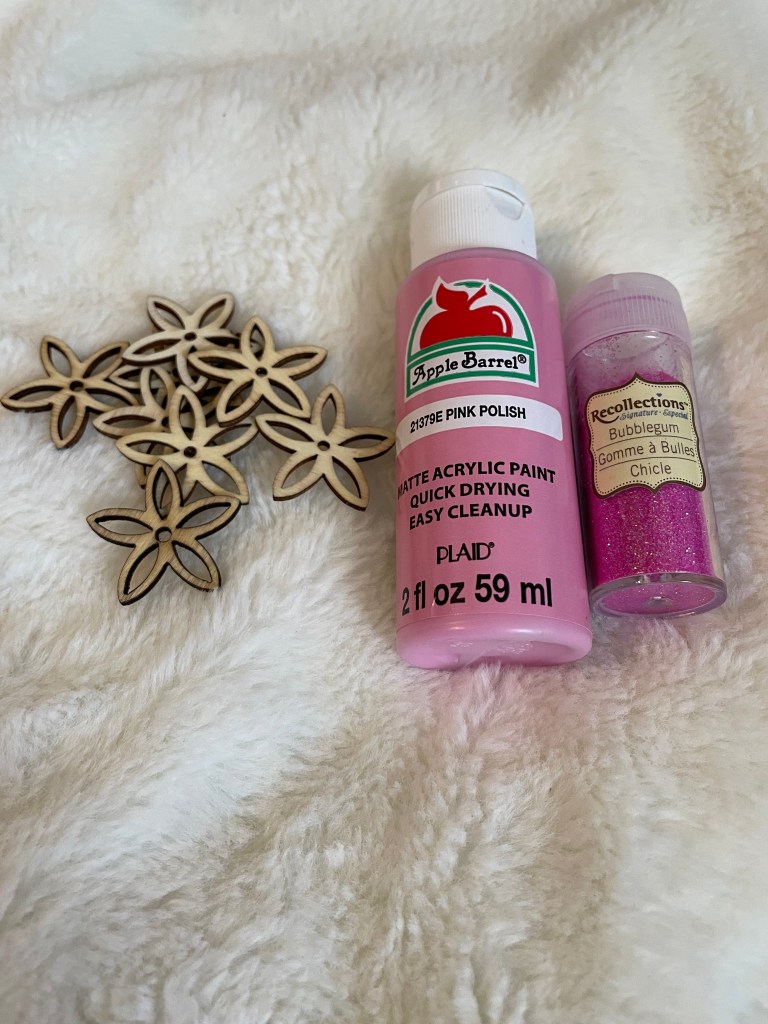
Flower number five was created using Apple Barrel matte acrylic paint in the color Pink Polish as the base coat and topping it with Recollections fine glitter in the color Bubblegum.
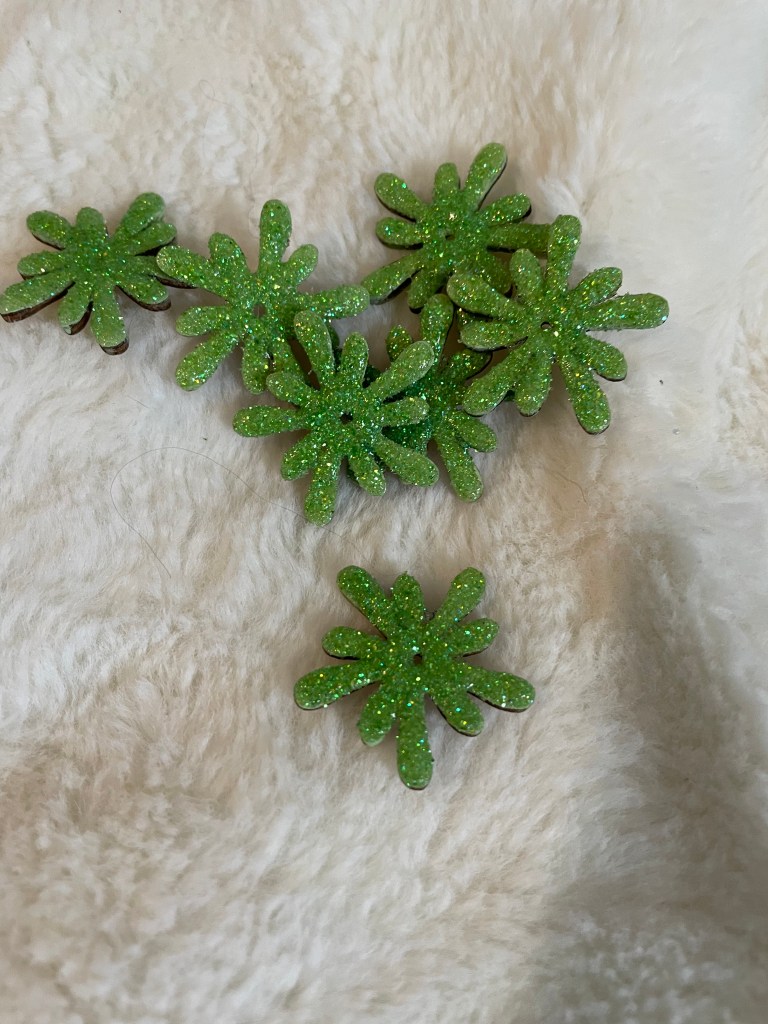
Last, but not least, is flower number six. This flower splash was created using FolkArt matte acrylic paint in the color Soft Apple as the base coat. I topped it with Recollections fine glitter in the color Mint. For some reason, this particular flower looks more like a paint splash than a flower which made me think it would be more appropriate as greenery than what would normally be considered a flower color.
In the end, all of the flowers were finished with a thick coat of Mod Podge to keep the glitter in place and to make them shine!
Now it is on to the next wooden project… Butterflies!!!!
I love shopping for decorations and things to use for craft projects. And the spring items are no exception.
Beginning with Amazon. I actually did not purchase as much as I usually do. I purchased several yellow rose garlands. Obviously more that I would usually purchased, but we will be using most of the garlands to decorate her very large window area. The wood flowers and butterflies will be used on several different projects. Of course I purchased a banner for the door as well.
Dollar Tree purchases was definitely on the small side for the spring season purchases.. From the Dollar General section in Dollar Tree, I purchased some floral garland that will adorn her walker as well as the tree. I also purchased some individual floral stems to use on the tree as well. I purchased some removable wall stickers that I want to try to use on the wall around the front door.
I purchased most of the spring items from Hobby Lobby this time. What can I say, when they have 50% off in their floral department, I do tend to go a little crazy, but not as crazy as I would have wanted to. I purchased wood letters and one word, for two separate projects. Other items included a lot of fabric for wreaths, scrapbook paper that may or may not be used on some letters, a wood frame which I have already started working on, wire ribbon, and pom poms.
I realize this appears that I only purchased one item from Michaels, but that is not the case.
I purchased a lot of acrylic paints for the spring projects. Some came from Hobby Lobby, some from Michaels, and some from Walmart.
I also purchased a lot of items for Easter while purchasing the spring items, but those will be in a different blog.
Thanks for reading my blog. I hope you have enjoyed it. Please return to see the craft project I make with these items and how I use them when decorating mom’s door, walker, and room.
I’m hoping to stick to a strict timeline!!!!! But some things may have to be adjusted ever so slightly. I hope to have most of the draft projects completed by March 23rd. But if I miss it, I have given myself a little wiggle room.
As you can see, my list of projects is rather long, but luckily, I think I have almost everything I need to at least begin the projects.
Can you think of any craft projects I should add to the list??? Please let me know.
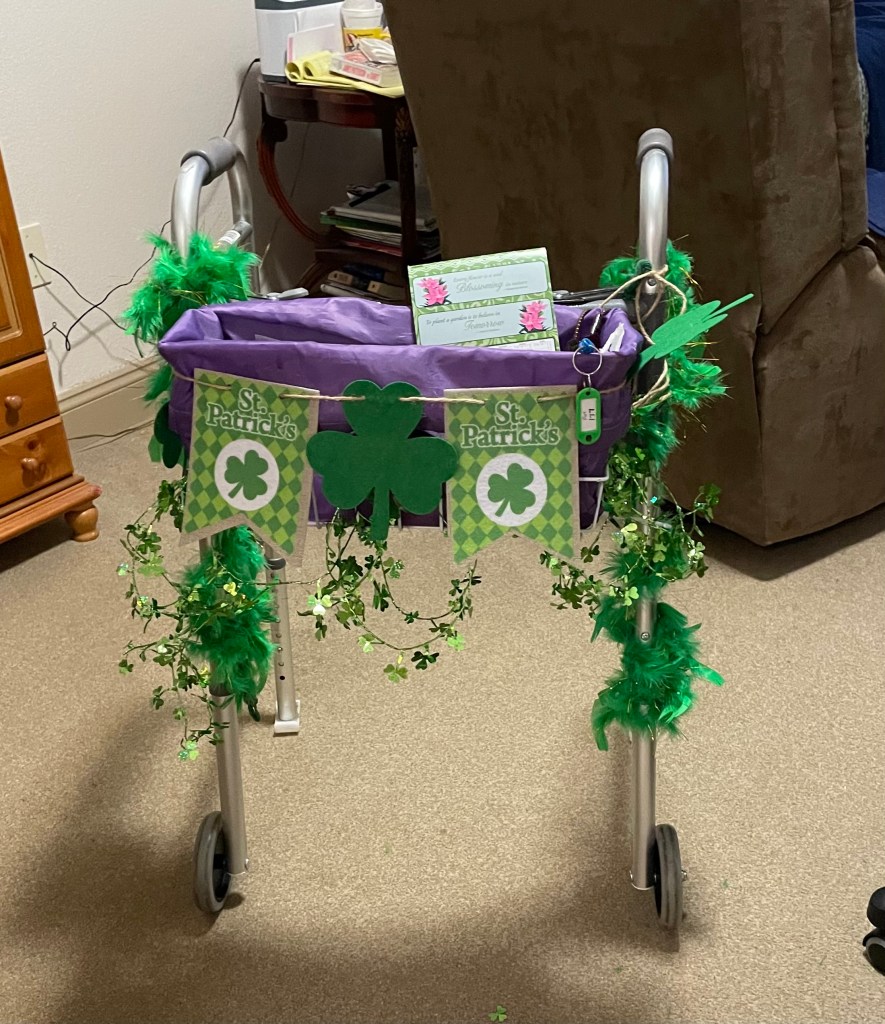
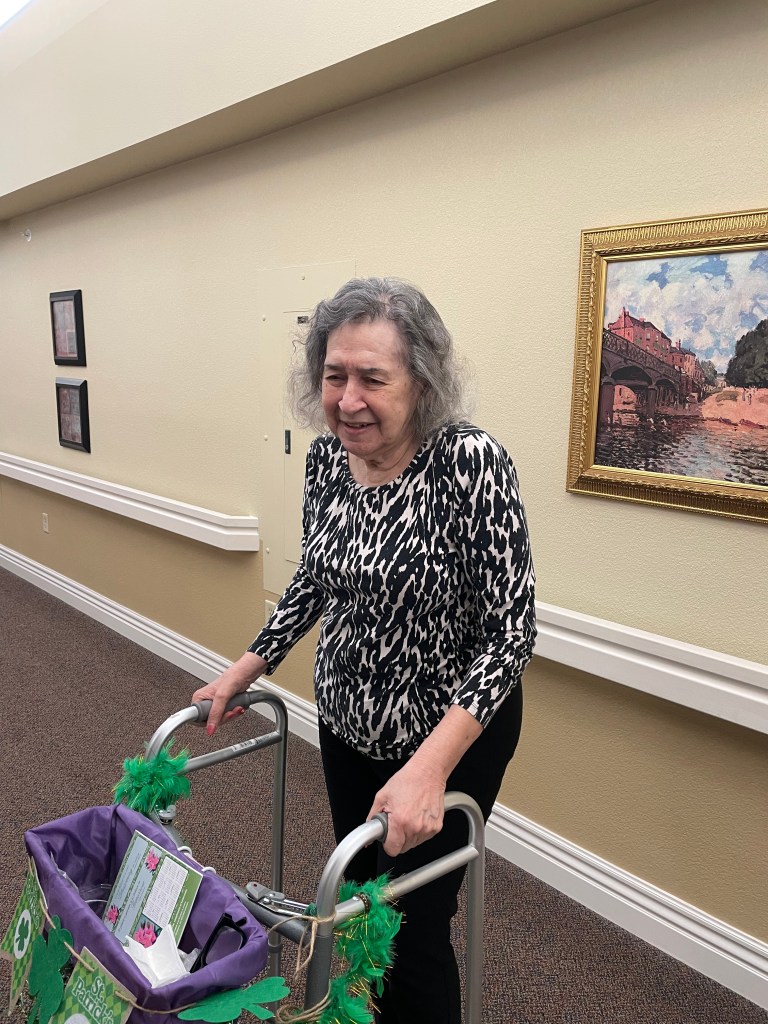
The day finally came when I could decorate her door. Jim and I arrived at her apartment around lunch time. Jim walked mom down to the dining room and returned with her walker so we could decorate it while she ate.
The walker was quick and easy to decorate once the Mardi Gras decorations were removed. The St. Patrick’s Day banner and the feather boa’s are from Dollar Tree. Everything else was stuff she had in a box in her closet. I had already taken the box home with me so I could see what we could use.
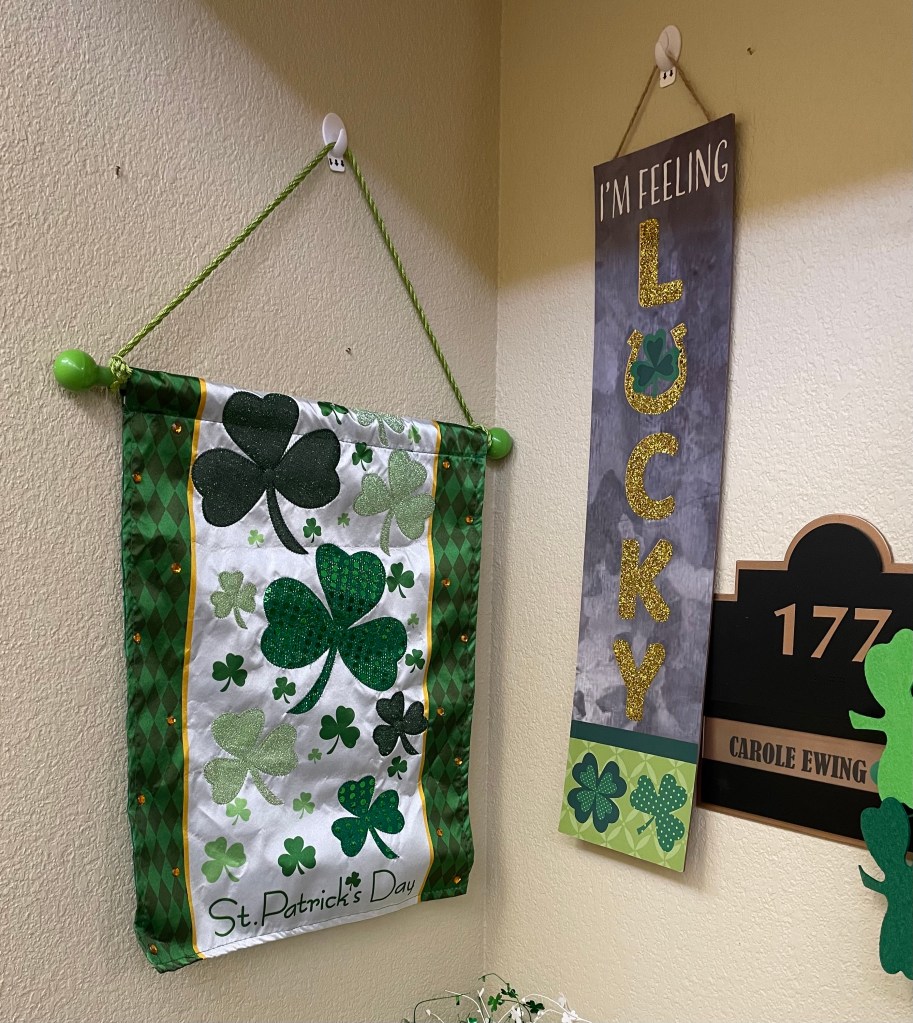
Then it was on to decorating her door.
The St. Patricks Day hanging decoration was something she had in the box I believe she purchased it at Joann’s years ago. The I’m feeling lucky sign is from Dollar Tree.
The green bootie, gnome and clover pick in the bootie were purchased at Joann’s. The gold coins are from Amazon,
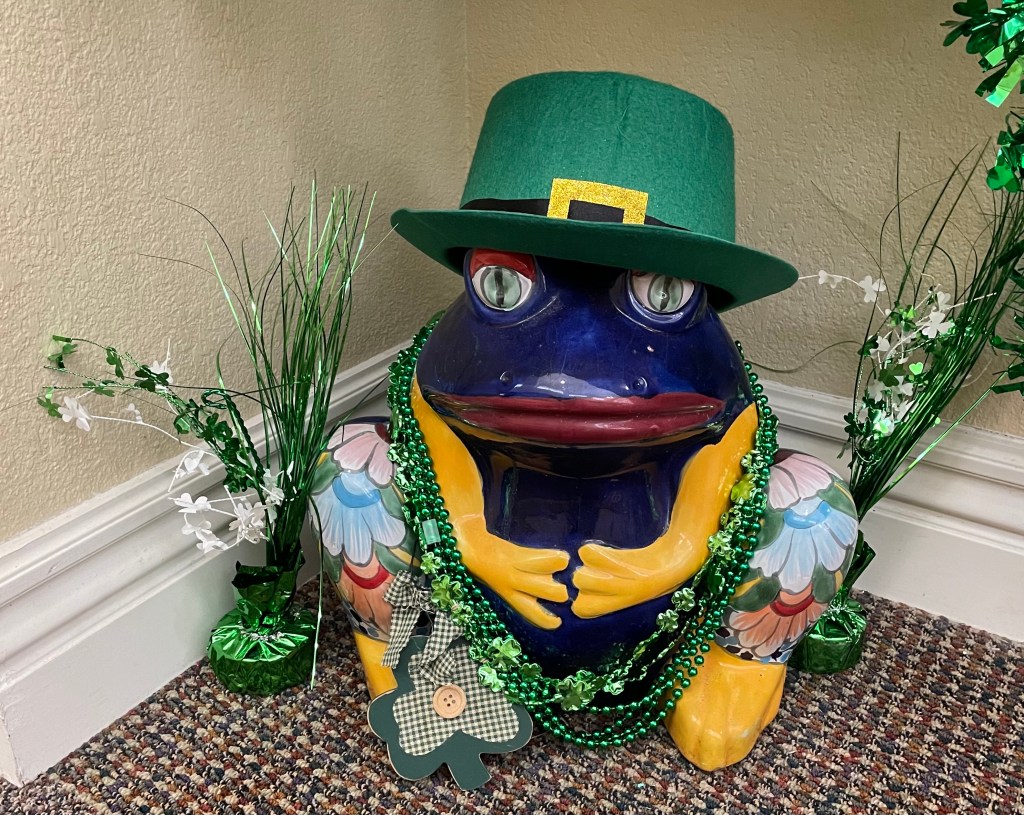
She had asked me if I had plans to decorate her frog. I assured her I had purchased an item specifically for him. The hat and green beads are from Dollar Tree. The other decorations around the frog are things I found in the box she had.
Now for the tree decorations. The green clover shaped ornaments were purchased from Amazon as were the gold coins. I made the gold coin ornaments. The black ribbon with the gold coins and the gold sequin ribbon were purchased at Hobby Lobby.
The hat on top of the tree is from Dollar Tree. I’m beginning to think I will need to replace the tree this summer, if it lasts that long.
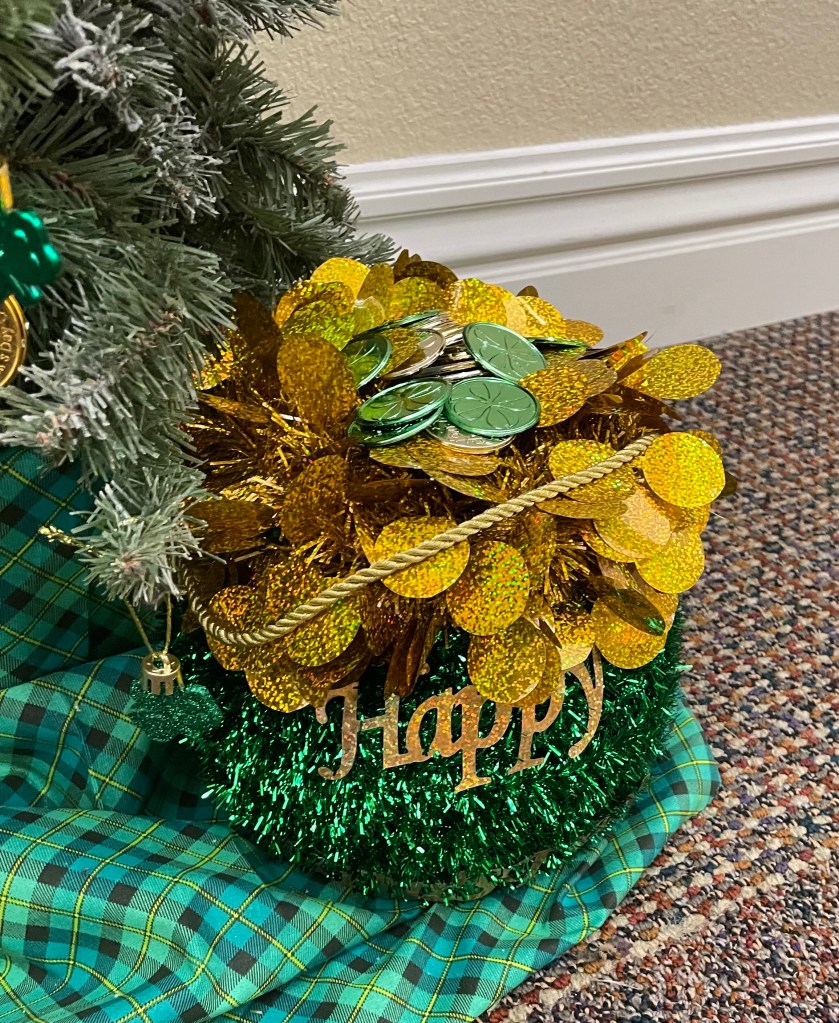
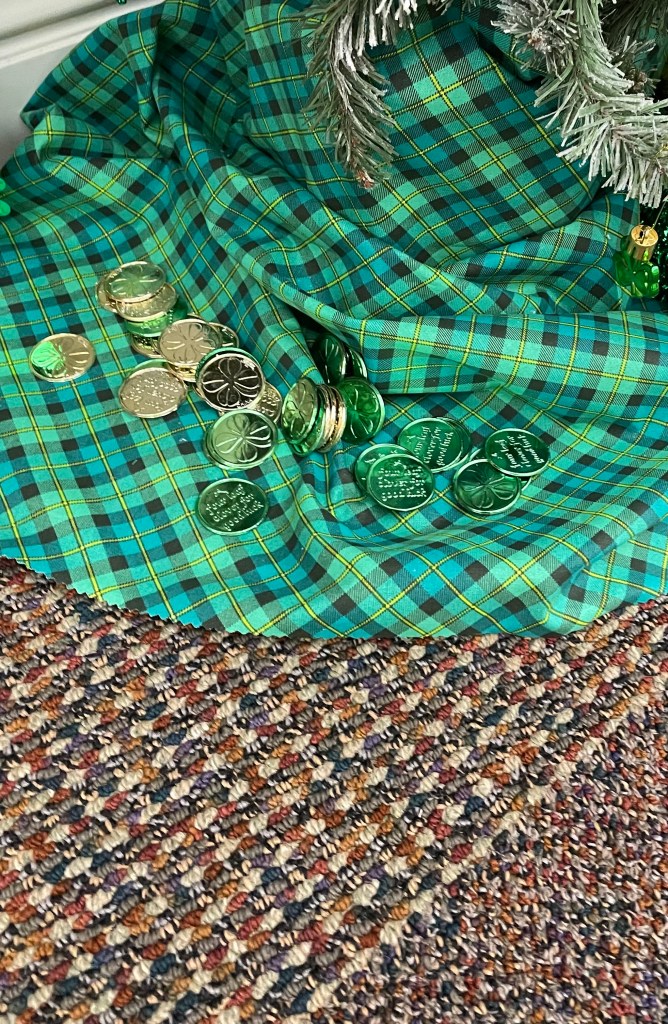
Items pot of gold under the tree was purchased at Joann’s. Some of the coins were in the box that my mom had and some were purchased at Dollar Tree. The fabric used as a tree skirt was purchased at Joann’s.
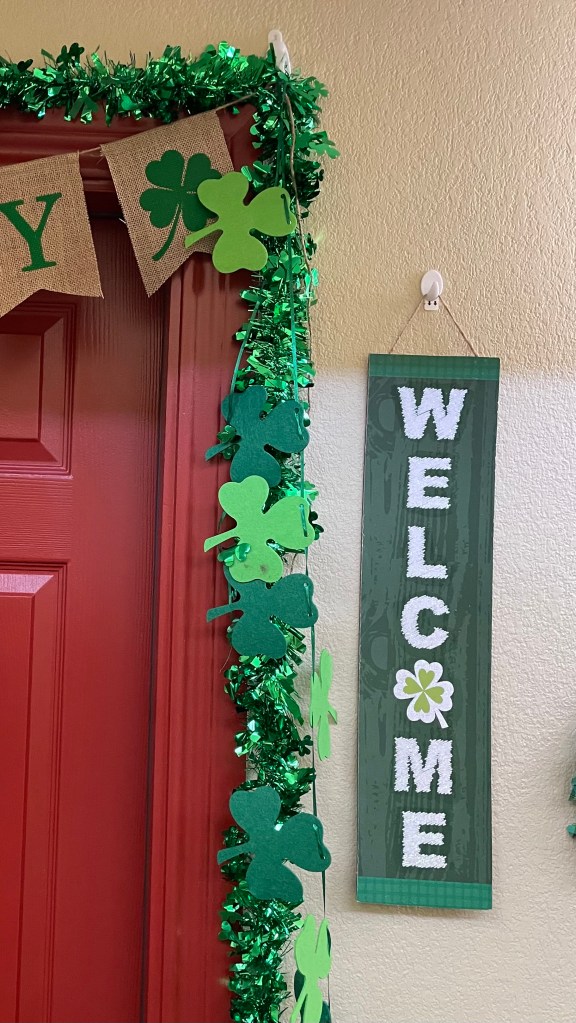
The welcome sign above the tree was found at Dollar Tree. I made the wreath with fabric from Joann’s. The gnome is from Hobby Lobby.
Now for the door. The LUCKY banner is from Amazon. It also came with 2 clover banners that were used on either side of the door. The green clover garland is from Amazon. I made the door wreath with fabric from Joann’s and the clover shape wire form is from Dollar Tree.
She loves everything!!! It make me happy to see her smile.
I will continue to decorate her door. In fact, I am starting on the spring decorations now.